
Spring Cloud Config是使用配置服务来保存各个服务的配置文件,在分布式系统中,由于服务数量巨多,为了方便服务配置文件统一管理,实时更新,所以需要分布式配置中心组件。在Spring Cloud中,有分布式配置中心组件spring cloud config ,它支持配置服务放在配置服务的内存中(即本地),也支持放在远程Git仓库中。
一.创建工程
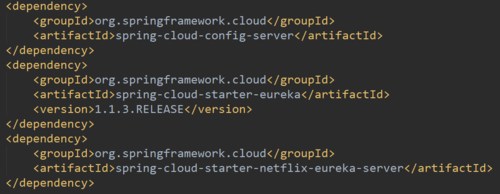
创建名为config-server的spring boot工程,引入依赖
<dependency>
    <groupId>org.springframework.cloud</groupId>
    <artifactId>spring-cloud-config-server</artifactId>
</dependency>
<dependency>
    <groupId>org.springframework.cloud</groupId>
    <artifactId>spring-cloud-starter-eureka</artifactId>
    <version>1.1.3.RELEASE</version>
</dependency>
<dependency>
    <groupId>org.springframework.cloud</groupId>
    <artifactId>spring-cloud-starter-netflix-eureka-server</artifactId>
</dependency>
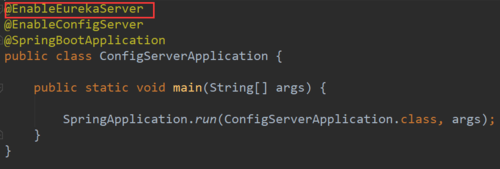
在程序的入口Application类加上@EnableConfigServer注解开启配置服务器的功能
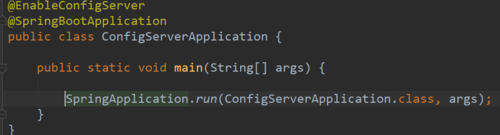
@EnableConfigServer
@SpringBootApplication
public class ConfigServerApplication {

    public static void main(String[] args) {

        SpringApplication.run(ConfigServerApplication.class, args);
    }
}
需要在程序的配置文件application.yml文件配置如下:
spring:
  cloud:
    config:
      server:
        label: master
      git:
        uri: https://github.com/
        searchPaths:
#          username: your username
#          password: your password
  application:
    name: config-server
server:
  port: 8888
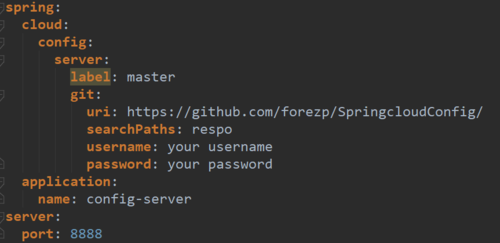
spring.cloud.config.server.git.uri:配置git仓库地址
spring.cloud.config.server.git.searchPaths:配置仓库路径
spring.cloud.config.label:配置仓库的分支
spring.cloud.config.server.git.username:访问git仓库的用户名
spring.cloud.config.server.git.password:访问git仓库的用户密码
如果Git仓库为公开仓库,可以不填写用户名和密码,如果是私有仓库需要填写,本例子是公开仓库。远程仓库https://github.com/ 中有个文件config-client-dev.properties文件中有一个属性:
foo = foo version 2
二.启动测试
启动程序:访问http://localhost:8888/config-client/dev
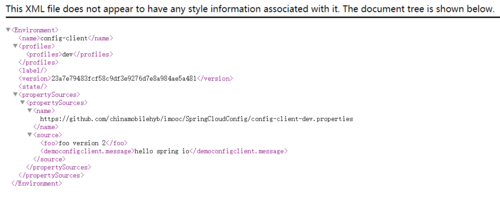
<Environment>
  <name>config-client</name>
  <profiles>
    <profiles>dev</profiles>
  </profiles>
  <label/>
  <version>23a7e79483fcf58c9df3e9276d7e8a984ae5a481</version>
  <state/>
  <propertySources>
    <propertySources>
      <name>
        https://github.com/chinamobilehyb/imooc/SpringCloudConfig/config-client-dev.properties
      </name>
      <source>
        <foo>foo version 2</foo>
        <democonfigclient.message>hello spring io</democonfigclient.message>
      </source>
      </propertySources>
    </propertySources>
</Environment>
证明配置服务中心可以从远程程序获取配置信息。
http请求地址和资源文件映射如下:
/{application}/{profile}[/{label}]
/{application}-{profile}.yml
/{label}/{application}-{profile}.yml
/{application}-{profile}.properties
/{label}/{application}-{profile}.properties
三.构建config-client工程
创建名为config-client的工程,引入依赖:
<dependency>
    <groupId>org.springframework.cloud</groupId>
    <artifactId>spring-cloud-starter-config</artifactId>
</dependency>

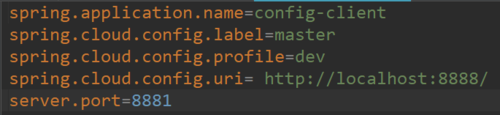
配置文件bootstrap.properties(此处配置文件一定是这个格式,否则会测试失败)
spring.application.name=config-client
spring.cloud.config.label=master
spring.cloud.config.profile=dev
spring.cloud.config.uri= http://localhost:8888/
server.port=8881

#spring.cloud.config.label 指明远程仓库的分支
#spring.cloud.config.profile
#dev开发环境配置文件
#test测试环境
#pro正式环境
#spring.cloud.config.uri= http://localhost:8888/ 指明配置服务中心的网址
程序的入口类,写一个API接口“/hi”,返回从配置中心读取的foo变量的值
@SpringBootApplication
@RestController
public class ConfigClientApplication {

    public static void main(String[] args) {

        SpringApplication.run(ConfigClientApplication.class, args);
    }

    @Value("${foo}")
    String foo;

    @RequestMapping(value = "/hi")
    public String hi() {
        return foo;
    }
}打开网址访问:http://localhost:8881/hi,网页显示:
foo version 2
这就说明,config-client从config-server获取了foo的属性,而config-server是从git仓库读取的。
四.高可用化
我们已经学会了一个服务如何从配置中心读取文件,配置中心如何从远程git读取配置文件,当服务实例很多时,都从配置中心读取文件,这时可以考虑将配置中心做成一个微服务,将其集群化,从而达到高可用。
五.创建eureka_config工程
引入Eureka的起步依赖spring-cloud-starter-eureka-server

<dependency>
    <groupId>org.springframework.cloud</groupId>
    <artifactId>spring-cloud-starter-eureka-server</artifactId>
    <version>1.1.3.RELEASE</version>
</dependency>
在配置文件application.yml上,指定服务端口为8889,加上作为服务注册中心的基本配置
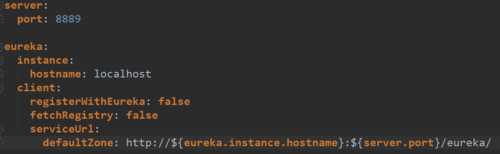
server:
  port: 8889

eureka:
  instance:
    hostname: localhost
  client:
    registerWithEureka: false
    fetchRegistry: false
    serviceUrl:
      defaultZone: http://${eureka.instance.hostname}:${server.port}/eureka/
入口类加上注解@@EnableEurekaServer

@EnableEurekaServer
@SpringBootApplication
public class EurekaConfigApplication {

    public static void main(String[] args) {
        SpringApplication.run(EurekaConfigApplication.class, args);
    }
}
六.改造config-server
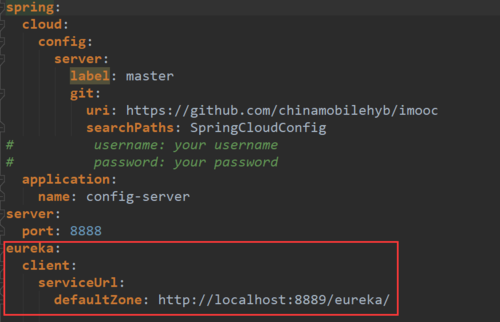
加上EurekaClient的起步依赖spring-cloud-starter-eureka。配置文件application.yml,指定服务注册地址为http://localhost:8889/eureka/
spring:
  cloud:
    config:
      server:
        label: master
        git:
          uri: https://github.com/chinamobilehyb/imooc
          searchPaths: SpringCloudConfig
#          username: your username
#          password: your password
  application:
    name: config-server
server:
  port: 8888
eureka:
  client:
    serviceUrl:
      defaultZone: http://localhost:8889/eureka/
最后需要在程序的启动类Application加上@EnableEureka的注解
七.改造config-client
加上起步依赖spring-cloud-starter-eureka,配置文件bootstrap.properties,加上服务注册地址为http://localhost:8889/eureka/
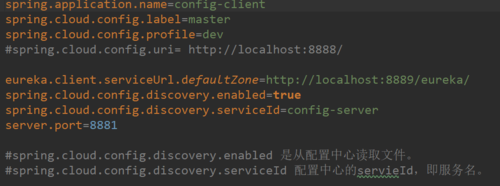
spring.application.name=config-client
spring.cloud.config.label=master
spring.cloud.config.profile=dev
#spring.cloud.config.uri= http://localhost:8888/

eureka.client.serviceUrl.defaultZone=http://localhost:8889/eureka/
spring.cloud.config.discovery.enabled=true
spring.cloud.config.discovery.serviceId=config-server
server.port=8881

#spring.cloud.config.discovery.enabled 是从配置中心读取文件。
#spring.cloud.config.discovery.serviceId 配置中心的servieId,即服务名。
依次启动eureka-servr,config-server,config-client
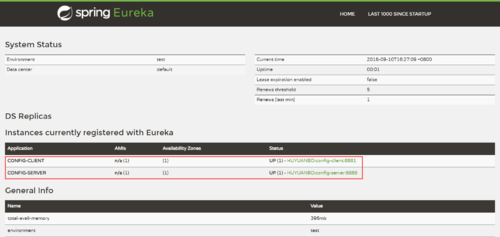
访问网址:http://localhost:8889/
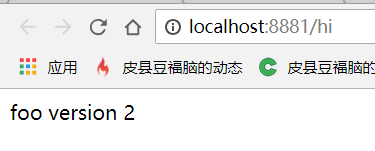
访问http://localhost:8881/hi,浏览器显示:
foo version 2
以上便是建立分布式配置中心及其高可用化的具体流程,按部就班应该是不会出错的~感谢大家的阅读~
上一篇:一周学会Spring Cloud(Day3 断路器 Hystrix和路由网关 zuul)
下一篇:一周学会Spring Cloud(Day5 消息总线和链路追踪)


热门评论
-

小浣熊爱高高2018-12-04 0
查看全部评论只有一个配置中心工程,怎么只写配置文件就能实现高可用