Zookeeper Curator
1. 前言
在上一节中我们学习了 Zookeeper 的 Java 客户端之一 ZkClient ,除了 ZkClient 之外,还有就是 Zookeeper 最流行的 Java 客户端之一的 Curator。Curator 与 ZkClient 相比较又有什么区别呢?接下来我们就开始 Curator 的学习。
2. Curator 简介
我们来看一下 Curator 的官网介绍:
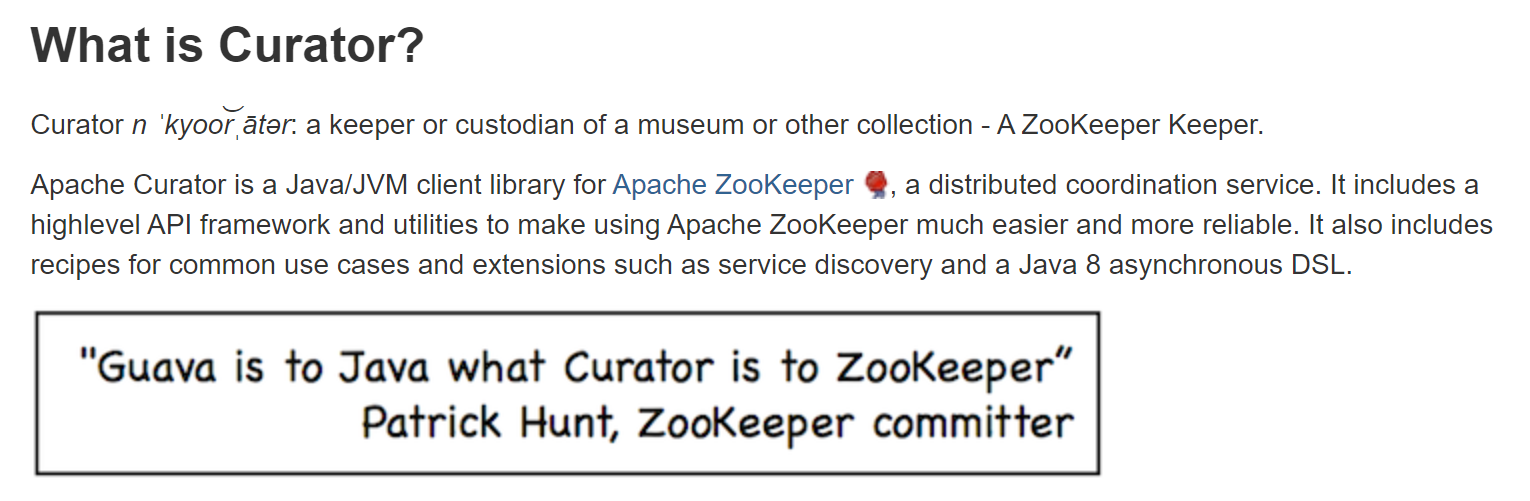
Curator 是 Netflix 公司开源的一套 Zookeeper 客户端框架,后来捐献给 Apache 成为顶级的开源项目。
Curator 和 ZkClient 同样简化了 Zookeeper 原生 API 的开发工作,而 Curator 提供了一套易用性和可读性更强的 Fluent 风格的客户端 API ,还提供了 Zookeeper 各种应用场景的抽象封装,比如:分布式锁服务、集群领导选举、共享计数器、缓存机制、分布式队列等。
Curator 相较其它 Zookeeper 客户端功能更强大,应用更广泛,使用更便捷,所以它能成为当下最流行的 Zookeeper 的 Java 客户端之一。
接下来我们就开始学习如何使用 Curator 客户端对 Zookeeper 服务进行操作。
Tips: Fluent 风格类似于链式编程,使用 Fluent 风格编写的类,调用该类的方法会返回该类本身,然后可以继续调用该类方法。
3. Curator 使用
我们新建一个 Spring Boot 项目来对 Curator 进行集成。首先我们要在 pom.xml 文件中加入 Curator 的 Maven 依赖。
3.1 Curator 依赖
pom.xml 文件配置如下:
<?xml version="1.0" encoding="UTF-8"?>
<project xmlns="http://maven.apache.org/POM/4.0.0" xmlns:xsi="http://www.w3.org/2001/XMLSchema-instance"
         xsi:schemaLocation="http://maven.apache.org/POM/4.0.0 https://maven.apache.org/xsd/maven-4.0.0.xsd">
    <modelVersion>4.0.0</modelVersion>
    <parent>
        <groupId>org.springframework.boot</groupId>
        <artifactId>spring-boot-starter-parent</artifactId>
        <version>2.3.2.RELEASE</version>
        <relativePath/> <!-- lookup parent from repository -->
    </parent>
    <groupId>cn.cdd</groupId>
    <artifactId>curator-demo</artifactId>
    <version>0.0.1-SNAPSHOT</version>
    <name>curator-demo</name>
    <description>curator-demo project for Spring Boot</description>

    <properties>
        <java.version>11</java.version>
    </properties>

    <dependencies>
        <dependency>
            <groupId>org.springframework.boot</groupId>
            <artifactId>spring-boot-starter</artifactId>
        </dependency>

        <!-- https://mvnrepository.com/artifact/org.apache.curator/curator-framework -->
        <dependency>
            <groupId>org.apache.curator</groupId>
            <artifactId>curator-framework</artifactId>
            <version>5.1.0</version>
        </dependency>
        <dependency>
            <groupId>org.apache.curator</groupId>
            <artifactId>curator-recipes</artifactId>
            <version>5.1.0</version>
        </dependency>

        <dependency>
            <groupId>org.springframework.boot</groupId>
            <artifactId>spring-boot-starter-test</artifactId>
            <scope>test</scope>
            <exclusions>
                <exclusion>
                    <groupId>org.junit.vintage</groupId>
                    <artifactId>junit-vintage-engine</artifactId>
                </exclusion>
            </exclusions>
        </dependency>
    </dependencies>

    <build>
        <plugins>
            <plugin>
                <groupId>org.springframework.boot</groupId>
                <artifactId>spring-boot-maven-plugin</artifactId>
            </plugin>
        </plugins>
    </build>

</project>
引入 Curator 的依赖后,我们先来介绍一下 Curator 的 API ,然后再编写测试用例进行 API 测试。
3.2 Curator API
本小节我们来对 Curator 的 API 进行介绍,主要有 Curator 客户端实例的创建,session 的重连策略,节点的添加,获取节点数据,修改节点的数据,删除节点等。
3.2.1 创建客户端
我们这里讲解 3 种创建客户端的方法,Curator 客户端的实现类为 CuratorFrameworkImpl,我们可以用它的接口 CuratorFramework 来接收创建客户端的返回值 。
- 第 1 种: 使用创建 Curator 客户端的 API newClient 方法,其中第一个参数 connectString 为 Zookeeper 服务端的地址字符串,第二个参数 RetryPolicy 为会话重连策略,关于重连策略我们稍后再进行详细的讲解。
public static CuratorFramework newClient(String connectString, RetryPolicy retryPolicy) { return newClient(connectString, DEFAULT_SESSION_TIMEOUT_MS, DEFAULT_CONNECTION_TIMEOUT_MS, retryPolicy); } - 第 2 种: 在上面的 newClient 方法中,其实还是调用的下面的 newClient 方法,增加了参数 sessionTimeoutMs 会话超时时间,connectionTimeoutMs 连接超时时间。
public static CuratorFramework newClient(String connectString, int sessionTimeoutMs, int connectionTimeoutMs, RetryPolicy retryPolicy) { return builder().connectString(connectString).sessionTimeoutMs(sessionTimeoutMs).connectionTimeoutMs(connectionTimeoutMs).retryPolicy(retryPolicy).build(); } - 第 3 种: 我们可以直接调用工厂类 CuratorFrameworkFactory 的 builder 方法,并且使用 Fluent 风格的写法来完成客户端的实例化。写法如下:
/**
* 获取 CuratorClient
* 使用 Fluent 风格
* @return CuratorFramework
*/
public CuratorFramework getCuratorClient(){
    // 使用 CuratorFrameworkFactory 来构建 CuratorFramework
    CuratorFramework client = CuratorFrameworkFactory.builder()
        // Zookeeper 服务器地址字符串
        .connectString(connectString)
        // session 会话超时时间
        .sessionTimeoutMs(sessionTimeoutMs)
        // 使用哪种重连策略
        .retryPolicy(retryOneTime)
        // 命名空间,表示当前客户端的父节点,我们可以用它来做业务区分
        .namespace(namespace)
        .build();
    return client;
}
Curator 客户端创建完毕后,我们使用 start 方法就可以创建会话,使用 close 方法结束会话。
client.start();
client.close();
3.2.2 会话重连策略
Curator 提供了会话重连策略的接口 RetryPolicy,并且提供了几种默认的实现,下面我们介绍几种常用的策略。
- RetryForever
// RetryForever:间隔{参数1}毫秒后重连,永远重试 private RetryPolicy retryForever = new RetryForever(3000); - RetryOneTime
// RetryOneTime:{参数1}毫秒后重连,只重连一次 private RetryPolicy retryOneTime = new RetryOneTime(3000); - RetryNTimes
// RetryNTimes: {参数2}毫秒后重连,重连{参数1}次 private RetryPolicy retryNTimes = new RetryNTimes(3,3000); - RetryUntilElapsed
// RetryUntilElapsed:每{参数2}毫秒重连一次,总等待时间超过{参数1}毫秒后停止重连 private RetryPolicy retryUntilElapsed = new RetryUntilElapsed(10000,3000); - ExponentialBackoffRetry
// ExponentialBackoffRetry:可重连{参数2}次,并增加每次重连之间的睡眠时间,递增加公式如下:
// {参数1} * Math.max(1,random.nextInt(1 << ({参数2} + 1)))
private RetryPolicy exponential = new ExponentialBackoffRetry(1000,3);
Curator 的会话重连策略方案介绍完毕,我们选择其中一种实现即可。
3.2.3 创建节点
创建好客户端实例,开启会话之后,我们就可以开始创建节点了,我们使用 create 方法来创建节点,Fluent 风格的方式可以让我们自由组合创建方式。
// 节点路径前必须加上/
String path = "/imooc";
// forPath 指定路径创建节点,内容默认为客户端ip。默认为持久节点。
client.create().forPath(path);
// 创建 imooc 节点,内容为 Wiki,内容参数需要字节数组。
client.create().forPath(path,"Wiki".getBytes());
// 创建节点时,同时创建它的父节点。withMode 声明节点是什么类型的,可以使用枚举类型CreateMode来确定。
client.create().creatingParentsIfNeeded().withMode(CreateMode.EPHEMERAL).forPa
th(path);
3.2.4 获取节点数据
获取节点数据我们使用 getData 方法,同时我们还可以使用 Stat 来获取节点的最新状态信息。
// 普通查询
client.getData().forPath(path);
// 包含状态的查询
Stat stat = new Stat();
client.getData().storingStatIn(stat).forPath(path);
3.2.5 更新节点数据
更新节点数据我们使用 setData 方法,我们可以指定 version 来更新对应版本的数据。如果 version 已过期,则抛出 BadVersionException 异常,表示更新节点数据失败。
// 普通更新
client.setData().forPath(path,"wiki".getBytes());
// 指定版本更新
client.setData().withVersion(1).forPath(path);
3.2.4 删除节点
删除节点我们使用 delete 的方法,我们可以对节点进行递归删除,我们也可以指定 version 进行删除,我们还可以强制删除一个节点,只要当前客户端的会话有效,客户端在后台就会持续进行删除操作,直到删除成功。
// 普通删除
client.delete().forPath(path);
// 递归删除子节点
client.delete().deletingChildrenIfNeeded().forPath(path);
// 指定版本删除
client.delete().withVersion(1).forPath(path);
// 强制删除
client.delete().guaranteed().forPath(path);
这里的 version 过期也会抛出 BadVersionException 异常,表示删除失败。
Curator 的 API 介绍完毕,我们接下来进行 API 测试。
3.3 API 测试
我们在 Spring Boot 主函数的同级新建 service 目录,在 service 目录中新建 CuratorService 类来获取客户端实例:
package cn.cdd.curatordemo.service;

import org.apache.curator.RetryPolicy;
import org.apache.curator.framework.CuratorFramework;
import org.apache.curator.framework.CuratorFrameworkFactory;
import org.apache.curator.retry.ExponentialBackoffRetry;
import org.apache.curator.retry.RetryNTimes;
import org.apache.curator.retry.RetryOneTime;
import org.apache.curator.retry.RetryUntilElapsed;
import org.springframework.beans.factory.annotation.Value;
import org.springframework.stereotype.Component;

@Component
public class CuratorService {
    // Zookeeper 服务器地址
    @Value("${curator.connectString}")
    private String connectString;
    // session 会话超时时间
    @Value("${curator.sessionTimeoutMs}")
    private int sessionTimeoutMs;
    // 名称空间:在操作节点时,会以 namespace 为父节点
    @Value("${curator.namespace}")
    private String namespace;

    /**
     * session 重连策略,使用其中一种即可
     */
    // RetryForever:间隔{参数1}毫秒后重连,永远重试
    private RetryPolicy retryForever = new RetryForever(3000);

    // RetryOneTime:{参数1}毫秒后重连,只重连一次
    private RetryPolicy retryOneTime = new RetryOneTime(3000);

    // RetryNTimes: {参数2}毫秒后重连,重连{参数1}次
    private RetryPolicy retryNTimes = new RetryNTimes(3,3000);

    // RetryUntilElapsed:每{参数2}毫秒重连一次,总等待时间超过{参数1}毫秒后停止重连
    private RetryPolicy retryUntilElapsed = new RetryUntilElapsed(10000,3000);

    // ExponentialBackoffRetry:可重连{参数2}次,并增加每次重连之间的睡眠时间,增加公式如下:
    // {参数1} * Math.max(1,random.nextInt(1 << ({参数2:maxRetries} + 1)))
    private RetryPolicy exponential = new ExponentialBackoffRetry(1000,3);


    /**
     * 获取 CuratorClient
     * 使用 Fluent 风格
     * @return CuratorFramework
     */
    public CuratorFramework getCuratorClient(){
         // 使用 CuratorFrameworkFactory 来构建 CuratorFramework
         return CuratorFrameworkFactory.builder()
                 // Zookeeper 服务器地址字符串
                 .connectString(connectString)
                 // session 会话超时时间
                 .sessionTimeoutMs(sessionTimeoutMs)
                 // 使用哪种重连策略
                 .retryPolicy(retryOneTime)
                 // 配置父节点
                 .namespace(namespace)
                 .build();
    }
}
在 application.properties 配置文件中添加配置:
# Zookeeper 地址
curator.connectString=192.168.0.77:2181,192.168.0.88:2181,192.168.0.88:2181
# 会话超时时间
curator.sessionTimeoutMs=5000
# 命名空间,当前客户端的父节点
curator.namespace=imooc
配置完成后,在 CuratorDemoApplicationTests 测试类中编写测试用例。
首先我们来测试节点的创建:
package cn.cdd.curatordemo;

import cn.cdd.curatordemo.service.CuratorService;
import org.apache.curator.framework.CuratorFramework;
import org.junit.jupiter.api.Test;
import org.springframework.beans.factory.annotation.Autowired;
import org.springframework.boot.test.context.SpringBootTest;

@SpringBootTest
class CuratorDemoApplicationTests {
    // 注入 CuratorService 依赖
    @Autowired
    private CuratorService curatorService;

    @Test
    void contextLoads() throws Exception {
        // 获取客户端
        CuratorFramework curatorClient = curatorService.getCuratorClient();
        // 开启会话
        curatorClient.start();
        // 在 namespace 下创建节点 Mooc , 节点前需要加 “/” 表示命名空间下的子节点
        // 节点内容为 Wiki ,使用字节数组传入
        String mooc = curatorClient.create().forPath("/Mooc", "Wiki".getBytes());
        // 返回 /Mooc
        System.out.println(mooc);
        curatorClient.close();
    }
}
控制台输出当前创建的节点:
/Mooc
创建完成后我们来查询命名空间下的子节点:
@Test
void contextLoads() throws Exception {
    // 获取客户端
    CuratorFramework curatorClient = curatorService.getCuratorClient();
    // 开启会话
    curatorClient.start();
    // 查询命名空间下的子节点
    List<String> strings = curatorClient.getChildren().forPath("/");
    System.out.println(strings);
    curatorClient.close();
}
控制台输出命名空间的子节点列表:
[Mooc]
Tips: 在我们创建客户端使用了命名空间时,API 中可用
/表示命名空间,也表示当前客户端的根节点。
获取节点数据测试:
@Test
void contextLoads() throws Exception {
    // 获取客户端
    CuratorFramework curatorClient = curatorService.getCuratorClient();
    // 开启会话
    curatorClient.start();
    // 获取 Mooc 节点的内容
    byte[] bytes = curatorClient.getData().forPath("/Mooc");
    // 输出
    System.out.println(new String(bytes));
    curatorClient.close();
}
控制台输出当前节点的内容:
Wiki
更新节点数据测试:
@Test
void contextLoads() throws Exception {
    // 获取客户端
    CuratorFramework curatorClient = curatorService.getCuratorClient();
    // 开启会话
    curatorClient.start();
	// 更新节点数据,返回当前节点状态
    Stat stat = curatorClient.setData().forPath("/Mooc", "wiki".getBytes());
    // 输出
    System.out.println(stat);
    curatorClient.close();
}
控制台输出表示当前节点状态的数字:
4294967345,4294967352,1597805299226,1597850397723,1,0,0,0,4,0,4294967345
上面这串数字表示当前节点的状态 Stat,我们可以查看 Stat 类来找到对应的信息:
public class Stat implements Record {
    // 创建节点时的事务 id
    private long czxid;
    // 修改节点时的事务 id
    private long mzxid;
    // 节点创建时的毫秒值
    private long ctime;
    // 节点修改时的毫秒值
    private long mtime;
    // 节点数据修改的次数
    private int version;
    // 子节点修改的次数
    private int cversion;
    // ACL修改的次数
    private int aversion;
    // 如果是临时节点,该值为节点的 SessionId,其它类型的节点则为 0
    private long ephemeralOwner;
    // 数据长度
    private int dataLength;
    // 子节点数量
    private int numChildren;
    // 添加和删除子节点的事务 id
    private long pzxid;
}
删除节点数据测试:
@Test
void contextLoads() throws Exception {
    // 获取客户端
    CuratorFramework curatorClient = curatorService.getCuratorClient();
    // 开启会话
    curatorClient.start();
	// 删除节点
    curatorClient.delete().forPath("/Mooc");
    curatorClient.close();
}
执行完成后,我们再次查询命名空间下的子节点:
@Test
void contextLoads() throws Exception {
    // 获取客户端
    CuratorFramework curatorClient = curatorService.getCuratorClient();
    // 开启会话
    curatorClient.start();
    // 查询命名空间下的子节点
    List<String> strings = curatorClient.getChildren().forPath("/");
    System.out.println(strings);
    curatorClient.close();
}
控制台输出为空,表示删除成功
[]
Tips: 使用 API 时,我们需要注意是否配置 namespace ,如果没有配置 namespace 的话,我们使用 API 进行操作时,path 参数需要填写全路径。如果配置了 namespace ,我们使用 API 时,Curator 会自动帮我们在 path 前加上 namespace 。
4. 总结
本节我们学习了 Curator 是什么,Curator 可以是实现什么功能,我们还介绍了 Curator 常用的 API,并做了相应的测试。以下是本节内容的总结:
- 为什么要学习使用 Curator 客户端。
- Curator 常用的 API。
- 使用 Spring Boot 集成 Curator。