

引子
Light计划我思考良久,觉得可以着手了。第一束光便照进---服务器:
服务器对于编程者爱好者而言就像剑之于男人的浪漫关于Linux云服务器的入门,该走的坑带你走一遍。记住一点:服务器就是一台永远开机,没有屏幕的本子,一个永不见天日的搬砖工。
第一章:初入江湖
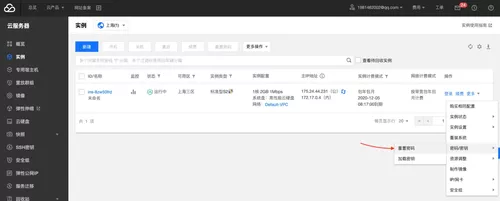
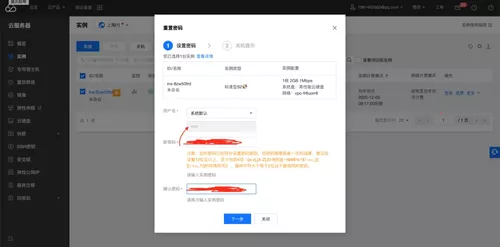
1. 滴血认主
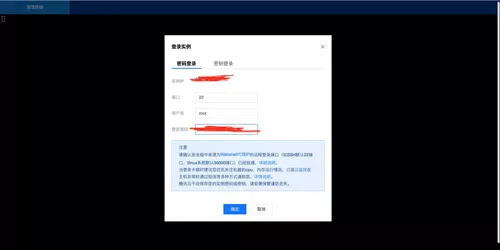
怎么确定一个东西是你的?没错,是密码。这样你的神器就只归你所有:
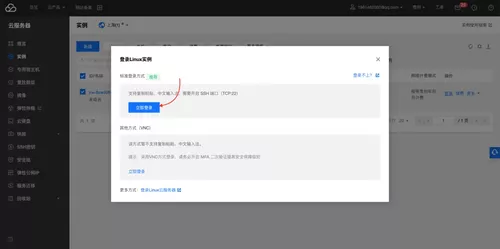
2.我是谁,我在哪里,我要去往何方
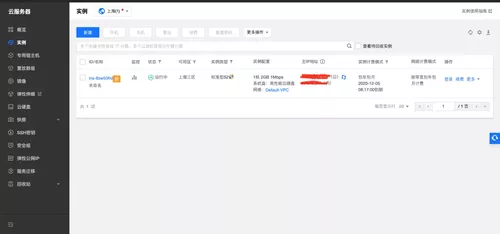
点击登录,进入服务器
然后发出灵魂三问之首:
我是谁?

然后发出灵魂三问之中:
我在哪里?

然后发出灵魂三问之尾:
我要去往何方?
这个问题太困难,服务器表示I don't know.

3.剑入宝鞘,鞘配英雄
每次登录都要用浏览器未免太麻烦,有很多终端的连接软件,如SecureCRT
下载什么的,一搜一大把。点击右上角快速连接,主机名填你的公网ip(第一幅图里一片红的地方是ip)
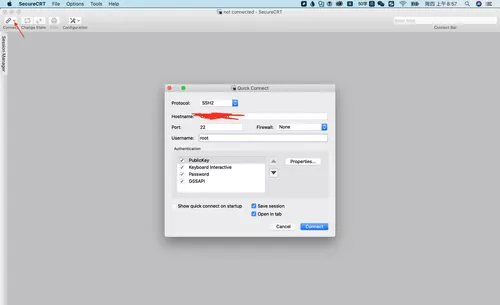
然后会让你输密码,输一下就行了。

[root@VM_0_4_centos ~]# cat /etc/centos-release # 查看版本 CentOS Linux release 7.6.1810 (Core)
现在服务器就是一个只有一条钢索桥的小破村,先把ftp跑通,至少能和服务器文件收发
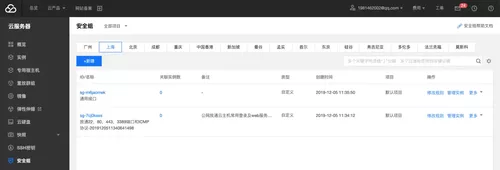
在控制台的安全组里先把常用放入端口开放一下22,80,21,3306等。
[root@VM_0_4_centos ~]# systemctl status firewalld.service # 查看防火墙信息 ● firewalld.service - firewalld - dynamic firewall daemon Loaded: loaded (/usr/lib/systemd/system/firewalld.service; disabled; vendor preset: enabled) Active: inactive (dead) # 表示默认就是关的 Docs: man:firewalld(1) [root@VM_0_4_centos ~]# rpm -qa | grep vsftpd #查看是否已安装vsftpd [root@VM_0_4_centos ~]# yum -y install vsftpd #安装vsftpd [root@VM_0_4_centos ~]# systemctl start vsftpd #开启vsftpd
默认的ftp文件在
/var/ftp下,现在通过浏览器就可以访问、下载服务器文件了。
[root@VM_0_4_centos ~]# cd /var/ftp [root@VM_0_4_centos ftp]# mkdir projects [root@VM_0_4_centos ftp]# ls projects pub

这里通过FileZilla进行文件传输:
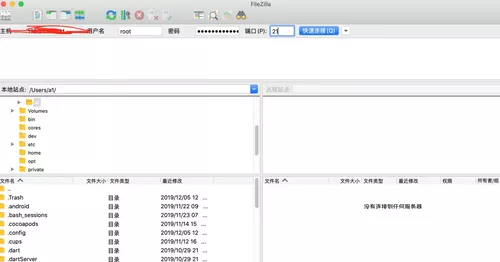
坑来了:503 Permission denied,,哥可是至高无上的root权限,你有什么资格denied我?
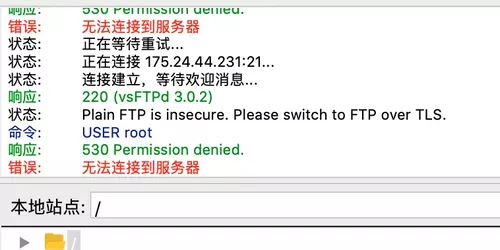
vsftpd默认不给root用户暴露ftp,可以修改一下,或者新建一个用户。
vi /etc/vsftpd/ftpusers #修改:注释root vi /etc/vsftpd/user_list #修改:注释root /bin/systemctl restart vsftpd.service # 重启

一首我很喜欢的MV奉上,也是音视频文章的素材: ftp://175.24.44.231/projects/
这样两端的路就通了,文件实现互通。

第二章:仗剑江湖(Java)
1.天下第一剑-Java
看了一下,没有Java怎么能忍,宝剑出鞘,召唤Java。
[root@VM_0_4_centos local]# java --version -bash: java: command not found
---[· yum search jdk #搜索jdk ---->[结果]----- //略... java-1.8.0-openjdk.x86_64 : OpenJDK Runtime Environment //略... ---[· yum install java-1.8.0-openjdk.x86_64 # 安装JDL ---[· java -version openjdk version "1.8.0_232" OpenJDK Runtime Environment (build 1.8.0_232-b09) OpenJDK 64-Bit Server VM (build 25.232-b09, mixed mode)
2.Java之剑最华丽光环--SpringBoot
下面运行SpringBoot项目,先演示一下,详见SpringBoot系列(已放在ftp里,可下载)
将本地写好的项目通过ftp传到服务器上去,使用java -jar 运行
[root@VM_0_4_centos ~]# cd ~ [root@VM_0_4_centos ~]# mkdir project [root@VM_0_4_centos ~]# ls project
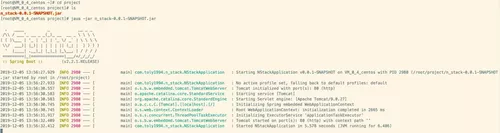
服务器已打开,现在可以访问:http://175.24.44.231/
至此,你可以测试服务器是否正常运作,连通无误,这是一切的基础

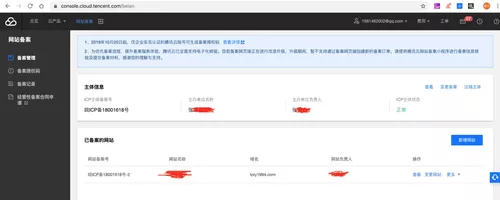
3.以宇宙的名义-域名
其实域名就是将你的服务器ip映射成 www.toly1994.com 而已,并没有什么大不了的
不用域名,给别人抛个ip也能访问,只不过有了域名+备案就名正言顺,咱是好公民。
很简单,将域名解析一下,映射到
公网ip即可
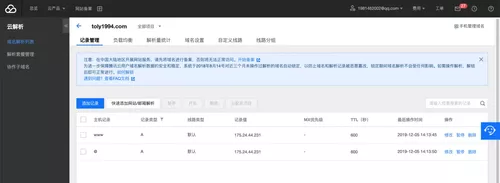
这样沉睡已久的 toly1994.com 开始苏醒,
为服务器小破村修了路,又盖了间小破房,至此,域名解析OK。
4. 你的生命有我来守护 - 防火墙
systemctl start firewalld.service # 开启防火墙 systemctl stop firewalld.service # 关闭防火墙 systemctl status firewalld.service # 查看防火墙状态
防火墙一旦开启,再访问
toly1994.com就会找不到80端口,需要开放防火墙端口
[root@VM_0_4_centos ~]# /sbin/iptables -L -n # 查看防火墙开放的端口 Chain INPUT (policy ACCEPT) target prot opt source destination Chain FORWARD (policy ACCEPT) target prot opt source destination Chain OUTPUT (policy ACCEPT) target prot opt source destination
firewall-cmd --permanent --add-port=80/tcp # 开放80端口 firewall-cmd --reload # 重启防火墙
当你需要开放什么端口时,自己开就行了。还有个小点:当你关闭命令行时应用就挂了
可以用sudo nohup java -jar n_stack-0.0.1-SNAPSHOT.jar开启
Java/SpringBoot大军已集结完毕,随时准备进击...
第三章:多媒体风云-nginx/流媒体服务器
1.创建文件夹
---[· cd /usr/local/ ---[· mkdir nginx ---[· cd nginx/
2.下载解压nginx和nginx-rtmp-module
wget https://nginx.org/download/nginx-1.16.1.tar.gz wget https://github.com/arut/nginx-rtmp-module/archive/v1.2.1.tar.gz ---[· tar -xvf nginx-1.16.1.tar.gz ---[· tar -xvf v1.2.1.tar.gz ---[· ls nginx-1.16.1 nginx-1.16.1.tar.gz nginx-rtmp-module-1.2.1 v1.2.1.tar.gz # 这时候压缩包就可以删掉了
3.编译nginx
---[· cd nginx-1.16.1 # 添加编译配置--注意模块名 ./configure --with-http_ssl_module --add-module=../nginx-rtmp-module-1.2.1 make && make install #编译安装 ---[· cd .. ---[· ls conf html logs nginx-1.16.1 nginx-rtmp-module-1.2.1 sbin
4.[配置的修改处]
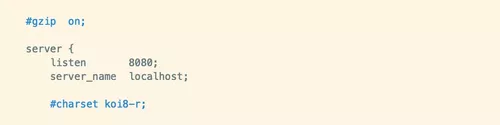
80端口已经在用了,可以在conf/nginx.conf里修改端口为8080
---[· cd conf ---[· ls fastcgi.conf fastcgi_params koi-utf mime.types nginx.conf scgi_params uwsgi_params win-utf fastcgi.conf.default fastcgi_params.default koi-win mime.types.default nginx.conf.default scgi_params.default uwsgi_params.default ---[· vim nginx.conf
5. 启动nginx
控制台什么都没输出,别慌,没有错就是成功了
注意:腾讯云控制台的安全组和防火墙需要开放8080端口

---[· cd /usr/local/nginx/sbin ---[· ./nginx ---[· ps -ef | grep nginx # 查看情况 root 10043 1 0 10:32 ? 00:00:00 nginx: master process ./nginx nobody 10044 10043 0 10:32 ? 00:00:00 nginx: worker process root 14035 30742 0 11:03 pts/2 00:00:00 grep --color=auto nginx
cd /usr/local/nginx/sbin ./nginx -s stop 关闭 ./nginx -s reload 重启
6.媒体流一下下
记得在ftp里有一个视频
---[· cd /var/ftp/projects ---[· ls n_stack-0.0.1-SNAPSHOT.jar sh.mp4
---[· vim /usr/local/nginx/conf/nginx.conf ####################修改添加与http、event同级#################### rtmp { #RTMP服务 server { listen 8081; #//服务端口8081,记得打开安全组和防火墙端口 chunk_size 4096; #//数据传输块的大小 application toly { play /var/ftp/projects; #//视频文件夹 } } } ####################修改#################### ---[· cd /usr/local/nginx/sbin ---[· sudo ./nginx -s reload #重启下面是本地通过ffplay拉流播放的效果,表示OK。
这样在projects下方的任何视频都可以被点播,至于FFmpeg直播,祈祷本王活得久一点吧.....
ffplay rtmp://toly1994.com:8081/toly/sh.mp4
nginx大军集结完毕,FFmpeg大军已在路上,准备进击....
第四章:天下第二剑-MySQL
1.前期准备
下载解压mysql
rpm -qa|grep -i mysql # 查看是否有mysql # 如果有 rpm -e XXXXX --nodeps 删除 cd /usr/local #选一个下载文件的地方 wget https://dev.mysql.com/get/Downloads/MySQL-8.0/mysql-8.0.18-linux-glibc2.12-x86_64.tar.xz # 下载mysql tar -xvf mysql-8.0.18-linux-glibc2.12-x86_64.tar.xz # 解压mysql [root@VM_0_4_centos mysql]# mv mysql-8.0.18-linux-glibc2.12-x86_64 mysql #重命名为mysql [root@VM_0_4_centos mysql]# ls bin etc games include lib lib64 libexec mysql qcloud sbin share src yd.socket.server
创建mysql用户及组
cd /usr/local # local目录 groupadd mysql # 创建mysql组 useradd -r -g mysql mysql # 在mysql组 创建mysql用户 cd mysql/ #进入mysql文件下 chown -R mysql:mysql ./ #授权所有的文件
初始化mysql
---[· pwd /usr/local/mysql ---[· mkdir data ---[· bin/mysqld --initialize --user=mysql --basedir=/usr/local/mysql --datadir=/usr/local/mysql/data ❌ bin/mysqld: error while loading shared libraries: libnuma.so.1: ---[· yum -y install numactl ---[· bin/mysqld --initialize --user=mysql --basedir=/usr/local/mysql --datadir=/usr/local/mysql/data [root@VM_0_4_centos mysql]# bin/mysqld --initialize --user=mysql --basedir=/usr/local/mysql --datadir=/usr/local/mysql/data 2019-12-05T09:11:42.077017Z 0 [Warning] [MY-011070] [Server] 'Disabling symbolic links using --skip-symbolic-links (or equivalent) is the default. Consider not using this option as it' is deprecated and will be removed in a future release. 2019-12-05T09:11:42.077121Z 0 [System] [MY-013169] [Server] /usr/local/mysql/bin/mysqld (mysqld 8.0.18) initializing of server in progress as process 31048 2019-12-05T09:11:47.785216Z 5 [Note] [MY-010454] [Server] A temporary password is generated for root@localhost: 47<:0(pYQs>C
⭐️ 会生成默认的密码:root@localhost: 47<:0(pYQs>C
[只将data文件暴露给mysql用户]
[root@VM_0_4_centos mysql]# chown -R root:root ./ [root@VM_0_4_centos mysql]# chown -R mysql:mysql data [root@VM_0_4_centos mysql]# ll total 552 drwxr-xr-x 2 root root 4096 Sep 20 20:57 bin drwxr-xr-x 6 mysql mysql 4096 Dec 5 17:11 data drwxr-xr-x 2 root root 4096 Sep 20 20:57 docs drwxr-xr-x 3 root root 4096 Sep 20 20:57 include drwxr-xr-x 7 root root 4096 Sep 20 20:57 lib -rw-r--r-- 1 root root 408918 Sep 20 16:30 LICENSE //略...
2.mysql配置文件相关
配置mysql
[root@VM_0_4_centos mysql]# cd support-files/ [root@VM_0_4_centos support-files]# ls mysqld_multi.server mysql-log-rotate mysql.server [root@VM_0_4_centos support-files]# touch my-default.cnf [root@VM_0_4_centos support-files]# chmod 777 ./my-default.cnf [root@VM_0_4_centos support-files]# cd ../ [root@VM_0_4_centos mysql]# cp support-files/my-default.cnf /etc/my.cnf
按需修改配置文件
vim /etc/my.cnf
[client] port=3306 #.sock文件路径 socket = /tmp/mysql/mysql.sock default-character-set=utf8 [mysqld] #mysql最大连接数 max_connections=2000 datadir=/wocloud/mysql/data basedir = /usr/local/mysql datadir = /usr/local/mysql/data socket = /tmp/mysql/mysql.sock log-error = /usr/local/mysql/data/error.log pid-file = /usr/local/mysql/data/mysql.pid #密码有效期,0表示永久有效 default_password_lifetime=0 #提高source导入数据速度 innodb_flush_log_at_trx_commit=0 max_allowed_packet=100M user=mysql #临时文件存放路径 tmpdir=/tmp/mysql #默认配置 symbolic-links=0 character-set-server=utf8 sql_mode=NO_ENGINE_SUBSTITUTION,STRICT_TRANS_TABLES [mysql] no-auto-rehash default-character-set=utf8 [mysqld_safe] default-character-set = utf8 [mysql.server] default-character-set = utf8
开机自起
[root@VM_0_4_centos mysql]# cd support-files/ [root@VM_0_4_centos support-files]# cp mysql.server /etc/init.d/mysql [root@VM_0_4_centos support-files]# chmod +x /etc/init.d/mysql [root@VM_0_4_centos support-files]# chkconfig mysql on
开启/关闭服务
service mysql start service mysql stop
添加环境变量
vim ~/.bash_profile:
#MYSQL ENVIRONMENT export PATH=$PATH:/usr/local/mysql/bin:/usr/local/mysql/lib
source ~/.bash_profile,通过$PATH命令可以查看是否按照成功。
[番外]-也许你比较好奇为嘛在
etc里写my.cnf配置
可以查看一下mysql默认可生效的my.cnf位置:
[root@VM_0_4_centos mysql]# mysql --verbose --help | grep my.cnf order of preference, my.cnf, $MYSQL_TCP_PORT, /etc/my.cnf /etc/mysql/my.cnf /usr/local/mysql/etc/my.cnf ~/.my.cnf 复制代码
3. 登录mysql和修改密码
使用上面随机的密码进行登录,然后再修改密码。
[root@VM_0_4_centos mysql]# mysql -u root -p Enter password: Welcome to the MySQL monitor. Commands end with ; or \g. Your MySQL connection id is 8 Server version: 8.0.18 Copyright (c) 2000, 2019, Oracle and/or its affiliates. All rights reserved. Oracle is a registered trademark of Oracle Corporation and/or its affiliates. Other names may be trademarks of their respective owners. Type 'help;' or '\h' for help. Type '\c' to clear the current input statement. mysql> ALTER USER 'root'@'localhost' IDENTIFIED WITH mysql_native_password BY 'ooxxooxxooxx';# 修改密码 mysql> SHOW DATABASES; +--------------------+ | Database | +--------------------+ | information_schema | | mysql | | performance_schema | | sys | +--------------------+ 4 rows in set (0.00 sec) Grant all privileges on *.* to 'root'@'%' identified by 'toly1994' with grant option; GRANT ALL PRIVILEGES ON . TO 'root'@'%' IDENTIFIED BY 'toly1994' WITH GRANT OPTION; GRANT ALL ON *.* TO 'root'@'%';
MySQL大军已集结完毕,随时准备进击...
第五章:斩魔双剑-NodeJS + Python
1.node 环境
cd /usr/local wget https://npm.taobao.org/mirrors/node/v12.13.1/node-v12.13.1-linux-x64.tar.xz tar -xvf node-v12.13.1-linux-x64.tar.xz mv node-v12.13.1-linux-x64 nodejs ln -s /usr/local/nodejs/bin/node /usr/sbin/node ln -s /usr/local/nodejs/bin/npm /usr/sbin/npm ---[· node -v v12.13.1 ---[· npm -v 6.12.1 复制代码
node 已填充完毕,前端大军准备进击...
2.Python环境
自带Python 2.7.5,再装个python3吧,
编译pip3时需要一些东西,先装一下,否则编译无法生成pip3:
yum -y install zlib-devel bzip2-devel openssl-devel ncurses-devel sqlite-devel readline-devel tk-devel gdbm-devel db4-devel libpcap-devel xz-devel libffi-devel
---[· python -V Python 2.7.5 ---[· cd /usr/local/ wget https://www.python.org/ftp/python/3.7.5/Python-3.7.5.tar.xz tar -xvf Python-3.7.5.tar.xz #解压 cd Python-3.7.5 ./configure --prefix=/usr/local/python3 # 配置 make && make install # 编译安装
查看是否生成python3和pip3
---[· cd /usr/local/python3/bin ---[· ls 2to3 2to3-3.7 easy_install-3.7 idle3 idle3.7 pip3 pip3.7 pydoc3 pydoc3.7 python3 python3.7 python3.7-config python3.7m python3.7m-config python3-config pyvenv pyvenv-3.7
建立软连接
ln -s /usr/local/python3/bin/python3 /usr/sbin/python3 ln -s /usr/local/python3/bin/pip3 /usr/sbin/pip3 ---[· python3 -V Python 3.8.0 ---[· pip3 -V pip 19.2.3 from /usr/local/python3/lib/python3.7/site-packages/pip (python 3.7)
python 已集结完毕,随时准备进击...
附录:操作系统
如果你一不小心选了个低版本,或者想要将Windows版的服务器换成Linux,只需要十秒

尾声
声明一点,我可不是在为腾讯云做广告,只是恰好在用。你用任何虚拟服务器都可以
甚至用电脑上的Linux虚拟机也可以模拟玩玩,通过局域网间可访问
如果有公网的ip,完全可以将自己的电脑搞成个高性能服务器....
现在我宣布:
Light计划正式开启--2019.12.05 。