
本系列可能会伴随大家很长时间,这里我会从0开始搭建一个「网易云音乐」的APP出来。
下面是该APP 功能的思维导图:

前期回顾:
本篇为第二篇,在这里我们会搭建闪屏页、登录页、发现页的UI及逻辑。
Splash Page
我们现在的APP都有一个初始页面,在这个页面当中做一些插件和逻辑的初始化工作,所以我们首先就来做一个这个页面。
先来看一下效果:
非常简单,就是一个网易云音乐的 Logo 从小到大。
大致代码如下:
return Scaffold(
backgroundColor: Colors.white,
body: Container(
height: double.infinity,
width: double.infinity,
child: ScaleTransition(
scale: _logoAnimation,
child: Hero(
tag: 'logo',
child: Image.asset('images/icon_logo.png'), ), ), ),);
但是,这个页面远不止只有一个动画这么简单。
首先在查看过API 之后了解到,因很多接口都需要登录之后才能使用,所以在当前页面要判断是否已经登录,
如果没有登录,那么则跳转到登录页,如果已经登录,那么则跳转到APP首页。
逻辑代码如下:
UserModel userModel = Provider.of<UserModel>(context);
userModel.initUser();
if (userModel.user != null) {
NetUtils.refreshLogin(context);
NavigatorUtil.goHomePage(context);
} else
NavigatorUtil.goLoginPage(context);
使用 Provider 来全局存储用户信息, SharedPreferences 存储用户信息到本地。
其中 initUser() 方法就是用来从 SharedPreferences 中获取用户信息,如果没有获取到就为null。
为 null 的情况下就要去跳转登录,如果不为空那么则刷新登录状态,然后跳转到首页。
当然,最后不要忘了 AnimationController.dispose()。
登录页
这里就区分两种:
1.UI页面2.登录逻辑
先说UI。
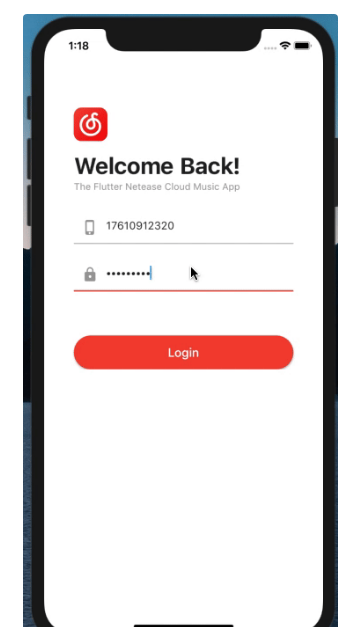
登录 UI

首先从上面的UI能看出来有两个动画效果:
1.hero动画2.logo 下方的组件渐变以及改变位置
Hero比较简单我就不多说了,可以查看我以前的文章:
所有的登录组件被我封装在了组件中,然后使用 AnimatedWidget 来控制动画:
class _LoginAnimatedWidget extends AnimatedWidget {
final Tween<double> _opacityTween = Tween(begin: 0, end: 1);
final Tween<double> _offsetTween = Tween(begin: 40, end: 0);
final Animation animation;
_LoginAnimatedWidget({
@required this.animation,
}) : super(listenable: animation);
@override
Widget build(BuildContext context) {
return Opacity(
opacity: _opacityTween.evaluate(animation),
child: Container(
margin: EdgeInsets.only(top: _offsetTween.evaluate(animation)),
child: _LoginWidget(),
),
);
}
}
这样就组成了从 splash 页面跳转到登录页的动画效果。
登录逻辑
前面说过,是使用 Provider 来存储用户信息的,那么请求登录也使用 Provider 来控制,以达到 UI 数据分离的效果。
先看一下 UserModel 类:
class UserModel with ChangeNotifier {
User _user;
User get user => _user;
/// 初始化 User
void initUser() {
if (Application.sp.containsKey('user')) {
String s = Application.sp.getString('user');
_user = User.fromJson(json.decode(s));
}
}
/// 登录
void login(BuildContext context, String phone, String pwd) async {
User user = await NetUtils.login(context, phone, pwd);
if (user.code > 299) {
Fluttertoast.showToast(msg: user.msg ?? '登录失败,请检查账号密码', gravity: ToastGravity.CENTER);
return;
}
Fluttertoast.showToast(msg: '登录成功', gravity: ToastGravity.CENTER);
_saveUserInfo(user);
NavigatorUtil.goHomePage(context);
}
/// 保存用户信息到 sp
_saveUserInfo(User user) {
_user = user;
Application.sp.setString('user', json.encode(user.toJson()));
}
}
代码也很清晰,一共就三个方法:
1.初始化用户数据(在 Splash Page 调用,保存用户信息)2.调用登录接口(成功后跳转到首页,并保存数据)3.保存用户数据
发现页

发现页从上到下,一共分五块:
1.Banner2.分类3.推荐歌单4.新碟上架5.MV 排行
其中除「分类」模块为本地外,其余都是网络请求的数据。
Banner 使用的控件,我之前也分享过文章:Flutter | 封装一个 Banner 轮播图。
其余的也是用我之前写过的Flutter | 定义一个通用的多功能网络请求 Widget。
使用该控件的好处就是 省去处理网络请求的逻辑,只有返回正确数据时才会走到build回调。其他的逻辑一概不用考虑。

有没有发现这两个控件很像?
区别有两个,第一个是上面的有播放量,下面的没有。而下面的有第二行小字,上面的没有。
那我们就可以把它封装成一个组件!
等等!为什么我们不把圆角矩形图片也封装成一个组件呢?万一后面也能用到呢?
???那为什么不把封面也封装成一个组件呢?万一后面也能用到呢?
所以,我们先来封装圆角矩形图片:
class RoundedNetImage extends StatelessWidget {
final String url;
final double width;
final double height;
final double radius;
RoundedNetImage(this.url, {this.width, this.height, this.radius = 10});
@override
Widget build(BuildContext context) {
return ClipRRect(
borderRadius: BorderRadius.all(Radius.circular(radius)),
child: Image.network(
url,
width: ScreenUtil().setWidth(width),
height: ScreenUtil().setWidth(height),
),
);
}
}
然后继续封装我们的封面组件:
/// 歌单、新碟上架等封面组件
class PlayListCoverWidget extends StatelessWidget {
final String url;
final int playCount;
final double width;
PlayListCoverWidget(this.url, {this.playCount, this.width = 200});
@override
Widget build(BuildContext context) {
return ClipRRect(
borderRadius: BorderRadius.all(Radius.circular(8)),
child: Container(
width: ScreenUtil().setWidth(width),
height: ScreenUtil().setWidth(width),
child: Stack(
alignment: Alignment.topRight,
children: <Widget>[
Image.network(url),
playCount == null
? Container()
: Padding(
padding: EdgeInsets.only(
top: ScreenUtil().setWidth(2),
right: ScreenUtil().setWidth(5)),
child: Row(
mainAxisSize: MainAxisSize.min,
children: <Widget>[
Image.asset(
'images/icon_triangle.png',
width: ScreenUtil().setWidth(30),
height: ScreenUtil().setWidth(30),
),
Text(
'${NumberUtils.amountConversion(playCount)}',
style: TextStyle(
color: Colors.white,
fontSize: 12,
fontWeight: FontWeight.w500,
),
)
],
),
)
],
),
),
);
}
}
•url:封面图的url(必填)•playCount:播放数量,null就不显示(非必填)•width:封面的宽高(默认200)
接下来就简单了,因为前两个组件都已经封装好了:
/// 歌单、新碟上架等封装的组件
class PlayListWidget extends StatelessWidget {
final String picUrl;
final String text;
final String subText;
final num playCount;
final int maxLines;
final VoidCallback onTap;
final int index;
PlayListWidget({
this.picUrl,
@required this.text,
this.playCount,
this.subText,
this.onTap,
this.maxLines = -1,
this.index,
});
@override
Widget build(BuildContext context) {
return GestureDetector(
onTap: onTap,
child: Container(
width: ScreenUtil().setWidth(200),
child: Column(
crossAxisAlignment: CrossAxisAlignment.start,
mainAxisSize: MainAxisSize.min,
children: <Widget>[
picUrl == null ? Container() : PlayListCoverWidget(
picUrl,
playCount: playCount,
),
index == null ? Container() : Text(index.toString(), style: commonGrayTextStyle,),
VEmptyView(5),
Text(
text,
style: smallCommonTextStyle,
maxLines: maxLines != -1 ? maxLines : null,
overflow: maxLines != -1 ? TextOverflow.ellipsis : null,
),
subText == null ? Container() : VEmptyView(2),
subText == null
? Container()
: Text(
subText,
style: TextStyle(fontSize: 10, color: Colors.grey),
maxLines: maxLines != -1 ? maxLines : null,
overflow: maxLines != -1 ? TextOverflow.ellipsis : null,
),
],
),
),
);
}
}
虽然代码比较多,但逻辑还是很简单的。
其实就是一个Column,然后根据字段是否为null来显示/隐藏某一个组件。
这样我们的发现页的逻辑大致就结束了。
总结
可以看得出来,只要我们前期架构搭的好,后期写起来代码真的是一气呵成。
代码我就不放在单独的分支里了,都在主分支里。


