概述
What is Electron?
Electron是一个使用JavaScript、HTML和CSS构建跨平台桌面应用程序的框架。 您可以将Electron与纯JavaScript或您选择的JavaScript框架一起使用:
构建一个简单的Electron应用程序
要创建基本的Electron应用程序,请按照下列步骤操作:
git clone https://github.com/electron/electron-quick-startcd electron-quick-startnpm install
npm start
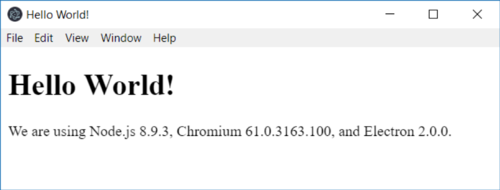
您应该看到如下所示的Hello World应用程序:
将JavaScript UI控件(WijmoJS)添加到应用程序
要将WijmoJS添加到应用程序,请先安装它。在命令提示符下,进入app文件夹(electron-quick-start)并键入:
npm install Wijmo
接下来,使用VS Code或您喜好的编辑器打开index.html文件,并添加以下内容:
<!DOCTYPE html><html>
  <head>
    <meta charset="UTF-8">
    <title>Hello World!</title>

    <!-- add Bootstrap and Wijmo css -->
    <link href=https://maxcdn.bootstrapcdn.com/bootstrap/3.2.0/css/bootstrap.min.css
          rel="stylesheet"/>
    <link href=https://cdn.grapecity.com/wijmo/5.latest/styles/wijmo.min.css
          rel="stylesheet"/>

    <!-- define the app styles -->
    <style>
      .app-panel {        margin: 0 48pt;
      }      .app-panel .wj-control {        display: inline-block;        vertical-align: top;        width: 400px;        height: 300px;
      }    </style>
  </head>
  <body>
    <div class="container">
      <h1>Hello World!</h1>
      <p>
        <!-- Node.js APIs are available in this renderer process. -->
        We are using Node.js        <script>document.write(process.versions.node)</script>,
        Chromium <script>document.write(process.versions.chrome)</script>,
        and Electron        <script>document.write(process.versions.electron)</script>.      </p>

      <!--add Wijmo controls to the page -->
      <div class="app-panel">
        <div id="theGrid"></div>
        <div id="theChart"></div>
      </div>
    </div>
    <script>
      // You can also require other files to run in this process
      require('./renderer.js')    </script>
  </body></html>
在这一步中,我们为两个WijmoJS控件添加了一些样式和主题元素。接下来,打开“renderer.js”文件并按如下所示进行编辑:
// This file is required by the index.html file and will// be executed in the renderer process for that window.// All of the Node.js APIs are available in this process.// import Wijmovar wjCore = require('./node_modules/wijmo/wijmo.js');var wjGrid = require('./node_modules/wijmo/wijmo.grid.js');var wjChart = require('./node_modules/wijmo/wijmo.chart.js');// set the Wijmo license keyvar key = 'GrapeCity-Internal-Use-Only,…';
wjCore.setLicenseKey(key);// create the controlsvar theGrid = new wjGrid.FlexGrid('#theGrid', {    itemsSource: getData()
});var theChart = new wjChart.FlexChart('#theChart', {    itemsSource: theGrid.itemsSource,    bindingX: 'country',    series: [
        { name: 'Sales', binding: 'sales' },
        { name: 'Expenses', binding: 'expenses' },
        { name: 'Downloads', binding: 'downloads' },
    ]
});// get some random datafunction getData() {    var countries = 'US,Germany,UK,Japan,Italy,Greece'.split(','),
        data = [];    for (var i = 0; i < countries.length; i++) {
        data.push({        country: countries[i],        sales: Math.random() * 10000,        expenses: Math.random() * 5000,        downloads: Math.round(Math.random() * 20000),
        });
    }    return new wjCore.CollectionView(data);
}
实现这段代码首先需要三个WijmoJS模块:WijmoJS Core,Grid和Chart。 (它设置了WijmoJS许可证密钥,因此应用程序在运行时不会显示水印。如果您没有许可证密钥,请跳过此步骤,应用程序仍将运行,但会显示水印元素)
如果您在此之前已经安装了许可证密钥,则不需要特定域。WijmoJS电子应用程序会从文件或本地主机协议运行,因此任何有效的WijmoJS密钥都将起作用,无论用于生成它的域是什么。
最后一步是创建WijmoJS控件并将它们绑定到数据源。 在此示例中,网格和图表绑定到同一数据源。
运行Electron应用程序
像以前一样运行应用程序!
npm start
这次你会看到这个:
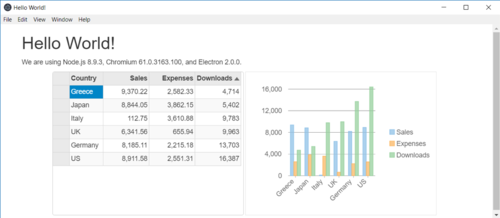
由于表格和图表绑定到相同的数据,因此您对网格所做的任何更改(如编辑单元格或排序列)都将自动应用于图表。
现在,请下载WijmoJS,享用WijmoJS JavaScript控件的Electron应用程序吧。
WijmoJS:灵活高效的前端开发工具包,可快速搭建企业 Web 应用程序