
首先看下最终的效果图:
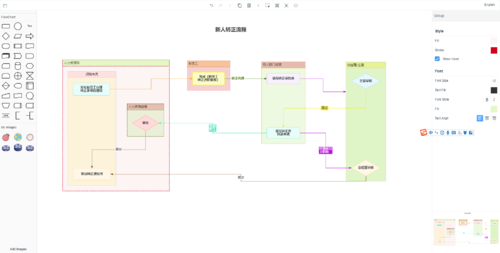
主要使用的技术是zrender.js和vue.js,zrender 用于实现流程图,vue搭建整体架构。
本篇文章主要面向对zrender有一定了解的同学。
本篇文章只讲解核心flowchart的实现方法。
一.分析
流程图主要包含节点node、联系edge以及组group三个部分。
功能主要有
添加节点
添加联系,分为节点与节点、节点与组、组与组之间的联系
添加组
删除功能
二.实现方式
实现一个flowEditor类,用于管理节点、联系以及组。
主要方法包含:添加/删除节点,添加/删除组,添加/删除联系,处理事件等
2.实现一个Node类,用于创建节点
3.实现一个NodeGroup类,用于创建组
4.实现一个RelateLink类,用于创建联系
三.具体实现
节点node类
<1>创建一个基础Node类,管理公共的方法,比如创建锚点(锚点主要用于连接,即创建联系线时使用),获取锚点坐标,刷新等方法。
<2>通过
zrender.Path.extend({
    type: '',
    shape: {
        x: 0,
        y: 0,
        width: 0,
        height: 0
    },
    buildPath: function (ctx, shape) {
    }
});
方法来拓展zrender基础图形,并在此基础上实现节点。
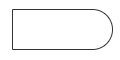
比如如下图形:
...
//拓展基础图形
var delay = zrender.Path.extend({
    type: 'delay',
    shape: {
        x: 0,
        y: 0,
        width: 0,
        height: 0
    },
    buildPath: function (ctx, shape) {
        var x=shape.x;
        var y=shape.y;
        var width = shape.width;
        var height = shape.height;
        var r=height/2;
        ctx.moveTo(x,y);
        ctx.lineTo(x+width-r,y);
        ctx.arc(x+width-r, y+r, r, -Math.PI/2, Math.PI/2 , false);
        ctx.lineTo(x,y+height);
        ctx.closePath();
        return ;
    }
});

//在基础图形上拓展一个节点
class Delay extends delay {
    constructor(data) {
        super(data);
        this.data = data;
        this.anchors = [];
        this.nodeType = "node";
        this.createAnchors();   //创建锚点坐标
    }

    createAnchors() {
        this.anchors = [];
        var g = new zrender.Group();
        var box = g.getBoundingRect([this]);
        var t = { x: box.x + box.width / 2, y: box.y, index: 1, node: this, direct: 'top' };
        var r = { x: box.x + box.width, y: box.y + box.height / 2, index: 2, node: this, direct: 'right' };
        var b = { x: box.x + box.width / 2, y: box.y + box.height, index: 3, node: this, direct: 'bottom' };
        var l = { x: box.x, y: box.y + box.height / 2, index: 4, node: this, direct: 'left' };
        this.anchors.push(t, r, b, l);
    }
}
...
2.连线类
这里主要介绍直线连线方式的实现。
连线类主要包括以下属性
连接节点,分为fromNode和toNode)
连接锚点,分为fromAnch和toAnch,其和节点是成对出现的,即有fromNode必有fromAnch,有toNode必有toAnch。
连接坐标,分为fromPoint和toPoint
连线不一定连在节点上,所以其中节点和锚点不一定的存在,而坐标是一定存在的。
在zrender中可以使用
zrender.Line类来实现直线,主要是获取开始坐标(x1,y1)和结束坐标(x2,y2)
如果有节点,那么可以通过锚点来获取坐标,反之通过mousemove方法获取鼠标坐标即可。
3.组
使用zrender.Group类来实现组。
通过getBoundingRect()方法来获取包围盒box,即组内节点所占据的矩形范围。当拖动节点时,不断的获取box,并不断的更新显示范围即可。
三.最后
以上是实现的思想,这里仅做抛转引玉,所有的源码可以在这里找到 [github] cicada-flowchart[能力有限,勿笑?]


热门评论
-

lockLuck2020-10-08 0
-

慕UI59868792020-03-16 0
查看全部评论我也是看的官方文档和例子...
我们现在要做zrender的开发工作,但是官方文档很简略,请问您那有没有比较全的文档,多谢