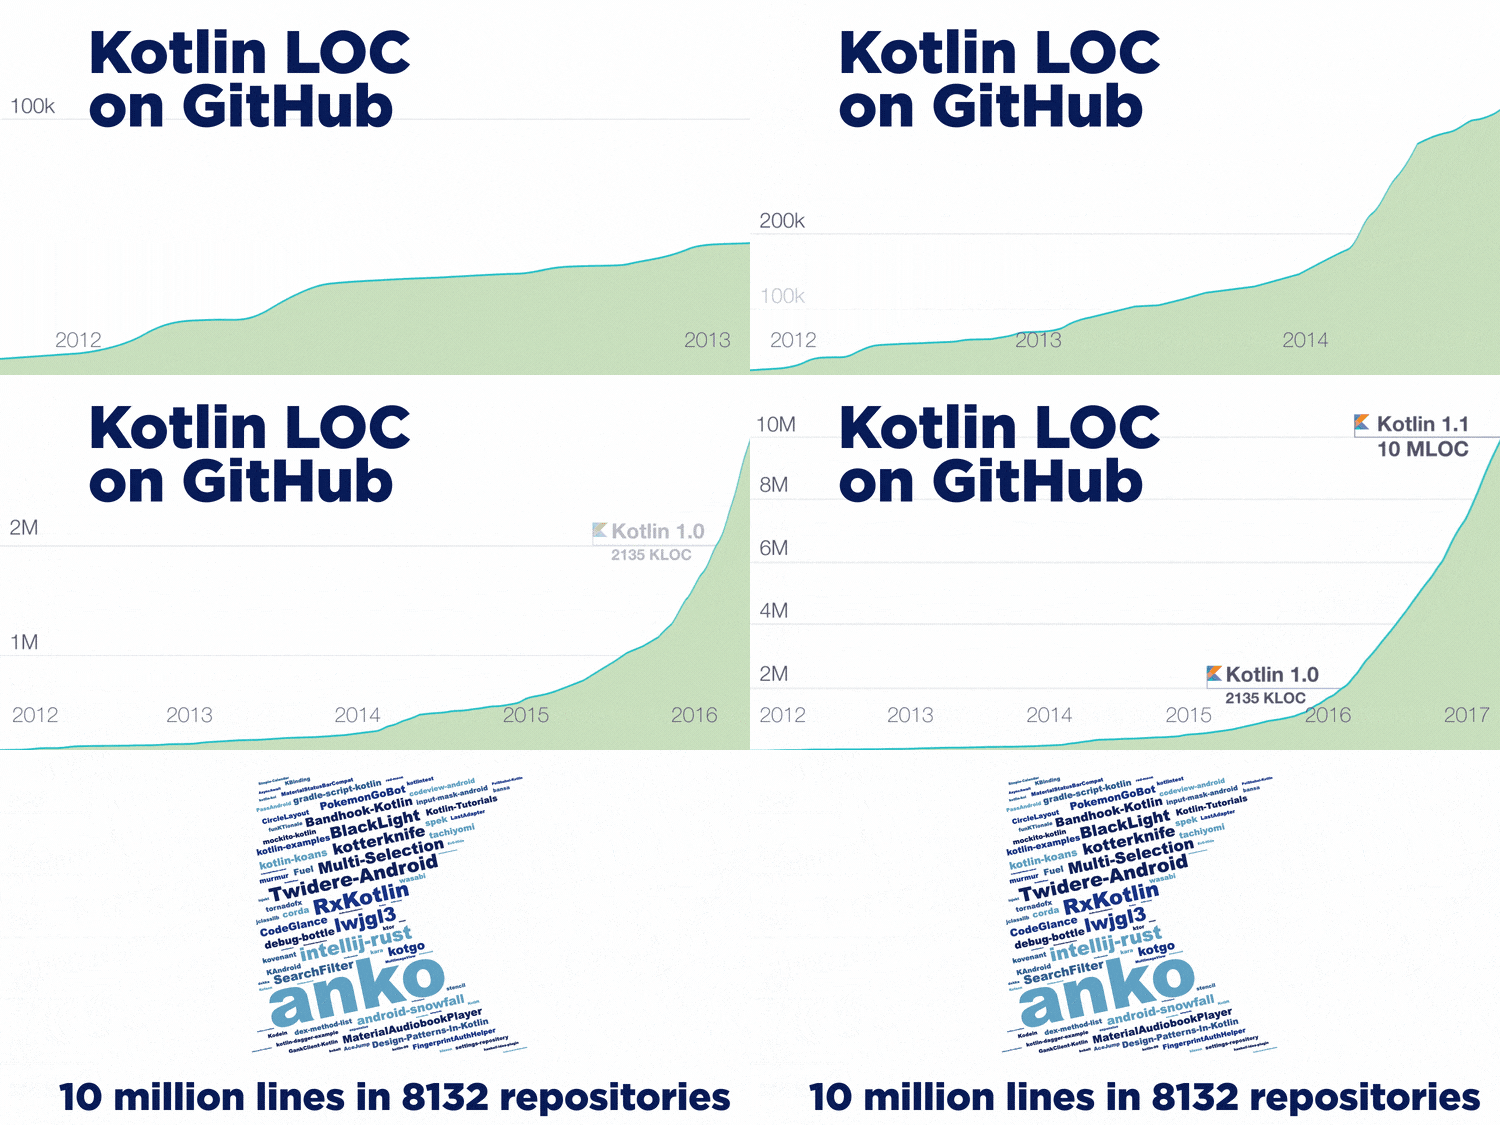
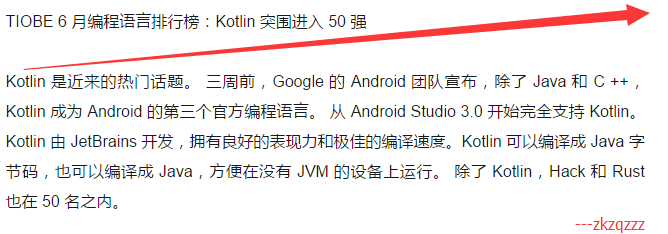
之前一直听一个做IOS开发的大学同学夸夸其谈他的Swift语言多么多么好,Java语言就是个渣渣。终于,在Google 2017 IO大会上,Kotlin正式被选为作为Android开发的官方语言。之前听说了这个传奇的语言,但是并没有认真的去尝试使用他用到开发中,现在已经成为官方语言了,学习是必须的了!首先看看他的一些特性吧,之前看了一些Swift语言的特点,就先拿Kotlin和Swift和Java的对比来看看他的优势吧。
Kotlin和Swift、Java
Kotlin 是一个基于 JVM 的新的编程语言,由 JetBrains开发。
后来了解到Kotlin原来是以一个岛的名字命名的(Котлин),它是一门静态类型编程语言,支持JVM平台,Android平台,浏览器JS运行环境,本地机器码等。支持与Java,Android 100% 完全互操作。
Swift,苹果于2014年WWDC(苹果开发者大会)发布的新开发语言,可与Objective-C共同运行于Mac OS和iOS平台,用于搭建基于苹果平台的应用程序。一个很不错的语言。
Java就不用说了,以前做Android开发那是都要把Java的基础打牢呀!
相信使用Kotlin用来开发的人肯定会越来越多的,这也许就是一个语言的魅力所在吧! 闲话少叙,我们还是来看干货吧!
一、简单比较
1.Hello,APKBUS!
Swift: print("Hello,APKBUS!")
Kotlin: println("Hello,APKBUS!")
JAVA: System.out.println("Hello,APKBUS!");
2.变量和常量
Swift:var myVariable = 42
myVariable = 50
let myConstant = 42
Kotlin:var myVariable = 42
myVariable = 50
val myConstant = 42 (Kotlin和Swift确实是很像哟。)
Java: int myVariable =42;
myVariable =50;
static final int myConstant = 42;
感觉Swift和Kotlin都比Java要简洁很多。 3.显式类型 Swift : let explicitDouble: Double = 70 Kotlin : val explicitDouble: Double = 70.0 4.强制类型转换 Swift : let label = "The width is " let width = 94 let widthLabel = label + String(width) Kotlin : val label = "The width is " val width = 94 val widthLabel = label + width 5.数组 Swift : var shoppingList = ["catfish", "water","tulips", "blue paint"] shoppingList[1] = "bottle of water" Kotlin : val shoppingList = arrayOf("catfish", "water","tulips", "blue paint") shoppingList[1] = "bottle of water" 6.函数 Swift : func greet(_ name: String,_ day: String) -> String { return "Hello \(name),today is \(day)." } greet("Bob", "Tuesday") Kotlin : fun greet(name: String, day: String): String { return "Hello $name, today is $day."} greet("Bob", "Tuesday") 7.类声明及用法 Swift : 声明:class Shape { var numberOfSides = 0 func simpleDescription() -> String { return "A shape with \(numberOfSides) sides." } } 用法:var shape = Shape() shape.numberOfSides = 7 var shapeDescription = shape.simpleDescription() Kotlin : 声明:class Shape { var numberOfSides = 0 fun simpleDescription() = "A shape with $numberOfSides sides." } 用法: var shape = Shape() shape.numberOfSides = 7 var shapeDescription = shape.simpleDescription()
经过上面简单的比较,发现Kotlin和Swift吼像呀!!! 当然,这两门语言还有其他可以比较的点,大家可以自己去找下,和Java的比较没有写出来,大家看下这两个的再想想Java怎么实现的就可以理解Kotlin的伟大了。
Kotlin相比Java有很多优势,首先一点就是你可以用更少的代码来做更多的事,其次Kotlin居然可以帮我们来避免空指针的问题,这个问题可是很多程序猿在写代码时时刻警惕着却又不能很好避免的问题呢!而且使用集合的时候也很方便,而在安卓开发中,视图绑定是必须要做的,虽然有黄油刀的辅助可能会省了不少力,但是现在Kotlin已经可以帮你很好的解决这个问题了!(具体的大家去搜索一下吧。 传送门:Java-Kotlin)
差点跑偏了,标题可是用Kotlin来开发Android 的呢,咱们现在只是对这门语言有了个大致的了解。现在就开始用他先做个小东西吧。
Kotlin开发Android
开发安卓的话肯定要有个开发工具吧,我之前一直用的是Android Studio,感觉挺不错的,后来到公司实习之后,发现公司基本上都是用的Intellij,然后我就开始用这个工具做开发了,感觉还是很好用的。我在这里使用的是Android Studio3.0 Canary版本,好像是Google在IO大会的时候更新的一个预览版本吧。如果使用正式版本的话,可能需要安装Kotlin的插件,但是3.0的版本就是本身集成好的,不需要安装多余的插件。
这里我给大家演示的是2.3版本下使用Kotlin。
1.首先新建一个项目KotlinProject, 配置项目的Gradle文件
配置项目Gradle文件:
apply plugin: 'com.android.application'
apply plugin:'kotlin-android'
apply plugin:'kotlin-android-extensions'
dependencies {
classpath 'org.jetbrains.kotlin:kotlin-gradle-plugin:1.1.1'
}
配置app的Gradle文件:
compile 'org.jetbrains.kotlin:kotlin-stdlib:1.1.1'
compile 'org.jetbrains.anko:anko-sdk25:0.10.0-beta-1'// sdk15, sdk19, sdk21, sdk23 are also available
compile 'org.jetbrains.anko:anko-appcompat-v7:0.10.0-beta-1'
通过上面的配置,你会发现引入的有anko的依赖。Anko是JetBrains开发的一个强大的库,说起JetBrains ,那就牛逼了,Kotlin语言是他们开发的,最流行的的开发工具intellij idea都是他们开发的,AS也是基于IDEA的。好了,言归正传,Anko是Kotlin官方开发的一个让开发Android应用更快速更简单的Kotlin库,并且能让我们书写的代码更简单清楚更容易阅读。(具体也可以看我一篇博客:用Kotlin和Anko实现安卓UI )
接下来,我们就通过代码来理解Kotlin语言开发Android的优势所在。
视图绑定不需要findViewById
做过Android开发的人都知道,布局文件写的多了,findViewById也是一个很大的工作量,而且还要先声明变量,在findViewById然后再强转成我们的控件,使用方式一般如下
[代码]java代码:
TextView username;username=(TextView)findViewById(R.id.user);username.setText("我是来自APKBUS的文本"); |
有时候写的是不是想吐,可能有些人说现在不是有一些注解的库,如butterknife,当我们使用注解时可以不用findViewById了,使用方式如下
[代码]java代码:
@BindView(R.id.user)TextView username;username.setText("我是来自APKBUS的文本"); |
确实是这样,使用注解后确实给我们少了一些工作量,不过这依然没有最简单化,最简单的就是我们可以直接给id为user的控件直接赋值,或许你会感觉这有点不可思议。不过Kotlin确实做到了。我们可以直接这样写:
[代码]java代码:
| 1 | user.text="我是来自APKBUS的文本" |
user就是我们布局文件声明的id,.text就想当与setText()给,在Kotlin语言中,我们看不到了像Java中的set/get方法了。需要注意的时,当我没呢这样使用,需要加入下面一句代码
[代码]java代码:
//activity_login就是我们的布局import kotlinx.android.synthetic.main.activity_login.* |
Anko Layout
通常我们使用xml文件写我们的布局,但是他有一些缺点如不是类型安全,不是空安全,解析xml文件消耗更多的CPU和电量等等。而Anko Layout可以使用DSL动态创建我们的UI,并且它比我们使用Java动态创建布局方便很多主要是更简洁,它和拥有xml创建布局的层级关系,能让我们更容易阅读。
[代码]java代码:
verticalLayout { val textView=textView("我是来自APKBUS的文本")<br data-filtered="filtered"> val name = editText("EditText") button("Button") { onClick { toast("${name.text}!") } }} |
我们在OnCreate方法中可以去掉setContentView,然后加入上面代码就可以显示如下图的效果,即一个垂直的线性布局中,放了一个TextView,一个EditText,和一个Button。并且Button中有一个点击事件,当点击时将EditText的内容
上面的代码是不是很简单易懂,当然,默认的控件并不能满足我们的需求,例如我们会更改字体的颜色及大小,会设置宽度和高度,会设置margin,padding值,那么该如何实行呢,当然也很简单,因为它的逻辑和xml书写布局是一个套路。例如以下实现
[代码]java代码:
val textView=textView("我是来自APKBUS的文本"){<br data-filtered="filtered"> textSize = sp(17).toFloat() textColor=context.resources.getColor(R.color.red)}.lparams{ margin=dip(10) height= dip(40) width= matchParent} |
在上面创建UI过程中,我们直接把创建UI的代码写在onCreate方法中了,当然,还有一种写法。我们创建一个内部类实行AnkoComponent接口,并重写createView方法,该方法返回一个View,也就是我们创建的布局。修改如下
[代码]java代码:
inner class UI : AnkoComponent<loginactivity> { override fun createView(ui: AnkoContext<loginactivity>): View { return with(ui){ verticalLayout { val textView=textView("我是来自APKBUS的文本"){<br data-filtered="filtered"> textSize = sp(17).toFloat() textColor=context.resources.getColor(R.color.red) }.lparams{ margin=dip(10) height= dip(40) width= matchParent } val name = editText("EditText") button("Button") { onClick { view -> toast("Hello, ${name.text}!") } } } } } }</loginactivity></loginactivity> |
然后在onCreate方法中加一句代码,即可创建我们的布局页面了。如下
[代码]java代码:
| 1 | UI().setContentView(this@LoginActivity) |
现在我们编译运行,发现效果和布局文件写的界面是一样的。但是它的性能是有优势的,其实吧并没有发觉性能优势。不管怎样,这种DSL确实便于阅读,也很容易上手,在上面的代码中,你可能注意到了dip(10),它表示将10dp转换为像素的意思,是Anko的扩展函数,说的扩展函数,如果阅读过Anko的源码我们发现里面大量的使用扩展函数,这也是Kotlin语言的优势之一。确实很强大,例如dip扩展(摘取View扩展)
[代码]java代码:
inline fun View.dip(value: Int): Int = context.dip(value)fun Context.dip(value: Int): Int = (value * resources.displayMetrics.density).toInt() |
在上面resources.displayMetrics.density和我们Java getResources().getDisplayMetrics().density是一个效果,不过看着你会不会感觉比Java书写舒服多了,反正我是这么感觉的。在上面的我们给Button加了一个点击事件,我们发现它支持lambda表达式。我们想显示一个Toast,只需要toast("内容")就可以了,是不是又很简洁。其实它也是扩展函数,实现
[代码]java代码:
inline fun AnkoContext<*>.toast(message: CharSequence) = ctx.toast(message)fun Context.toast(message: CharSequence) = Toast.makeText(this, message, Toast.LENGTH_SHORT).show() |
当然创建dialog依然也很简单,如下
[代码]java代码:
alert ("我是Dialog"){ yesButton { toast("yes")} noButton { toast("no")} }.show() |
[代码]java代码:
doAsync { //后台执行代码 uiThread { //UI线程 toast("线程${Thread.currentThread().name}") } } |
如果你使用Kotlin开发Android一段时间后,会发现它给我们减少了很多的代码量,当然更多的优势及用法需要我们自己去探索。相信经过探索后它会让你大吃一惊。
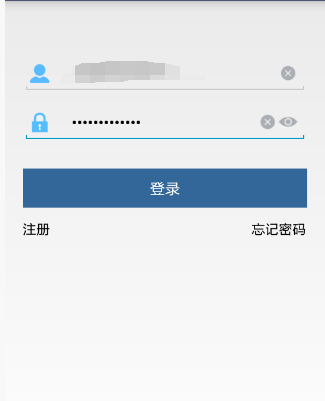
[代码]xml代码:
<RelativeLayout xmlns:android="http://schemas.android.com/apk/res/android" xmlns:custom="http://schemas.android.com/apk/res-auto" android:layout_width="fill_parent" android:layout_height="fill_parent" android:fitsSystemWindows="true" > <RelativeLayout android:id="@+id/login_layout" android:layout_width="fill_parent" android:layout_height="wrap_content" android:layout_marginLeft="20dp" android:layout_marginRight="20dp" android:gravity="center" > <FrameLayout android:id="@+id/username_layout" android:layout_width="fill_parent" android:layout_height="wrap_content" android:layout_marginTop="55dp" android:gravity="center" > <EditText android:id="@+id/username" android:layout_width="fill_parent" android:layout_height="@dimen/default_edittext_height" android:layout_marginTop="5dp" android:inputType="number" android:paddingRight="60dp" android:maxLength="20" android:paddingLeft="55dp" > </EditText> <ImageView android:layout_width="22dp" android:layout_height="21dp" android:layout_marginStart="8dp" android:layout_gravity="left|center_vertical" android:background="@drawable/login_usr_in_img" android:visibility="visible" /> <TextView android:id="@+id/contry_sn" android:layout_width="40dp" android:layout_height="50dp" android:layout_gravity="left|center_vertical" android:layout_marginTop="4dp" android:gravity="center" android:text="+62" android:textColor="@android:color/black" android:textSize="18sp" android:visibility="invisible" /> <Button android:id="@+id/bt_username_clear" android:layout_width="23dp" android:layout_height="23dp" android:background="@drawable/button_clear" android:layout_gravity="right|center_vertical" android:layout_marginRight="10dp" android:visibility="invisible" /> </FrameLayout> <FrameLayout android:id="@+id/usercode_layout" android:layout_width="fill_parent" android:layout_height="wrap_content" android:layout_below="@id/username_layout" android:layout_marginTop="6dp" android:gravity="center" > <EditText android:id="@+id/password" android:layout_width="fill_parent" android:layout_height="@dimen/default_edittext_height" //40 android:inputType="textPassword" android:paddingRight="60dp" android:maxLength="20" android:paddingLeft="55dp" > </EditText> <ImageView android:layout_width="24dp" android:layout_height="22dp" android:layout_marginStart="7dp" android:layout_gravity="left|center_vertical" android:background="@drawable/login_code_in_img" /> <Button android:id="@+id/bt_pwd_eye" android:layout_width="23dp" android:layout_height="23dp" android:background="@drawable/button_eye_n" android:layout_gravity="right|center_vertical" android:layout_marginRight="10dp" /> <Button android:id="@+id/bt_pwd_clear" android:layout_width="23dp" android:layout_height="23dp" android:background="@drawable/button_clear" android:visibility="invisible" android:layout_gravity="right|center_vertical" android:layout_marginRight="33dp" /> </FrameLayout> <Button android:id="@+id/login" android:layout_width="fill_parent" android:layout_height="@dimen/default_button_height" android:layout_below="@id/usercode_layout" android:layout_marginTop="30dp" android:background="#ff336699" android:textColor="@android:color/white" android:gravity="center" android:text="登录" /> <Button android:id="@+id/login_error" android:layout_width="wrap_content" android:layout_height="wrap_content" android:layout_alignRight="@id/login" android:layout_below="@id/login" android:background="#00000000" android:text="忘记密码" android:textSize="16sp" /> <Button android:id="@+id/register" android:layout_width="wrap_content" android:layout_height="wrap_content" android:layout_alignLeft="@id/login" android:layout_below="@id/login" android:background="#00000000" android:gravity="left|center_vertical" android:text="注册" android:textSize="16sp" android:visibility="visible" /> </RelativeLayout> <RelativeLayout android:id="@+id/remember_layout000" android:layout_width="wrap_content" android:layout_height="wrap_content" android:layout_alignParentBottom="true" android:layout_marginBottom="1dp" android:layout_marginLeft="20dp" android:layout_marginRight="20dp" > </RelativeLayout></RelativeLayout> |
[代码]java代码:
lateinit var et_account: EditText lateinit var et_password: EditText inner class LoginUi : AnkoComponent<loginactivity> { override fun createView(ui: AnkoContext<loginactivity>) = with(ui) { verticalLayout { backgroundColor = context.resources.getColor(android.R.color.white) gravity = Gravity.CENTER_HORIZONTAL imageView(R.mipmap.ic_launcher).lparams { width = dip(100) height = dip(100) topMargin = dip(64) } linearLayout { gravity = Gravity.CENTER_VERTICAL orientation = HORIZONTAL backgroundResource = R.drawable.bg_frame_corner imageView { image = resources.getDrawable(R.mipmap.ic_username) }.lparams(width = wrapContent, height = wrapContent) { leftMargin = dip(12) rightMargin = dip(15) } et_account = editText { hint = "登录账户" hintTextColor = Color.parseColor("#666666") textSize = 16f background = null } }.lparams(width = dip(300), height = dip(40)) { topMargin = dip(45) } linearLayout { orientation = HORIZONTAL backgroundResource = R.drawable.bg_frame_corner gravity = Gravity.CENTER_VERTICAL imageView { image = resources.getDrawable(R.mipmap.ic_password) }.lparams { leftMargin = dip(12) rightMargin = dip(15) } et_password = editText { hint = "登录密码" hintTextColor = Color.parseColor("#666666") textSize = 16f background = null } }.lparams { width = dip(300) height = dip(40) topMargin = dip(10) } button("登录") { gravity = Gravity.CENTER background = resources.getDrawable(R.drawable.bg_login_btn) textColor = Color.parseColor("#ffffff") onClick { if (et_account.text.toString().isNotEmpty() && et_password.text.toString().isNotEmpty()) startActivity<mainactivity>() else toast("请输入账户或者密码") } }.lparams(width = dip(300), height = dip(44)) { topMargin = dip(18) } linearLayout { orientation = HORIZONTAL gravity = Gravity.CENTER_VERTICAL checkBox("注册") { textColor = Color.parseColor("#666666") textSize = 16f leftPadding = dip(5) } textView("忘记密码") { textColor = Color.parseColor("#1783e3") gravity = Gravity.RIGHT textSize = 16f }.lparams(width = matchParent) }.lparams(width = dip(300)) { topMargin = dip(18) } textView("Copyright © Code4Android") { textSize = 14f gravity = Gravity.CENTER or Gravity.BOTTOM }.lparams { bottomMargin = dip(35) weight = 1f } } } }</mainactivity></loginactivity></loginactivity> |
看到上面的代码怎么样,看起来还不错吧,即使现在你不会写,但是你也能读懂它。在上面我们给登录按钮设置一个打开MainActivity的事件。
startActivity的<>中写的是我们要跳转的Activity,如果给打开的界面传递参数,直接写在()中。例如我们将输入的账号和密码传到跳转的界面,则实现为
[代码]java代码:
| 1 | startActivity<mainactivity>("account" to et_account.text.toString(),"password" to et_password.text.toString())</mainactivity> |
不会用巴士的编辑器,感觉好气啊。。不过总算是写完了,Kotlin这门语言肯定会发展的越来越好,当然,现在还在用Java开发的也不用担心会被抛弃,毕竟Java的用处还是很广的。本片博文参与《安卓巴士线上博文大赛终于来了 》活动,活动链接:安卓巴士线上博文大赛终于来了 。


 随时随地看视频


