书接上文,继续干,配置一些常用的插件使支持
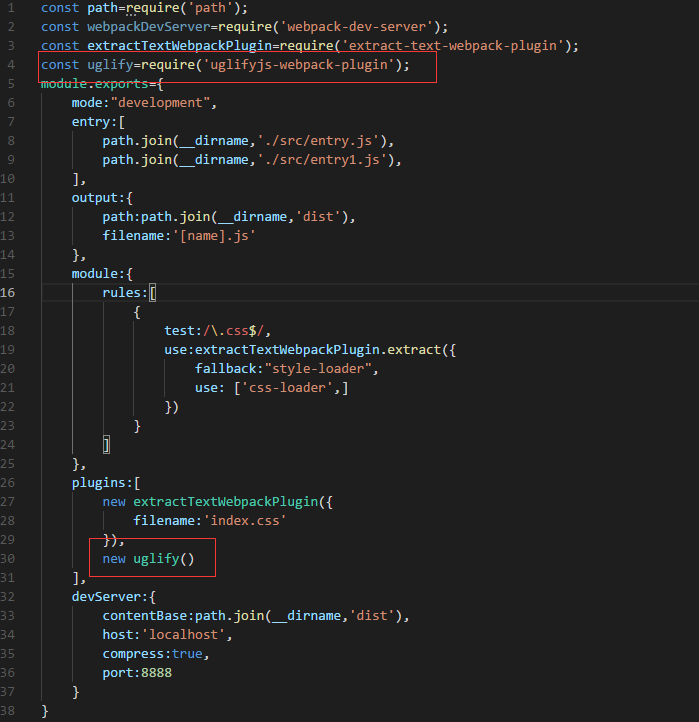
uglifyjs js压缩插件
webpack默认已经有uglifyjs,所以只需要引入就可以使用.
在webpack.config.js中配置:
const path=require('path');
const webpackDevServer=require('webpack-dev-server');
const extractTextWebpackPlugin=require('extract-text-webpack-plugin');
const uglify=require('uglifyjs-webpack-plugin');
module.exports={
    mode:"development",
    entry:[
        path.join(__dirname,'./src/entry.js'),
        path.join(__dirname,'./src/entry1.js'),
    ],
    output:{
        path:path.join(__dirname,'dist'),
        filename:'[name].js'
    },
    module:{
        rules:[
            {
                test:/\.css$/,
                use:extractTextWebpackPlugin.extract({
                    fallback:"style-loader",
                    use: ['css-loader',]
                })
            }
        ]
    },
    plugins:[
        new extractTextWebpackPlugin({
            filename:'index.css'
        }),
        new uglify()
    ],
    devServer:{
        contentBase:path.join(__dirname,'dist'),
        host:'localhost',
        compress:true,
        port:8888
    }
}
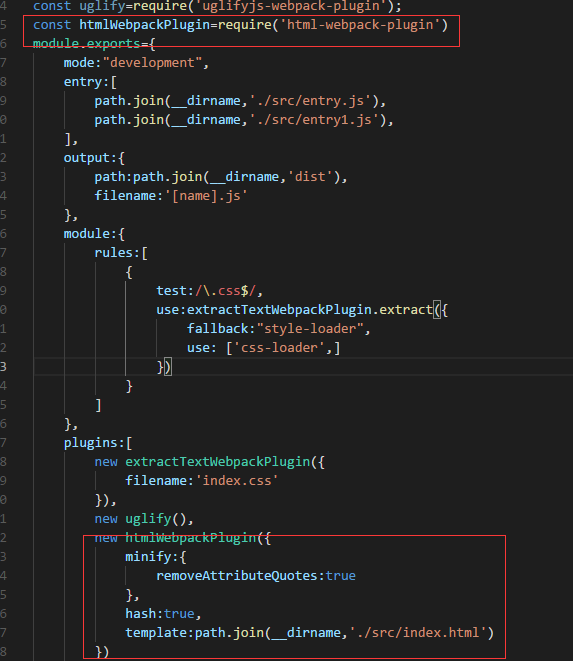
2.html-webpack-plugin 生成html
将dist的目录下面的index.html移入src目录,并且删除script 以及css 的引入标签,然
后安装html-webpack-plugin包。
cnpm install --save-dev html-webpack-plugin
在webpack.config.js中修改如下
const path=require('path');
const webpackDevServer=require('webpack-dev-server');
const extractTextWebpackPlugin=require('extract-text-webpack-plugin');
const uglify=require('uglifyjs-webpack-plugin');
const htmlWebpackPlugin=require('html-webpack-plugin')
module.exports={
    mode:"development",
    entry:[
        path.join(__dirname,'./src/entry.js'),
        path.join(__dirname,'./src/entry1.js'),
    ],
    output:{
        path:path.join(__dirname,'dist'),
        filename:'[name].js'
    },
    module:{
        rules:[
            {
                test:/\.css$/,
                use:extractTextWebpackPlugin.extract({
                    fallback:"style-loader",
                    use: ['css-loader',]
                })
            }
        ]
    },
    plugins:[
        new extractTextWebpackPlugin({
            filename:'index.css'
        }),
        new uglify(),
        new htmlWebpackPlugin({
            minify:{
                removeAttributeQuotes:true
            },
            hash:true,
            template:path.join(__dirname,'./src/index.html')
        })
    ],
    devServer:{
        contentBase:path.join(__dirname,'dist'),
        host:'localhost',
        compress:true,
        port:8888
    }
}
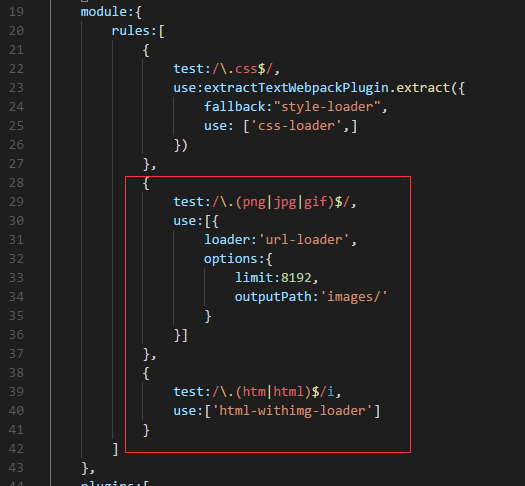
file-loader、url-loader html-withimg-loader图片处理以及打包
在src下面建一个images的文件夹放入一张图片
分别在css和html 的img标签中引入
cnpm install --save-dev file-loader url-loader
cnpm install --save html-withimg-loader
webpack.config.js修改如下:
const path=require('path');
const webpackDevServer=require('webpack-dev-server');
const extractTextWebpackPlugin=require('extract-text-webpack-plugin');
const uglify=require('uglifyjs-webpack-plugin');
const htmlWebpackPlugin=require('html-webpack-plugin');
const webset={
    publicPath:'192.168.0.175:8888/'
}
module.exports={
    mode:"development",
    entry:[
        path.join(__dirname,'./src/entry.js'),
        path.join(__dirname,'./src/entry1.js'),
    ],
    output:{
        path:path.join(__dirname,'dist'),
        filename:'[name].js'
    },
    module:{
        rules:[
            {
                test:/\.css$/,
                use:extractTextWebpackPlugin.extract({
                    fallback:"style-loader",
                    use: ['css-loader',]
                })
            },
            {
                test:/\.(png|jpg|gif)$/,
                use:[{
                    loader:'url-loader',
                    options:{
                        limit:8192,
                        outputPath:'images/'
                    }
                }]
            },
            {
                test:/\.(htm|html)$/i,
                use:['html-withimg-loader']
            }
        ]
    },
    plugins:[
        new extractTextWebpackPlugin({
            filename:'index.css'
        }),
        new uglify(),
        new htmlWebpackPlugin({
            minify:{
                removeAttributeQuotes:true
            },
            hash:true,
            template:path.join(__dirname,'./src/index.html')
        })
    ],
    devServer:{
        contentBase:path.join(__dirname,'dist'),
        host:'localhost',
        compress:true,
        port:8888
    }
}
4.配置babel(很关键,可以让浏览器支持es6语法。)
cnpm install babel-loader babel-core babel-preset-env
在webpack.config.js中添加loader: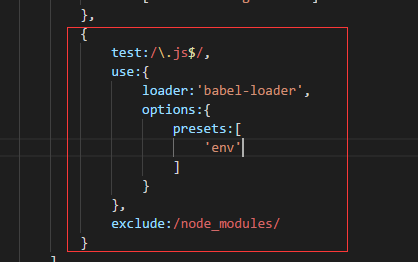
后续抽空补上打包jquery以及第三方插件的webpack的配置。。。。。。
原文链接:https://segmentfault.com/a/1190000015970277

 随时随地看视频


