
继前面写的两篇文章之后( 有问题欢迎反馈哦 ):
接着来写写Android系统UI新特性,本文是我对最近开发过程中应用 NavigationDrawer 特性的详细总结。 本文涉及到的所有代码实现细节,会在文末附上源码地址。有问题欢迎在下方留言讨论 。
NavigationDrawer 简介
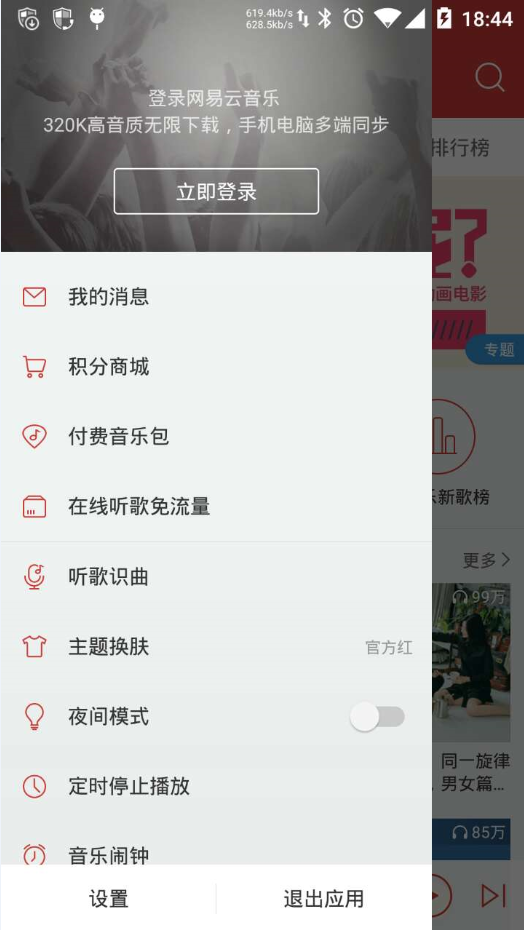
NavigationDrawer是 Google 在 Material Design 中推出的一种侧滑导航栏设计风格。说起来可能很抽象,我们直接来看看 网易云音乐 的侧滑导航栏效果
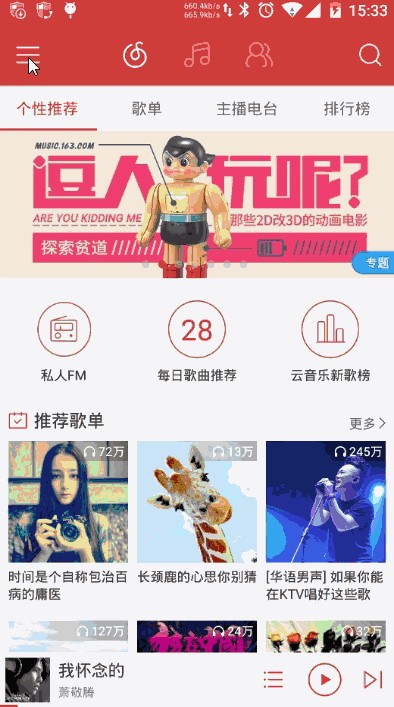
网易云音乐侧滑导航栏效果
Google 为了支持这样的导航效果,推出一个新控件 —— DrawerLayout 。而在 DrawerLayout 没诞生之前,需求中需要实现侧滑导航效果时,我们必然会选择去选择一些成熟的第三方开源库(如最有名的 SlidingMenu )来完成开发 。效果上,普遍都像 手Q 那样:
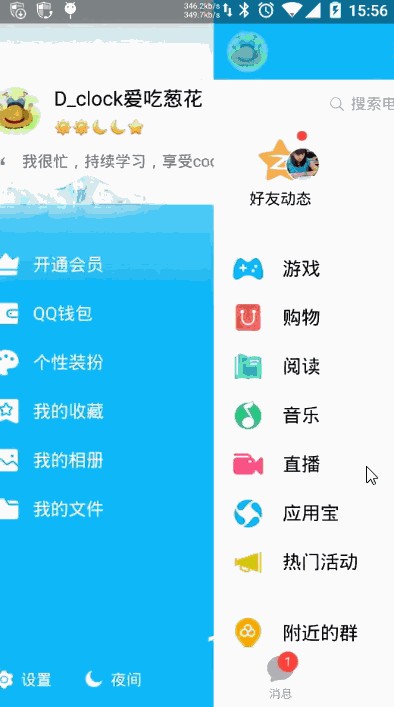
手Q的SlidingMenu实现侧滑效果
在对比过 DrawerLayout 和 SlidingMenu 的实现效果后,基于以下的几点,我认为完全可以在开发中使用 DrawerLayout 取代以前的 SlidingMenu :
从动画效果上看,你会发现两者仅仅是在移动的效果上有些差别外,其他地方并没有太大的差异
在交互效果上,我认为这两者都差不多的,就算你把 网易云音乐 的效果套到了 手Q 上,也不会影响到用户的交互
DrawerLayout 用起来比 SlidingMenu 更简单,代码量更少(往下看就知道了)
DrawerLayout 是向下兼容的,所以不会存在低版本兼容性问题
Google 亲儿子,没理由不支持啊!!!!!!
到这里,要是你还没有引入 DrawerLayout 开发的冲动,请继续听我为你好好安利一番。
初识 DrawerLayout
一般情况下,在 DrawerLayout 布局下只会存在两个子布局,一个 内容布局 和 一个 侧滑菜单布局 ,这两个布局关键在于 android:layout_gravity 属性的设置。如果你想把其中一个子布局设置成为左侧滑菜单,只需要设置 android:layout_gravity=”start” 即可(也可以是 left,右侧滑则为 end 或 right ),而没有设置的布局则自然成为 内容布局 。那么,使用 DrawerLayout 到底有多简单呢,我们先直接看看下面的布局文件
layout/activity_simple_drawer.xml
<?xml version="1.0" encoding="utf-8"?><RelativeLayout xmlns:android="http://schemas.android.com/apk/res/android"
    android:layout_width="match_parent"
    android:layout_height="match_parent">

    <android.support.v4.widget.DrawerLayout
        android:id="@+id/simple_navigation_drawer"
        android:layout_width="match_parent"
        android:layout_height="match_parent">

        <!--内容视图-->
        <include
            android:id="@+id/tv_content"
            layout="@layout/drawer_content_layout"
            android:layout_width="match_parent"
            android:layout_height="match_parent" />

        <!--左侧滑菜单栏-->
        <include
            layout="@layout/drawer_menu_layout"
            android:layout_width="250dp"
            android:layout_height="match_parent"
            android:layout_gravity="start" />

        <!--右侧滑菜单栏-->
        <include
            layout="@layout/drawer_menu_layout"
            android:layout_width="250dp"
            android:layout_height="match_parent"
            android:layout_gravity="end" />
    </android.support.v4.widget.DrawerLayout></RelativeLayout>
到此,你在 Activity 里面什么都不用做,就已经完成了下面侧滑效果的实现了,简单到害怕有木有。
最简单的侧滑效果实现
在欣赏着 DrawerLayout 简单方便的同时,Google 也为我们提供了 DrawerLayout 很多常用的API,其中包括:打开或关闭侧滑栏、控制侧滑栏的方向、设置滑动时渐变的阴影颜色和监听滑动事件等。
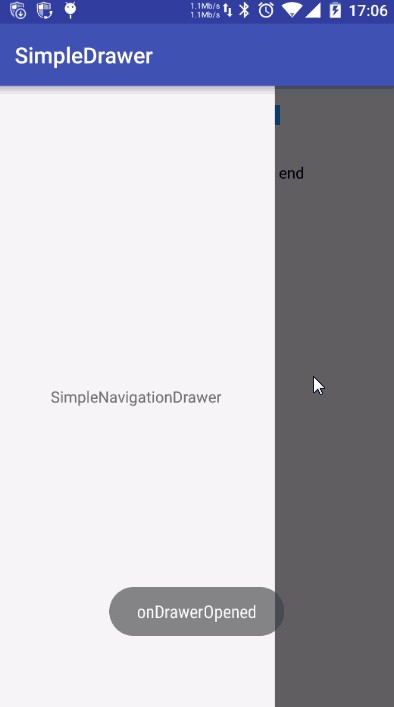
SimpleDrawerActivity运行效果
具体详细代码请参加工程中的 SimpleDrawerActivity,此处就不贴代码了。还有一处 DrawerLayout 使用的小细节需要温馨提醒一下,有一次,我手误把 DrawerLayout 的 android:layout_width 设置成 wrap_content ,就出现下面的异常了
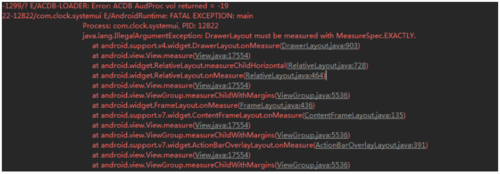
DrawerLayout的wrap_content错误
遇到过相同情况的童鞋,只需要把 android:layout_width 设置成 match_parent 即可。
再识 NavigationView
在 Google 推出 NavigationDrawer 设计中, NavigationView 和 DrawerLayout 是官方推荐的最佳组合。在使用 NavigationView 前,因为它是在 Material Design 的兼容包中,所以需要先在 build.gradle 中引入
compile 'com.android.support:design:23.1.1'
这里因为我工程配置的 compileSdkVersion 是 23 ,所以需要引入 com.android.support:design:23.x.x 的版本。需要吐槽的是,这里如果你引入了 com.android.support:design:23.1.0 ,工程运行后 NavigationView 会报一个 android.view.InflateException:xxxxxx 的错误(又是一个大坑)。
接下来简单的介绍一下 NavigationView 的使用,我们继续看看几个相关布局文件 layout/activity_simple_navigation_drawer.xml 、 layout/navigation_drawer_header.xml 、 menu/navigation_drawer_menu.xml 和 实现效果:
layout/activity_simple_navigation_drawer.xml
<?xml version="1.0" encoding="utf-8"?><android.support.v4.widget.DrawerLayout xmlns:android="http://schemas.android.com/apk/res/android"
    xmlns:app="http://schemas.android.com/apk/res-auto"
    android:id="@+id/drawer"
    android:layout_width="match_parent"
    android:layout_height="match_parent">

    <LinearLayout
        android:layout_width="match_parent"
        android:layout_height="match_parent"
        android:orientation="vertical">

        <TextView
            android:layout_width="match_parent"
            android:layout_height="match_parent"
            android:gravity="center"
            android:text="NavigationDrawerContent" />
    </LinearLayout>

    <android.support.design.widget.NavigationView
        android:id="@+id/navigation_view"
        android:layout_width="wrap_content"
        android:layout_height="match_parent"
        android:layout_gravity="start"
        app:headerLayout="@layout/navigation_drawer_header"
        app:menu="@menu/navigation_drawer_menu" /></android.support.v4.widget.DrawerLayout>
layout/navigation_drawer_header.xml
<?xml version="1.0" encoding="utf-8"?><RelativeLayout xmlns:android="http://schemas.android.com/apk/res/android"
    android:layout_width="match_parent"
    android:layout_height="250dp"
    android:background="@color/color_512da8">

    <TextView
        android:layout_width="wrap_content"
        android:layout_height="wrap_content"
        android:layout_alignParentBottom="true"
        android:layout_alignParentLeft="true"
        android:layout_margin="10dp"
        android:text="HeaderLayout"
        android:textColor="@android:color/white"
        android:textSize="18sp" /></RelativeLayout>
menu/navigation_drawer_menu.xml
<?xml version="1.0" encoding="utf-8"?><menu xmlns:android="http://schemas.android.com/apk/res/android">

    <group android:checkableBehavior="single">
        <item
            android:id="@+id/item_green"
            android:icon="@mipmap/green"
            android:title="Green" />
        <item
            android:id="@+id/item_blue"
            android:icon="@mipmap/blue"
            android:title="Blue" />
        <item
            android:id="@+id/item_pink"
            android:icon="@mipmap/pink"
            android:title="Pink" />
    </group>

    <item android:title="SubItems">
        <menu>
            <item
                android:id="@+id/subitem_01"
                android:icon="@mipmap/ic_launcher"
                android:title="SubItem01" />
            <item
                android:id="@+id/subitem_02"
                android:icon="@mipmap/ic_launcher"
                android:title="SubItem02" />
            <item
                android:id="@+id/subitem_03"
                android:icon="@mipmap/ic_launcher"
                android:title="SubItem03" />
        </menu>
    </item>

    <item android:title="SubItems">
        <menu>
            <item
                android:id="@+id/subitem_04"
                android:icon="@mipmap/ic_launcher"
                android:title="SubItem04" />
            <item
                android:id="@+id/subitem_05"
                android:icon="@mipmap/ic_launcher"
                android:title="SubItem05" />
            <item
                android:id="@+id/subitem_06"
                android:icon="@mipmap/ic_launcher"
                android:title="SubItem06" />
        </menu>
    </item></menu>
最终得到下面的效果

activity_simple_navigation_drawer.xml实现效果
总的来说, NavigationView 比较关键的属性就只有 app:headerLayout 和 app:menu ,它们分别对应效果图中顶部的 紫色区域(layout/navigation_drawer_header.xml) 和 下方的 填充菜单项(menu/navigation_drawer_menu.xml) 。其实是用起来也和 DrawerLayout 一样,非常简单。
不实用的 NavigationView
其实谈到 NavigationView,个人认为它设计并不实用,而且是比较呆板的。最直接的一点是,它的菜单图标

NavigationView默认图标颜色
第一次运行代码的时候,把我五颜六色的图标居然跑出来这效果,差点没一口水喷在屏幕上。好在代码中可以调用下面这个API
mNavigationView.setItemIconTintList(null);//设置菜单图标恢复本来的颜色
还原菜单图标庐山真面目。(着实看不懂 Google 的设计了…)
其次,是关于菜单相中图标大小和文字间距之类的设置,从 Google 的设计文档来看,

NavigationView设计
NavigationView 基本已经规定设置好了大小距离,留给我们可以改动的空间并不多。如果你想调整一下菜单的布局宽高之类的,基本是不可能的了(即使可能,也估计非常蛋疼)。所以,目前我基本还没见过国内哪个 app 是直接使用了 NavigationView 来做导航(如果有的话,欢迎告知一下)。
以上关于 NavigationView 不实用,仅是本人的一些看法,如果你有不同看法,欢迎留言讨论。为了加深一下 NavigationDrawer 设计的实践,下面来大致的模仿实现网易云音乐的导航效果。
仿网易云音乐的 NavigationDrawer 实现
先来看看网易云音乐的效果
云音乐导航菜单
主要就是一个线性布局的菜单并结合了 Translucent System Bar 的特性(还不知道的童鞋请看我前面写的文章哈),下面就直接看看大致实现的布局文件 :
layout/activity_cloud_music.xml
<?xml version="1.0" encoding="utf-8"?><android.support.v4.widget.DrawerLayout xmlns:android="http://schemas.android.com/apk/res/android"
    android:id="@+id/drawer"
    android:layout_width="match_parent"
    android:layout_height="match_parent"
    android:background="@color/color_cd3e3a">

    <LinearLayout
        android:layout_width="match_parent"
        android:layout_height="match_parent"
        android:fitsSystemWindows="true"
        android:orientation="vertical">

        <TextView
            android:layout_width="match_parent"
            android:layout_height="65dp"
            android:background="@color/color_cd3e3a"
            android:gravity="center"
            android:text="网易云音乐"
            android:textColor="@android:color/white"
            android:textSize="18sp" />

        <LinearLayout
            android:layout_width="match_parent"
            android:layout_height="match_parent"
            android:background="@android:color/white"
            android:orientation="vertical">

        </LinearLayout>
    </LinearLayout>

    <LinearLayout
        android:id="@+id/navigation_view"
        android:layout_width="match_parent"
        android:layout_height="match_parent"
        android:layout_gravity="start"
        android:background="@android:color/white"
        android:fitsSystemWindows="true"
        android:orientation="vertical">

        <ImageView
            android:layout_width="match_parent"
            android:layout_height="180dp"
            android:scaleType="centerCrop"
            android:src="@mipmap/topinfo_ban_bg" />

        <LinearLayout
            android:layout_width="match_parent"
            android:layout_height="50dp"
            android:gravity="center_vertical"
            android:orientation="horizontal">

            <ImageView
                android:layout_width="40dp"
                android:layout_height="40dp"
                android:layout_marginLeft="10dp"
                android:layout_marginRight="10dp"
                android:src="@mipmap/topmenu_icn_msg" />

            <TextView
                android:layout_width="wrap_content"
                android:layout_height="wrap_content"
                android:text="我的消息"
                android:textColor="@android:color/black"
                android:textSize="15sp" />
        </LinearLayout>

        ...
        ...
        ...    </LinearLayout></android.support.v4.widget.DrawerLayout>
最终即可实现类似网易云音乐的效果。

仿造网易云音乐
彩蛋
彩蛋一:左上角的导航动画效果实现

左上角的导航动画
经常会看有些 app 的左上角有这些带感的导航动画,之前想要引入这种效果,都是来自第三方的开源代码,诸如下面两个比较有名的:
而现在再也不需要了,Google 推出的 ActionBarDrawerToggle 也能实现这样的效果了,具体查看我在 NavigationDrawerAnimationActivity 中的实现代码

ActionBarDrawerToggle实现效果
如果你对上面这种动画,效果不满意,也可以考虑一下 material-menu 的另一种实现效果。

material-menu动画效果
彩蛋二:比 NavigationView 更好的选择
前面提到 NavigationView 的不实用性,如果你真的要实现 NavigationView那样的效果,又渴望比较高的自由度。这个功能强大且自由度很高的开源库 MaterialDrawer 应该是个很不错的选择。

MaterialDrawer 效果图一

MaterialDrawer 效果图二
总结
到此,对于 NavigationDrawer 的实践总结基本结束。整体给我的感觉是,自从 Material Design 设计开始推出后,Google 推出的这些新控件使用起来更加简单,这能让我们更好的把精力放在编写业务代码上。很多以前需要借助第三方开源库才能实现的效果,现在已经慢慢的不需要了。当然,我们依旧可以去深入的学习这些优秀开源代码,沉淀到更多的干货。这样,小菜也就慢慢成为大牛了。
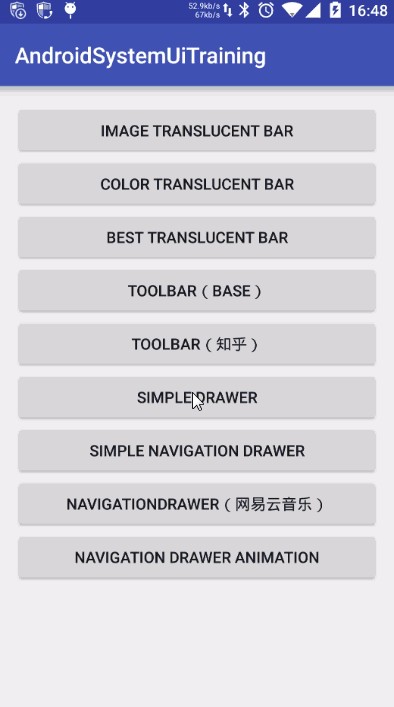
分享即美德,源代码请看: https://github.com/D-clock/AndroidSystemUiTraining ,本篇的主要实现代码如下红圈所示

主要示例代码


