
Keras是一个高层神经网络API,由纯Python编写而成,至少依赖Tensorflow、Theano、CNTK一种神经网络框架,这里建议用Tensorflow。
Keras的特性:
1.简易和快速的原型设计(keras具有高度模块化,极简,和可扩充特性)
2.支持CNN和RNN,或二者的结合
3.无缝CPU和GPU切换
Keras的设计原则是
1、用户友好:说白了就是傻瓜式开发,狗上狗也行。
2、模块性:模型可理解为一个层的序列或数据的运算图,完全可配置的模块可以用最少的代价自由组合在一起。具体而言,网络层、损失函数、优化器、初始化策略、激活函数、正则化方法都是独立的模块,你可以使用它们来构建自己的模型。
3、易扩展性:添加新模块超级容易,只需要仿照现有的模块编写新的类或函数即可。创建新模块的便利性使得Keras更适合于先进的研究工作。
4、与Python协作:Keras没有单独的模型配置文件类型(作为对比,caffe有),模型由python代码描述,使其更紧凑和更易debug,并提供了扩展的便利性。
Keras适用的Python版本是:Python 2.7-3.6 官方API文档:http://keras-cn.readthedocs.io/en/latest/
基于卷积神经网络的风格迁移Keras生成艺术字的demo(原作者余唯民 & 雷芳涵,代码稍作修改,原版代码在文末git仓库)
支持一张或两张风格图
测试代码:
第一次调用需要下载Keras提供的Vgg19网络,所以比较慢。
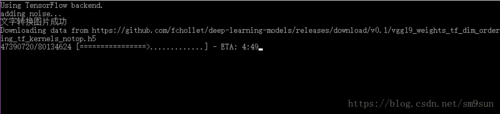
迭代处理建议用GPU,CPU的话我的老古董迭代一次大概在一分钟左右
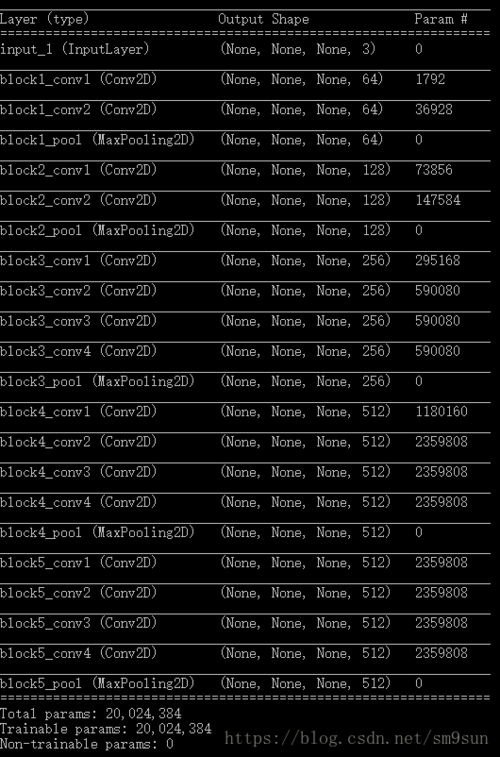

from __future__ import print_functionfrom keras.preprocessing.image import load_img, img_to_arrayimport numpy as npfrom scipy.optimize import fmin_l_bfgs_bimport timeimport argparsefrom scipy.misc import imsavefrom keras.applications import vgg19from keras import backend as Kimport osfrom PIL import Image, ImageFont, ImageDraw, ImageOps, ImageEnhance, ImageFilterimport randomrandom.seed(0)def save_img(fname, image, image_enhance=False): # 图像可以增强image = Image.fromarray(image)if image_enhance:# 亮度增强enh_bri = ImageEnhance.Brightness(image)brightness = 1.2image = enh_bri.enhance(brightness)# 色度增强enh_col = ImageEnhance.Color(image)color = 1.2image = enh_col.enhance(color)# 锐度增强enh_sha = ImageEnhance.Sharpness(image)sharpness = 1.2image = enh_sha.enhance(sharpness)imsave(fname, image)returndef smooth(image): # 模糊图片w, h, c = image.shapesmoothed_image = np.zeros([w - 2, h - 2,c])smoothed_image += image[:w - 2, 2:h,:]smoothed_image += image[1:w-1, 2:,:]smoothed_image += image[2:, 2:h,:]smoothed_image += image[:w-2, 1:h-1,:]smoothed_image += image[1:w-1, 2:h,:]smoothed_image += image[2:, 1:h - 1,:]smoothed_image += image[:w-2, :h-2,:]smoothed_image += image[1:w-1, :h - 2,:]smoothed_image += image[2:, :h - 2,:]smoothed_image /= 9.0return smoothed_image.astype("uint8")def str_to_tuple(s):s = list(s)ans = list()temp = ""for i in range(len(s)):if s[i] == '(' :continueif s[i] == ',' or s[i] == ')':ans.append(int(temp))temp = ""continuetemp += s[i]return tuple(ans)def char_to_picture(text="", font_name="宋体", background_color=(255,255,255), text_color=(0,0,0), pictrue_size=400, text_position=(0, 0), in_meddium=False, reverse_color=False,smooth_times=0,noise=0):pictrue_shape = (pictrue_size,pictrue_size)im = Image.new("RGB", pictrue_shape, background_color)dr = ImageDraw.Draw(im)# 由于系统内部不是使用汉字文件名,而是英文名,在此转换if font_name == "宋体":font_name = "SIMSUN.ttc"if font_name == "楷体":font_name = "SIMKAI.ttf"if font_name == "黑体":font_name = "SIMHEI.ttf"if font_name == "等线":font_name = "DENG.ttf"if font_name == "仿宋":font_name = "SIMFANG.ttf"# 取得字体文件的位置font_dir = "C:\Windows\Fonts\\" + font_namefont_size = int(pictrue_size * 0.8 / len(text)) # 设定文字的大小font = ImageFont.truetype(font_dir, font_size)# 开始绘图# 如果设置了居中,那么就居中# 英文字母的对齐方式并不一样char_dict = []for i in range(26):char_dict.append(chr(i + ord('a')))char_dict.append(chr(i + ord('A')))if in_meddium:char_num = len(text)text_position = (pictrue_shape[0]/2 - char_num*font_size/2, pictrue_shape[1]/2 - font_size/2) # 中文if text in char_dict:text_position = (pictrue_shape[0] / 2 - char_num*font_size/4, pictrue_shape[1] / 2 - font_size / 2) # 英文# 开始绘制图像dr.text(text_position, text, font=font, fill=text_color)if reverse_color:im = ImageOps.invert(im)# 随机扰动if noise > 0:print("adding noise...")im_array = np.array(im)noise_num = noise * pictrue_sizefor i in range(noise_num):pos = (random.randint(0,pictrue_size-1), random.randint(0,pictrue_size-1))color = [random.randint(0,255), random.randint(0,255), random.randint(0,255)]im_array[pos[0],pos[1],:] = colorim = Image.fromarray(im_array)# 模糊化图片''' for i in range(smooth_times): im =im.filter(ImageFilter.GaussianBlur) '''im_array = np.array(im)for i in range(smooth_times):im_array = smooth(im_array)im = Image.fromarray(im_array)# 图片经过模糊后略有缩小im = im.resize(pictrue_shape)print("文字转换图片成功")return im#第一张风格图style_reference_image_path="Style_Migration_For_Artistic_Font_With_CNN/style/fire/2.jpg"#第二张风格图style_reference_image2_path="Style_Migration_For_Artistic_Font_With_CNN/style/fire/1.jpg"#文本,支持多字chars='九日王朝'#尺寸pictrue_size =300#背景颜色background_color=(0,0,0)#文字颜色text_color=(255,255,255)#迭代次数iterations=50#模糊处理smooth_times=20#随机噪声noise=False#色度亮度锐度增强image_enhance=True#字体font_name = '楷体'#黑纸白字reverse_color =False#风格图一张&两张image_input_mode ="two_pic"#image_input_mode ="one_pic"#image_input_mode ="one_picT"#第一张图的相对权重two_style_k=0.5#输出目录result_prefix='Style_Migration_For_Artistic_Font_With_CNN/output/'# 生成输入图片char_image = char_to_picture(chars,font_name=font_name,background_color=background_color,text_color=text_color,pictrue_size=pictrue_size,in_meddium=True,reverse_color=reverse_color,smooth_times=smooth_times,noise=noise)width, height = char_image.size# 风格损失的权重没有意义,因为对于一张文字图片来说,不可能有没有内容损失style_weight = 1.0# util function to resize and format pictures into appropriate tensorsdef preprocess_image(image):""" 预处理图片,包括变形到(1,width, height)形状,数据归一到0-1之间 :param image: 输入一张图片 :return: 预处理好的图片 """image = image.resize((width, height))image = img_to_array(image)image = np.expand_dims(image, axis=0) # (width, height)->(1,width, height)image = vgg19.preprocess_input(image) # 0-255 -> 0-1.0return imagedef deprocess_image(x):""" 将0-1之间的数据变成图片的形式返回 :param x: 数据在0-1之间的矩阵 :return: 图片,数据都在0-255之间 """x = x.reshape((width, height, 3))x[:, :, 0] += 103.939x[:, :, 1] += 116.779x[:, :, 2] += 123.68# 'BGR'->'RGB'x = x[:, :, ::-1]x = np.clip(x, 0, 255).astype('uint8') # 以防溢出255范围return x# 得到需要处理的数据,处理为keras的变量(tensor),处理为一个(5, width, height, 3)的矩阵# 分别是文字图片,风格图片1,风格图片1T, 风格图片2,结果图片base_image = K.variable(preprocess_image(char_image))style_reference_image1 = K.variable(preprocess_image(load_img(style_reference_image_path)))style_reference_image1_T = K.variable(preprocess_image(load_img(style_reference_image_path).transpose(Image.ROTATE_90)))try:style_reference_image2 = K.variable(preprocess_image(load_img(style_reference_image2_path)))except: # 不会用到这个了if image_input_mode == "two_pic":print("尚未找到第二张图片,或许您忘记输入了,请输入--style_reference_image2_path 第二张图片的位置")style_reference_image2 = K.variable(preprocess_image(load_img(style_reference_image_path)))combination_image = K.placeholder((1, width, height, 3))input_tensor = K.concatenate([base_image, style_reference_image1, style_reference_image1_T,style_reference_image2, combination_image], axis=0)# 结合以上5张图片,作为输入向量# 使用Keras提供的训练好的Vgg19网络model = vgg19.VGG19(input_tensor=input_tensor,weights='imagenet', include_top=False)model.summary()# Vgg19网络中的不同的名字,储存起来以备使用outputs_dict = dict([(layer.name, layer.output) for layer in model.layers])def gram_matrix(x): # Gram矩阵assert K.ndim(x) == 3if K.image_data_format() == 'channels_first':features = K.batch_flatten(x)else:features = K.batch_flatten(K.permute_dimensions(x, (2, 0, 1)))gram = K.dot(features, K.transpose(features))return gram# 风格损失,是风格图片与结果图片的Gram矩阵之差,并对所有元素求和def style_loss(style, combination):assert K.ndim(style) == 3assert K.ndim(combination) == 3S = gram_matrix(style)C = gram_matrix(combination)S_C = S-Cchannels = 3size = height * widthreturn K.sum(K.square(S_C)) / (4. * (channels ** 2) * (size ** 2))#return K.sum(K.pow(S_C,4)) / (4. * (channels ** 2) * (size ** 2)) # 居然和平方没有什么不同#return K.sum(K.pow(S_C,4)+K.pow(S_C,2)) / (4. * (channels ** 2) * (size ** 2)) # 也能用,花后面出现了叶子loss = K.variable(0.)# 计算风格损失,糅合多个特征层的数据,取平均# [ A, B, C, D, E, F ]# feature_layers = ['block1_conv1', 'block2_conv1','block3_conv1', 'block4_conv1','block5_conv1','block5_conv4']# A全是颜色,没有纹理---------------------------------------------------->F全是纹理,没有颜色feature_layers = ['block1_conv1','block2_conv1','block3_conv1']feature_layers_w = [10.0,1.0,1.0]for i in range(len(feature_layers)):# 每一层的权重以及数据layer_name, w = feature_layers[i], feature_layers_w[i]layer_features = outputs_dict[layer_name]style_reference_features1 = layer_features[1, :, :, :]combination_features = layer_features[4, :, :, :]if image_input_mode == "one_pic":style_reference_features_mix = style_reference_features1elif image_input_mode == "one_pic_T":style_reference_features1_T = layer_features[2, :, :, :]style_reference_features_mix = 0.5 * (style_reference_features1 + style_reference_features1_T)#style_reference_features_mix = K.maximum(style_reference_features1, style_reference_features1_T)else: # image_input_mode == "two_pic"style_reference_features2 = layer_features[3, :, :, :]k = two_style_kstyle_reference_features_mix = style_reference_features1 * k + style_reference_features2 * (1-k)loss += w * style_loss(style_reference_features_mix, combination_features)# 求得梯度,输入combination_image,对loss求梯度grads = K.gradients(loss, combination_image)outputs = [loss]if isinstance(grads, (list, tuple)):outputs += gradselse:outputs.append(grads)f_outputs = K.function([combination_image], outputs)def eval_loss_and_grads(x): # 输入x,输出对应于x的梯度和lossif K.image_data_format() == 'channels_first':x = x.reshape((1, 3, height, width))else:x = x.reshape((1, height, width, 3))outs = f_outputs([x]) # 输入x,得到输出loss_value = outs[0]if len(outs[1:]) == 1:grad_values = outs[1].flatten().astype('float64')else:grad_values = np.array(outs[1:]).flatten().astype('float64')return loss_value, grad_values# Evaluator可以只需要进行一次计算就能得到所有的梯度和lossclass Evaluator(object):def __init__(self):self.loss_value = Noneself.grads_values = Nonedef loss(self, x):assert self.loss_value is Noneloss_value, grad_values = eval_loss_and_grads(x)self.loss_value = loss_valueself.grad_values = grad_valuesreturn self.loss_valuedef grads(self, x):assert self.loss_value is not Nonegrad_values = np.copy(self.grad_values)self.loss_value = Noneself.grad_values = Nonereturn grad_valuesevaluator = Evaluator()x = preprocess_image(char_image)img = deprocess_image(x.copy())fname = result_prefix + chars + '_原始图片.png'save_img(fname, img)# 开始迭代for i in range(iterations):start_time = time.time()print('代数', i,end=" ")x, min_val, info = fmin_l_bfgs_b(evaluator.loss, x.flatten(), fprime=evaluator.grads, maxfun=20, epsilon=1e-7)# 一个scipy的L-BFGS优化器print('目前loss:', min_val,end=" ")# 保存生成的图片img = deprocess_image(x.copy())fname = result_prefix + chars + '_代数_%d.png' % iend_time = time.time()print('耗时%.2f s' % (end_time - start_time))if i%5 == 0 or i == iterations-1:save_img(fname, img, image_enhance=image_enhance)print('文件保存为', fname)测试截图:
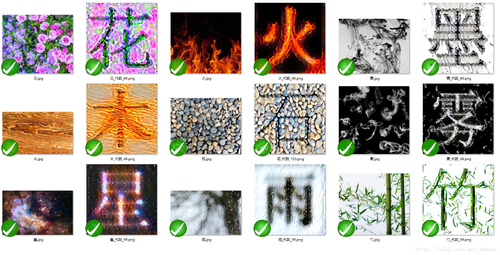
原文提供的输出:
自己训练的输出:

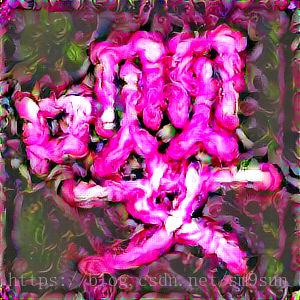
……丑的一比
嗯嗯,果然不是亲生的养不熟o(︶︿︶)o
文章来源 https://mp.weixin.qq.com/s/PVM7wMsT6TpJkQUlt7d2Aw
源码仓库 https://github.com/yuweiming70/Style_Migration_For_Artistic_Font_With_CNN