
bootstrap 为 flask 使用人员提供了一个非常优美且有效的前端页面组件,但是完美之处还存在些许缺陷,比如文件的上传功能.而 bootstrap-fileinput 是基于 bootstrap 的控件,非常完美的填补了这个空缺.
注意:本文是基于 bootstrap-fileinput v4.4.2. github 地址: https://github.com/kartik-v/bootstrap-fileinput
注意:本文是主要是以 http://plugins.krajee.com/file-input/demo 示例为基础进行讲解.
创建蓝图 basic
创建方法请参照 flask 项目中使用 bootstrapFileInput(构建篇) 中 lib 蓝图的创建方法,此处不在赘述.
构建基础 html 模板
app/basic/templates/basic_common/base.html 内容如下:
<!DOCTYPE html><html lang="zh">
    <head>
        <meta charset="utf-8">
        <meta http-equiv="X-UA-Compatible" content="IE=edge">
        <meta name="viewport" content="width=device-width, initial-scale=1">
        <!-- The above 3 meta tags *must* come first in the head; any other head content must come *after* these tags -->
        <meta name="description" content="">
        <meta name="author" content="">
        <link rel="icon" href="{{ url_for('lib.static', filename='favicon.ico')}}">

        <title>{% block title %}{% endblock %}</title>
        {% block css %}            <!-- 新 Bootstrap 核心 CSS 文件 -->
            <link rel="stylesheet" href="{{ url_for('lib.static', filename='css/bootstrap.min.css') }}">

            <!-- 可选的Bootstrap主题文件(一般不用引入) -->
            <link rel="stylesheet" href="{{ url_for('lib.static', filename='css/bootstrap-theme.min.css') }}">

            <!-- 个性化主题文件 -->
            <!-- font-awesome样式主题文体 -->
            <link href="{{ url_for('lib.static',filename='css/font-awesome.css') }}" media="all" rel="stylesheet" type="text/css" />
            <!-- fileinput样式主题文体 -->
            <link href="{{ url_for('lib.static',filename='css/fileinput.min.css') }}" media="all" rel="stylesheet" type="text/css" />
        {% endblock %}

        {% block js %}            <!-- jQuery文件。务必在bootstrap.min.js 之前引入 -->
            <script src="{{ url_for('lib.static', filename='js/jquery.min.js') }}"></script>

            <!-- 最新的 Bootstrap 核心 JavaScript 文件 -->
            <script src="{{ url_for('lib.static', filename='js/bootstrap.min.js') }}"></script>

            <!-- 个性化 js 文件 -->
            <!-- piexif.min.js is only needed if you wish to resize images before upload to restore exif data.
             This must be loaded before fileinput.min.js -->
            <script src="{{ url_for('lib.static',filename='js/plugins/piexif.min.js') }}" type="text/javascript"></script>
            <!-- sortable.min.js is only needed if you wish to sort / rearrange files in initial preview.
                 This must be loaded before fileinput.min.js -->
            <script src="{{ url_for('lib.static',filename='js/plugins/sortable.min.js') }}" type="text/javascript"></script>
            <!-- purify.min.js is only needed if you wish to purify HTML content in your preview for HTML files.
                 This must be loaded before fileinput.min.js -->
            <script src="{{ url_for('lib.static',filename='js/plugins/purify.js') }}" type="text/javascript"></script>
            <!-- the main fileinput plugin file -->
            <script src="{{ url_for('lib.static',filename='js/fileinput.min.js') }}"></script>
            <!-- optionally if you need a theme like font awesome theme you can include
                it as mentioned below -->
            <script src="{{ url_for('lib.static',filename='js/themes/fa/theme.min.js') }}"></script>
            <!-- optionally if you need translation for your language then include
                locale file as mentioned below -->
            <script src="{{ url_for('lib.static',filename='js/locales/zh.js') }}"></script>

        {% endblock %}    </head>

    <body>
        <div class="container">
            <div class="row">
                <div class="col-xs-12 col-sm-offset-2">
                    <div class="col-xs-12 col-sm-8">
                        {% block content %}

                        {% endblock %}                    </div>
                </div>
            </div><!--/row-->
        </div><!--/.container-->
    </body></html>
base.html 模板引入 css 和 js 时的几个坑
注意 css 和 js 文件的导入顺序
首先需要导入的 js 文件是 jquery.js.
第二需要导入 bootstrap 相关的 css 和 js.
第三需要导入 fileinput 相关的 css 和 js, 请注意项目中的注释, 相关的文件导入也需要有先后顺序的要求.
注意版本问题
此项目所需的 jquery 是 jQuery v2.1.1.
此项目所需的 bootstrap 是 v3.3.7 版本
此项目所需的 fileinput 是 v4.4.2 的版本.
其它版本可能会有所不同.
注意 fileinput 使用模式
fileinput 有两种使用模式,一种是利用 form 提交,一种是 ajax 方式提交.其中 ajax 提交方式,需要从 js 中进行设置, 并将类样式 class 设置为 file-loading. 而非 ajax 提交方式需要引入 form 表单, 类样式 class 需设置为 file, 本基础示例都需要引入 form 表单.
基础示例 1
模板内容
app/basic/templates/example_1.html 内容如下:
{% extends 'basic_common/base.html' %}
{% block content %}<h1>基本示例1 -- 自动展示缩略图</h1><label class="control-label">Select File</label><form method="post" role="form" enctype="multipart/form-data">
    <input id="input-1" name="input-1" type="file" class="file"></form>{% endblock %}
{% block title %}
    基本示例1 -- 自动展示缩略图
{% endblock %}
知识点:
需要引入 form 表单, 并支持文件上传, 需设置
enctype="multipart/form-data".由于 flask 项目是以 html 标签的 name 属性进行选择元素, 该 input 标签中需要设置 name 属性.
class 需要设置为 'file'.
input 标签的 type 属性要设置为 file, 以便支持文件上传.
input 标签由于没有引入 multiple 属性, 故不能实现选择多文件功能.
视图函数
app/basic/views.py 内容如下:
# -*- coding:utf-8 -*-__author__ = '东方鹗'from flask import render_template, request, current_app, redirect, url_forfrom . import basicfrom werkzeug.utils import secure_filenameimport osdef allowed_file(filename):
    ALLOWED_EXTENSIONS = set(['txt', 'pdf', 'png', 'jpg', 'jpeg', 'gif'])    return '.' in filename and \
           filename.rsplit('.', 1)[1] in ALLOWED_EXTENSIONS@basic.route('/example_1', methods=['GET', 'POST'])def example_1():
    if request.method == 'POST':
        file = request.files['input-1']        if file and allowed_file(file.filename):
            filename = secure_filename(file.filename)
            file.save(os.path.join(current_app.config['UPLOAD_FOLDER'], filename))    return render_template('example_1.html')
知识点:
allowed_file 函数是为了检查所上传的文件的格式, 主要实现方法是通过文件后缀来判断文件的格式. 参考文档: http://docs.jinkan.org/docs/flask/patterns/fileuploads.html
secure_filename 函数是为了让用户上传的文件的文件名更安全. 参考文档: http://werkzeug.pocoo.org/docs/0.12/utils/#werkzeug.utils.secure_filename
request.files['input-1'] 是为了获得上传的文件的对象. 此处的 'input-1' 对应的是 html 模板中 input 标签的 name 属性. 获取多个上传的文件需要用到 request.files.getlist('name属性标签'), 可得到一个文件对象的列表.
上传的路径是在 config.py 文件中设置的 UPLOAD_FOLDER 变量.
展示
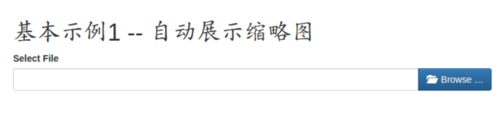
image
基础示例 2
模板内容
app/basic/templates/example_2.html 内容如下:
{% extends 'basic_common/base.html' %}
{% block content %}<h1>基本示例2 -- 隐藏展示缩略图</h1><label class="control-label">Select File</label><form method="post" role="form" enctype="multipart/form-data">
    <input id="input-2" name="input-2" type="file" class="file"  data-show-preview="false"></form>{% endblock %}
{% block title %}
    基本示例2 -- 隐藏展示缩略图
{% endblock %}
知识点:
data-show-preview="false" 属性将关闭文件选择后预览的功能, 既缩略图功能.
实现打开/关闭文件选择后的预览功能也可以在js里进行设置:
$(document).on('ready', function() {
    $("#input-2").fileinput({
        show-preview: false
    });
});
视图函数
views.py 视图函数和示例1基本相同,不在赘述.
展示
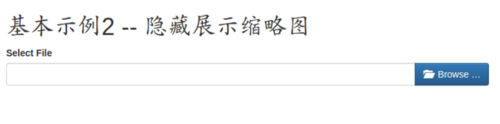
image
基础示例 3
模板内容
app/basic/templates/example_3.html 内容如下:
{% extends 'basic_common/base.html' %}
{% block content %}<h1>基本示例3 -- 利用 file input 属性控制相关选项,如本例可实现多文件上传,但不显示上传按钮</h1><label class="control-label">Select File</label><form method="post" role="form" enctype="multipart/form-data">
    <input id="input-3" name="input3[]" type="file" class="file" multiple data-show-upload="false" data-show-caption="true"></form>{% endblock %}
{% block title %}
    基本示例3 -- 利用 file input 属性控制相关选项,如本例可实现多文件上传,但不显示上传按钮
{% endblock %}
知识点:
input 标签里有 multiple 属性, 可实现多文件选择的功能.
data-show-upload="false" 属性将不显示上传按钮, 默认为 true.
data-show-caption="true" 属性将显示选择文件的输入框, 默认为 true. 框内将显示将要选择的文件的名称.
同样可以在 js 里实现相关功能.
$(document).on('ready', function() {
    $("#input-3").fileinput({
        show-upload: false,
        show-caption: true
    });
});
视图函数
由于没有上传按钮, 故无需处理选择的文件. 视图函数无需改变.
展示

image
基础示例 4
模板内容
app/basic/templates/example_4.html 内容如下:
{% extends 'basic_common/base.html' %}
{% block content %}<h1>基本示例4 -- 设置属性为只读或不可用</h1><label class="control-label">Select File</label><label class="control-label">Readonly Input</label><input id="input-4a" type="file" class="file" readonly="true"><label class="control-label">Disabled Input</label><input id="input-4b" type="file" class="file" disabled="true">{% endblock %}
{% block title %}
    基本示例4 -- 设置属性为只读或不可用
{% endblock %}
知识点:
利用 readonly 或 disabled 属性, 将选择框设置为只读或不可用.
视图函数
由于无法选择文件, 视图函数无需改变.
展示
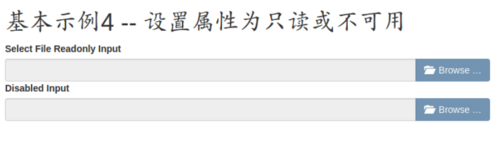
image
基础示例 5
模板内容
app/basic/templates/example_5.html 内容如下:
{% extends 'basic_common/base.html' %}
{% block content %}<h1>基本示例5 -- 设置为单按钮并隐藏文件选择输入框,在上传时显示上传等待图标</h1><label class="control-label">Select File</label><form method="post" role="form" enctype="multipart/form-data">
    <input id="input-5" name="input-5[]" type="file" multiple class="file-loading"></form><script>$(document).on('ready', function() {
    $("#input-5").fileinput({showCaption: false});
});</script>{% endblock %}
{% block title %}
    基本示例5 -- 设置为单按钮并隐藏文件选择输入框,在上传时显示上传等待图标
{% endblock %}
知识点:
通过 js 设置 showCaption 的属性为 false. 你也可以使用 data-show-caption 标签属性来设置.
注意样式类 class 此处成了 file-loading. 这是一个很积极的变化, 表明你可以使用 ajax 提交方式来上传文件啦. 你把 html 中的 form 表单去掉试试.
视图函数
app/basic/views.py 内容如下:
...@basic.route('/example_5', methods=['GET', 'POST'])def example_5():
    if request.method == 'POST':
        files = request.files.getlist('input-5[]')        for file in files:            if file and allowed_file(file.filename):
                filename = secure_filename(file.filename)
                file.save(os.path.join(current_app.config['UPLOAD_FOLDER'], filename))    return render_template('example_5.html')

...
知识点
使用 request.files.getlist() 来获取上传文件的对象列表.
展示

image
基础示例 6
模板内容
app/basic/templates/example_6.html 内容如下:
{% extends 'basic_common/base.html' %}
{% block content %}<h1>基本示例6 -- 设置最大上传的文件数为10</h1><label class="control-label">Select File</label><form method="post" role="form" enctype="multipart/form-data">
    <input id="input-6" name="input6[]" type="file" multiple class="file-loading"></form><script>$(document).on('ready', function() {
    $("#input-6").fileinput({        showUpload: false,        maxFileCount: 10,        mainClass: "input-group-lg"
    });
});</script>{% endblock %}
{% block title %}
    基本示例6 -- 设置最大上传的文件数为10
{% endblock %}
知识点:
通过 js 设置 showUpload 的属性为 false. 你也可以使用 data-show-upload 标签属性来设置.
设置 maxFileCount 的属性为 10, 表示最多可以一次性上传 10 个文件.
设置 mainClass 的 属性为 "input-group-lg", 基于 bootstrap 样式. 文件的选择框将变大.
视图函数
由于没有上传按钮, 故无需处理选择的文件. 视图函数无需改变.
展示
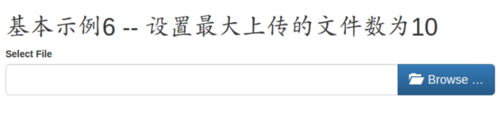
image
基础示例 7
模板内容
app/basic/templates/example_7.html 内容如下:
{% extends 'basic_common/base.html' %}
{% block content %}<h1>基本示例7 -- 设置允许上传的文件格式</h1><label class="control-label">Select File</label><form method="post" role="form" enctype="multipart/form-data">
<input id="input-7" name="input-7[]" multiple type="file" class="file file-loading" data-allowed-file-extensions='["csv", "txt"]'></form>{% endblock %}
{% block title %}
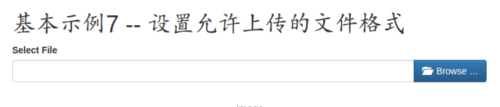
基本示例7 -- 设置允许上传的文件格式
{% endblock %}知识点:
注意样式类 class 此处成了 file-loading. 这是一个很积极的变化, 表明你可以使用 ajax 提交方式来上传文件啦. 你把 html 中的 form 表单去掉试试.
data-allowed-file-extensions='["csv", "txt"]' 设置上传的文件的格式只能是 csv 或 txt 两种格式
视图函数
app/basic/views.py 内容如下:
...@basic.route('/example_7', methods=['GET', 'POST'])def example_7():
    if request.method == 'POST':
        files = request.files.getlist('input-7[]')        for file in files:            if file and allowed_file(file.filename):
                filename = secure_filename(file.filename)
                file.save(os.path.join(current_app.config['UPLOAD_FOLDER'], filename))    return render_template('example_7.html')

...
知识点
此处的 allowed_file() 函数中的 ALLOWED_EXTENSIONS 变量, 最好和前端的一致.
展示
image
基础示例 8
模板内容
app/basic/templates/example_8.html 内容如下:
{% extends 'basic_common/base.html' %}
{% block content %}<h1>基本示例8 -- 使用rtl样式,让文件选择按钮居左</h1><span>注意:引入样式文件的时候, css/fileinput-rtl.css 必须在 the css/fileinput.css 之后引入</span><div dir=rtl>
    <label class="control-label">Select File</label></div><!-- note that your input must just set the `rtl` data property of the plugin or in your javascript code --><form method="post" role="form" enctype="multipart/form-data">
    <input id="input-8" name="input-8[]" multiple type="file" class="file-loading"></form><script>$(document).on('ready', function() {
    $("#input-8").fileinput({        rtl: true,        allowedFileExtensions: ["jpg", "png", "gif"]
    });
});</script>{% endblock %}
{% block title %}
    基本示例8 -- 使用rtl样式,让文件选择按钮居左
{% endblock %}
{% block css %}
    {{ super() }}    <link href="{{ url_for('lib.static',filename='css/fileinput-rtl.min.css') }}" media="all" rel="stylesheet" type="text/css" />{% endblock %}
知识点:
注意 js 的内容, 引入了 rtl 属性, 这需要先映入
css/fileinput-rtl.min.css样式表, 注意 flask 模板的导入方式. 此属性将是按钮的样式反转.allowedFileExtensions: ["jpg", "png", "gif"], 是在 js 中的设置方式.允许上传的文件的格式为 "jpg", "png", "gif" 三种.你也可以使用 data 属性选项来设置, data-allowed-file-extensions='["jpg", "png", "gif"]'.
视图函数
app/basic/views.py 内容如下:
...@basic.route('/example_8', methods=['GET', 'POST'])def example_8():
    if request.method == 'POST':
        files = request.files.getlist('input-8[]')        for file in files:            if file and allowed_file(file.filename):
                filename = secure_filename(file.filename)
                file.save(os.path.join(current_app.config['UPLOAD_FOLDER'], filename))    return render_template('example_8.html')

...
知识点
此处的 allowed_file() 函数中的 ALLOWED_EXTENSIONS 变量, 最好和前端的一致.
展示

image
本章源代码下载:
<a class="btn btn-primary" href="https://github.com/eastossifrage/bootstrapFileInput/archive/v1.2.zip">zip压缩包</a>
<a class="btn btn-primary" href="https://github.com/eastossifrage/bootstrapFileInput/archive/v1.2.tar.gz">tar.gz压缩包</a>
作者:藕丝空间
链接:https://www.jianshu.com/p/8507798c8e2a


