
1. 对话保持的解决方案。
要求:
1、app中使用webview访问具体网站的内容,但是app与服务器的沟通是使用HttpURLConnection来完成。
2、webview访问时不需要再次登陆,继承app的登陆状态。
会话未保持的现象:
1、虽然app已经登录服务器,但是在webview中还是提示需要登录。
2、app下一次对服务器的请求也会失败,提示session过期。
解决方案:
1、获取到HttpUrlConnection中服务器返回的session id。
2、本地保存session id,每次对服务器的请求,手动添加。
3、将此session id设置到持有webview的activity中的CookieManager里。
关键代码:
网络处理类 NetHelper/**
* 发送登陆请求,并将SESSIONID保存起来
* @param urlPath 登陆请求的地址
* @return 返回的内容
* */public static String login(String urlPath) {
......省略号...... try {
URL url = new URL(urlPath);
HttpURLConnection conn = (HttpURLConnection) url.openConnection(); //设置请求方式
conn.setRequestMethod("GET");
conn.setConnectTimeout(5000);// conn.setReadTimeout(5000);
int responseCode = conn.getResponseCode(); if (responseCode == HttpURLConnection.HTTP_OK) {
InputStream is = conn.getInputStream();
cookList = conn.getHeaderFields().get("Set-Cookie"); if ((sessionId == null) && (cookList != null)) { for (String value : cookList) { if ((value != null) && (value.toUpperCase().indexOf(";") > 0)) {
sessionId = value.split(";")[0];
}
}
}
......省略号......
}
}catch (Exception e){
e.printStackTrace();
}
......省略号......
}/**
* 发送一条请求,将内容以字符串返回
* @param urlPath 请求的地址
* @return 返回的内容
* */public static String request(String urlPath) {
......省略号...... try {
URL url = new URL(urlPath);
HttpURLConnection conn = (HttpURLConnection) url.openConnection(); if(sessionId !=null ){
conn.setRequestProperty("Cookie",sessionId);
}
conn.setRequestMethod("GET");
conn.setConnectTimeout(5000);// conn.setReadTimeout(5000);
......省略号......
} catch (Exception e) {
e.printStackTrace();
}
......省略号......
}持有webview的Activity MainActivityprivate CookieManager cookieManager;
cookieManager = CookieManager.getInstance();
cookieManager.setAcceptCookie(true);
clearSession();private void clearSession() { if (NetHelper.cookList != null) {
cookieManager.removeSessionCookie();
}
}//在第一次请求的时候,设置一次session即可private void setSession(String url) { if (NetHelper.cookList != null) {
String values = NetHelper.cookList.toString();
cookieManager.setCookie(url, values); //设置cookie
CookieSyncManager.getInstance().sync(); //同步
}
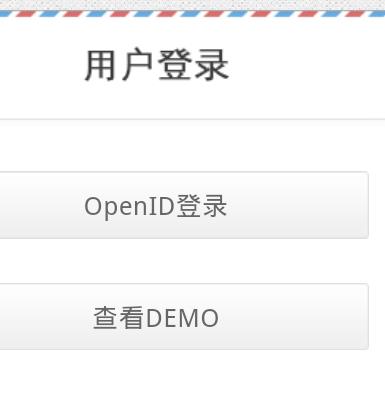
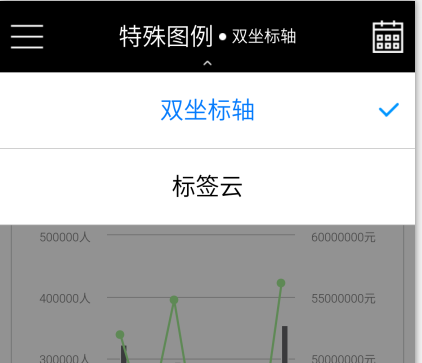
}2. 自定义控件的实现方案
自定义控件的实现方式(详细内容可以参考压缩包中的<自定义控件.pdf>):
1、继承方式
当简单控件不满足需求时,通过继承重写简单控件,实现对控件的定制。
2、组合方式
当单个控件不满足需求时,可以采用多个控件的组合,实现对控件的定制。
3、控件自绘方式
通过继承自view,重写onDraw方法实现。
项目中的具体应用:
1、登录邮箱的自动补全功能实现(纯代码实现布局)。
2、弹窗滚轮的实现(代码加布局文件)
3、TabButton的实现(两种实现方式)
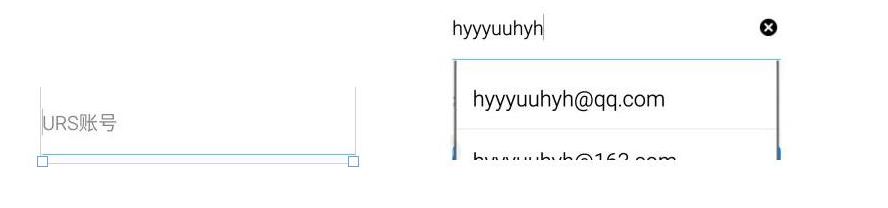
A、 登录邮箱的自动补全功能实现:
效果:
实现原理:
1、继承重写简单控件AutoCompleteTextView
2、编写自定义数据适配器和布局文件,并实现文字变化监听器
3、通过组合方式,实现右侧的删除图标。并根据焦点和文字的变化,动态显示右侧删除图标。
1、通过继承自简单控件AutoCompleteTextView实现帐号自动补全
关键代码:
public class AutoComplete extends AutoCompleteTextView { private static final String[] emailSuffix = { "@qq.com", "@163.com", "@126.com", "@gmail.com", "@sina.com", "@hotmail.com", "@yahoo.cn", "@sohu.com", "@foxmail.com", "@139.com", "@yeah.net", "@vip.qq.com", "@vip.sina.com"};
......省略号...... //构造函数原型要正确,留给系统调用
public AutoComplete(Context context) { super(context);
mContext = context;
} public AutoComplete(Context context, AttributeSet attrs) { super(context, attrs);
mContext = context;
} public void init(ImageView imageView) {
mImageView = imageView; final MyAdatper adapter = new MyAdatper(mContext);
setAdapter(adapter);
addTextChangedListener(new TextWatcher() { @Override
public void afterTextChanged(Editable s) { if (isTextWatch) {
String input = s.toString();
......省略号......
adapter.clearList(); //注意要清空数据,根据输入的变化,自动生成数据
if (input.length() > 0) { for (int i = 0; i < emailSuffix.length; ++i) {
adapter.addListData(input + emailSuffix[i]);
}
}
adapter.notifyDataSetChanged();
showDropDown();//该行代码会造成崩溃
}
}
}); //当输入一个字符的时候就开始检测
setThreshold(1);
} private class ViewHolder {
TextView tv_Text;
} class MyAdatper extends BaseAdapter implements Filterable { private List<String> mList; private Context mContext; private MyFilter mFilter;
......省略号...... public void clearList() {
mList.clear();
} public void addListData(String strData) {
mList.add(strData);
} @Override
public View getView(int position, View convertView, ViewGroup parent) {
View view;
ViewHolder viewHolder; if (convertView == null) {
view = LayoutInflater.from(mContext).inflate(R.layout.activity_autocomplete_item, null);
viewHolder = new ViewHolder();
viewHolder.tv_Text = (TextView) view.findViewById(R.id.tv_autocomplete);
view.setTag(viewHolder);
} else {
view = convertView;
viewHolder = (ViewHolder) view.getTag();
}
viewHolder.tv_Text.setText(mList.get(position)); return view;
}
......省略号......
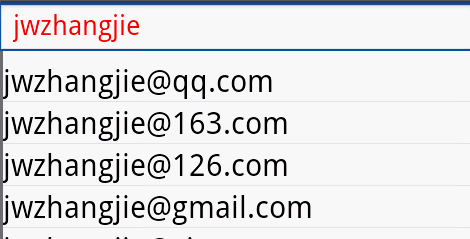
}activity_autocomplete_item 下拉列表布局文件
<?xml version="1.0" encoding="utf-8"?><LinearLayout xmlns:android="http://schemas.android.com/apk/res/android"
    android:orientation="vertical"
    android:layout_width="match_parent"
    android:background="@color/White"
    android:layout_height="wrap_content">

    <TextView
        android:id="@+id/tv_autocomplete"
        android:padding="15dp"
        android:textSize="20sp"
        android:singleLine="true"
        android:textColor="@color/Black"
        android:layout_width="match_parent"
        android:layout_height="wrap_content" /></LinearLayout>
上面自动补全的效果图:
2、通过组合方式实现帐号自动补全复杂控件
关键代码:
public class AdvancedAutoCompleteTextView extends RelativeLayout { private Context mContext; private AutoComplete mAutoComplete; //上面的自定义控件
private ImageView mImageView; //右侧的图标控件
......省略号...... @Override
protected void onFinishInflate() { super.onFinishInflate();
initViews();
} //代码方式,初始化布局
private void initViews() {
RelativeLayout.LayoutParams params = new RelativeLayout.LayoutParams(RelativeLayout.LayoutParams.FILL_PARENT, LayoutParams.FILL_PARENT);
params.addRule(RelativeLayout.ALIGN_PARENT_LEFT);
params.addRule(RelativeLayout.CENTER_VERTICAL);
mAutoComplete = new AutoComplete(mContext);
mAutoComplete.setLayoutParams(params);
mAutoComplete.setPadding(0, 0, 40, 0);
mAutoComplete.setSingleLine(true);
mAutoComplete.setInputType(InputType.TYPE_TEXT_VARIATION_EMAIL_ADDRESS);
mAutoComplete.setFitsSystemWindows(true);
mAutoComplete.setEms(10);
mAutoComplete.setHint("URS账号");
mAutoComplete.setImeOptions(EditorInfo.IME_ACTION_NEXT
| EditorInfo.IME_FLAG_NO_EXTRACT_UI | EditorInfo.IME_FLAG_NO_FULLSCREEN);
mAutoComplete.setDropDownHorizontalOffset(0);
mAutoComplete.setDropDownVerticalOffset(2);
mAutoComplete.setBackgroundResource(R.drawable.edit_text_background);
RelativeLayout.LayoutParams p = new RelativeLayout.LayoutParams(RelativeLayout.LayoutParams.WRAP_CONTENT, LayoutParams.FILL_PARENT);
p.addRule(RelativeLayout.ALIGN_PARENT_RIGHT);
p.addRule(RelativeLayout.CENTER_VERTICAL);
p.rightMargin = 10;
mImageView = new ImageView(mContext);
mImageView.setLayoutParams(p);
mImageView.setScaleType(ImageView.ScaleType.FIT_CENTER);
mImageView.setImageResource(R.drawable.unselect);
mImageView.setClickable(true);
mImageView.setOnClickListener(new View.OnClickListener() { @Override
public void onClick(View v) {
setText("");
}
}); this.addView(mAutoComplete); this.addView(mImageView); //监听获取焦点事件,目的:输入帐号时,右侧图标的显示
mAutoComplete.setOnFocusChangeListener(new OnFocusChangeListener() { @Override
public void onFocusChange(View v, boolean hasFocus) { if (hasFocus && !mAutoComplete.getText().toString().isEmpty()) {
mAutoComplete.setShow(false); //如果获取首次获取焦点,此时文本不为空,则显示,并禁止文本改变监听里的设置
mImageView.setImageResource(R.drawable.item_delete);
} else if (hasFocus) {
mAutoComplete.setShow(true);//如果获取首次获取焦点,此时文本为空,则不改变,并开启文本改变监听里的设置
} else {
mAutoComplete.setShow(false);
mImageView.setImageResource(R.drawable.unselect);
}
}
}); //对AutoComplete自定义控件初始化,一定要放到最后.否则,会由于AutoComplete初始化未完成,就弹窗,而崩溃
mAutoComplete.init(mImageView);
}
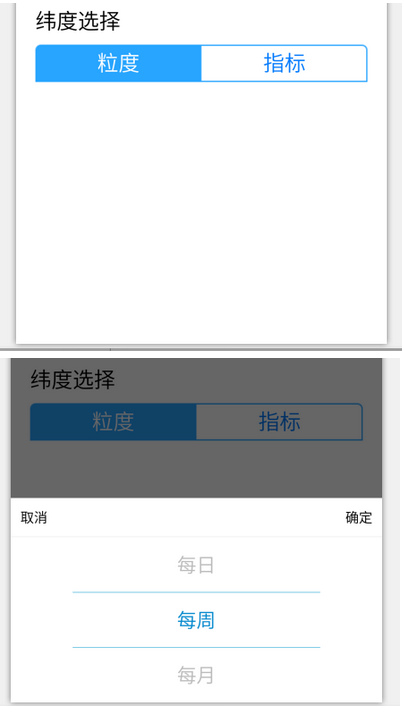
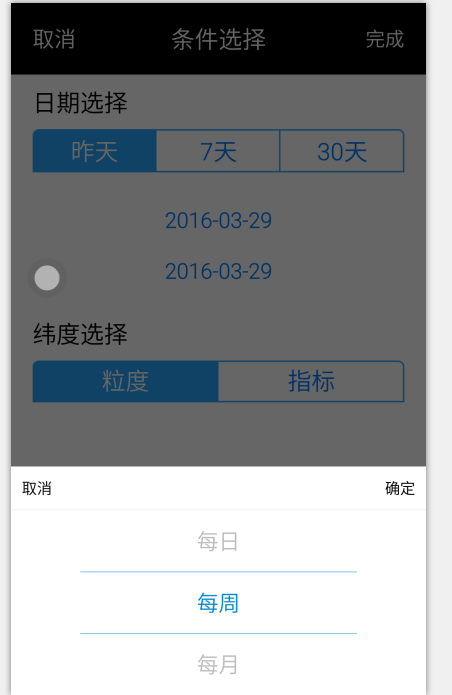
}B、弹窗滚轮的实现
效果:
实现原理:
1、继承重写简单控件ScrollView,实现滚动效果,并添加回调接口,用于获取选择的内容。
2、为自定义控件添加内容,其中每一项为一个TextView,用于内容显示。
3、通过自绘添加上下两条直线,实现选中状态。
4、最后利用popup弹窗,加载整个视图,显示弹窗滚动效果。
1、通过继承ScrollView实现滚动,并向布局添加具体项
关键代码:
public class WheelView extends ScrollView {    //选择后的回调接口
    public interface OnWheelViewListener {        void onSelected(int selectedIndex, String item);
    }

    ......省略号......    //初始化,并创建布局
    private void init(Context context) {        this.context = context;        this.setVerticalScrollBarEnabled(false);

        views = new LinearLayout(context);  //为自定义控件创建线性布局
        views.setOrientation(LinearLayout.VERTICAL);        this.addView(views);        //异步任务,根据滚动的位置自动调整待显示的数据,该异步任务会在滚动事件触发式执行
        scrollerTask = new Runnable() {            public void run() {                if (itemHeight == 0) {                    return;
                }                int newY = getScrollY();                if (initialY - newY == 0) { // stopped
                    final int remainder = initialY % itemHeight;                    final int divided = initialY / itemHeight;                    if (remainder == 0) {
                        selectedIndex = divided + offset;
                        onSeletedCallBack();
                    } else {                        if (remainder > itemHeight / 2) {
                            WheelView.this.post(new Runnable() {                                @Override
                                public void run() {
                                    WheelView.this.smoothScrollTo(0, initialY - remainder + itemHeight);
                                    selectedIndex = divided + offset + 1;
                                    onSeletedCallBack();
                                }
                            });
                        } else {
                            WheelView.this.post(new Runnable() {                                @Override
                                public void run() {
                                    WheelView.this.smoothScrollTo(0, initialY - remainder);
                                    selectedIndex = divided + offset;
                                    onSeletedCallBack();
                                }
                            });
                        }
                    }
                } else {
                    initialY = getScrollY();
                    WheelView.this.postDelayed(scrollerTask, newCheck);
                }
            }
        };
    }    //往布局添加数据

    private void initData() {
        displayItemCount = offset * 2 + 1;        //添加新view之前,必须移除旧的,否则不正确
        views.removeAllViews();        for (String item : items) {
            views.addView(createView(item));
        }

        refreshItemView(0);
    }    private TextView createView(String item) {
        TextView tv = new TextView(context);
        tv.setLayoutParams(new LayoutParams(ViewGroup.LayoutParams.MATCH_PARENT, ViewGroup.LayoutParams.WRAP_CONTENT));
        tv.setSingleLine(true);
        tv.setTextSize(TypedValue.COMPLEX_UNIT_SP, 20);
        tv.setText(item);
        tv.setGravity(Gravity.CENTER);        int padding = dip2px(15);
        tv.setPadding(padding, padding, padding, padding);        if (0 == itemHeight) {
            itemHeight = getViewMeasuredHeight(tv);
            views.setLayoutParams(new LayoutParams(ViewGroup.LayoutParams.MATCH_PARENT, itemHeight * displayItemCount));
            LinearLayout.LayoutParams lp = (LinearLayout.LayoutParams) this.getLayoutParams();            this.setLayoutParams(new LinearLayout.LayoutParams(lp.width, itemHeight * displayItemCount));
        }        return tv;
    }

    ......省略号......    @Override   //上下直线的自绘
    public void setBackgroundDrawable(Drawable background) {        if (viewWidth == 0) {
            viewWidth = ((Activity) context).getWindowManager().getDefaultDisplay().getWidth();
        }        if (null == paint) {
            paint = new Paint();
            paint.setColor(Color.parseColor("#83cde6"));
            paint.setStrokeWidth(dip2px(1f));
        }

        background = new Drawable() {            @Override
            public void draw(Canvas canvas) {
                canvas.drawLine(viewWidth * 1 / 6, obtainSelectedAreaBorder()[0], viewWidth * 5 / 6,

obtainSelectedAreaBorder()[0], paint);

                canvas.drawLine(viewWidth * 1 / 6, obtainSelectedAreaBorder()[1], viewWidth * 5 / 6,

obtainSelectedAreaBorder()[1], paint);

            }
        };        super.setBackgroundDrawable(background);
    }

}
2、动态加载布局,并利用PopupWindow弹窗显示。
关键代码:
private void addView(int num){

    ......省略号......

    wheel_layout_view = LayoutInflater.from(this).inflate(R.layout.wheel_view, null);

    ......省略号......

 }
布局文件 wheel_view 效果图

private void popupWindows(List<String> list){    if (wheel_layout_view != null){

        mPopupWindow = null;
        mPopupWindow = new PopupWindow(wheel_layout_view);
        mPopupWindow.setWidth(ViewGroup.LayoutParams.MATCH_PARENT);
        mPopupWindow.setHeight(ViewGroup.LayoutParams.WRAP_CONTENT);        //点击外部,自动消失
        mPopupWindow.setFocusable(true);
        mPopupWindow.setOutsideTouchable(true);

        ......省略号......

        mPopupWindow.showAtLocation(ll_weidu_condition, Gravity.BOTTOM, 0, 0);
    }
}
C、TabButton的实现
效果:
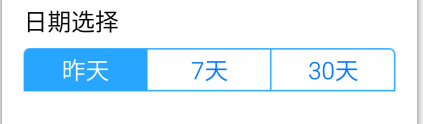
1、利用.9.png图标实现(简单、美观)
属性定义attrs.xml:
<?xml version="1.0" encoding="utf-8"?><resources>
    <!-- 自定义的button控件,用于日期的选择-->
    <declare-styleable name="TabButton">
        <attr name="normal_bg_res" format="reference" />
        <attr name="selected_bg_res" format="reference" />
    </declare-styleable></resources>
布局文件:
<LinearLayout xmlns:android="http://schemas.android.com/apk/res/android"
    xmlns:custom="http://schemas.android.com/apk/res-auto"   //声明自定义属性空间

    ......省略号......

    android:orientation="vertical">

    ......省略号......

        <xxxxxxxxxxx.customui.TabButton
            style="@style/commonButton"
            android:layout_width="0dp"
            android:layout_margin="0dp"
            android:layout_weight="1"
            android:layout_height="40dp"
            android:text="昨天"
            android:textSize="22sp"
            android:gravity="center"
            android:background="@drawable/btn_left"
            android:textColor="@color/blue"
            custom:normal_bg_res="@drawable/btn_left"
            custom:selected_bg_res="@drawable/btn_left_selected"
            android:id="@+id/bt_yesterday" />

    ......省略号......

</LinearLayout>
关键代码:
public class TabButton extends Button {    private int normal_bg_res;    private int selected_bg_res;    public TabButton(Context context) {        super(context);
    }    public TabButton(Context context, AttributeSet attrs) {        super(context, attrs);

        TypedArray typeArray = context.obtainStyledAttributes(attrs, R.styleable.TabButton);
        normal_bg_res = typeArray.getResourceId(R.styleable.TabButton_normal_bg_res, 0);
        selected_bg_res = typeArray.getResourceId(R.styleable.TabButton_selected_bg_res, 0);

        typeArray.recycle();
    }    public void setSelected(boolean selected) {        if (selected) {
            setBackgroundResource(selected_bg_res);
            setTextColor(Color.WHITE);
        } else {
            setBackgroundResource(normal_bg_res);
            setTextColor(getResources().getColor(R.color.blue));
        }
    }
}
2、利用布局文件实现(复杂、灵活)。
更多样式,可以参数官方的SDK(android-sdk-windows\platforms\android-1.5\data\res\)
布局样式button_style:
<?xml version="1.0" encoding="utf-8"?><selector xmlns:android="http://schemas.android.com/apk/res/android">
    <item android:state_pressed="true">
        <shape android:shape="rectangle">
            <solid android:color="#0d76e1" />
        </shape>
    </item>

    <item android:state_focused="true">
        <shape android:shape="rectangle">
            <solid android:color="@color/Grey" />
        </shape>
    </item>

    <item>
        <shape android:shape="rectangle">
            <solid android:color="@color/Grey" />
        </shape>
    </item></selector>
样式应用:
<Button android:id="@+id/tab_button"
    android:layout_width="wrap_content"
    android:layout_height="wrap_content"
    android:background="@drawable/button_style">
3. 蒙板效果的实现
1、不保留标题栏蒙板的实现
效果:
原理:
1、弹窗时,设置背景窗体的透明度
2、取消弹窗时,恢复背景窗体的透明度
关键代码:
private void popupWindows(List<String> list){    //产生背景变暗效果
    WindowManager.LayoutParams lp=getWindow().getAttributes();
    lp.alpha = 0.4f;
    getWindow().setAttributes(lp);

        ......省略号......

    mPopupWindow.setOnDismissListener(new PopupWindow.OnDismissListener() {            @Override
            public void onDismiss() {
                WindowManager.LayoutParams lp = getWindow().getAttributes();
                lp.alpha = 1f;
                getWindow().setAttributes(lp);
            }
        });

      ......省略号......

}
2、保留标题栏蒙板的实现
效果:
原理:
1、根据需求,设置蒙板布局大小。
2、弹窗时,显示蒙板布局
2、取消弹窗时,隐藏蒙板布局
关键代码:
1、蒙板布局实现:
<!-- popup蒙板 --><LinearLayout
    android:id="@+id/ll_popup_hide"
    android:layout_width="match_parent"
    android:background="@color/hide_bg"
    android:orientation="vertical"
    android:layout_height="match_parent"></LinearLayout><color name="hide_bg">#88323232</color>
2、代码处理
ll_popup_hide.setVisibility(View.VISIBLE); //显示蒙板ll_popup_hide.setVisibility(View.INVISIBLE); //隐藏蒙板
4. Activity的回收与操作超时的处理
1、Activity的回收
针对多个activity退出的处理
关键代码:
1、新建活动管理类:
public class ActivityCollector {    private static List<Activity> activityList = new ArrayList<Activity>();    public static void addActivity(Activity activity){
        activityList.add(activity);
    }    public static void removeActivity(Activity activity){
        activityList.remove(activity);
    }    public static void finishAllButLast(){
        Activity activity = activityList.get(activityList.size()-1);
        removeActivity(activity);        for (Activity activityItem: activityList){            if (!activityItem.isFinishing()){
                activityItem.finish();
            }
        }

        activityList.clear();
        activityList.add(activity);
    }    public static void finishAll(){        for (Activity activity: activityList){            if (!activity.isFinishing()){
                activity.finish();
            }
        }

        activityList.clear();
    }
}
2、创建基类BaseActivity,并使所有的activity继承自该基类 。在创建时,添加到活动管理器,销毁时,从活动管理器中移除。
public class BaseActivity extends Activity {    @Override
    protected void onCreate(Bundle savedInstanceState) {        super.onCreate(savedInstanceState);
        ActivityCollector.addActivity(this);
    }    @Override
    protected void onDestroy() {        super.onDestroy();
        ActivityCollector.removeActivity(this);
    }
}
如果需要销毁所有activity,只需调用finishAll()即可
2、操作超时处理
原理:
1、在activity的stop函数中,根据app进程IMPORTANCE_FOREGROUND判断app在前台或后台
2、在activity的onResume函数中,做超时检查。
关键代码:
abstract public class TimeOutCheckActivity extends BaseActivity {    private boolean isLeave = false;    @Override
    protected void onCreate(Bundle savedInstanceState) {        super.onCreate(savedInstanceState);
        pref = getSharedPreferences(Constant.CONFIG_NAME, Context.MODE_PRIVATE);
    }    /**
     * 回调函数,方便测试
     * @return
    */
    abstract protected String getTag();

    ......省略号......    /***
     * 当用户使程序恢复为前台显示时执行onResume()方法,在其中判断是否超时.
     */
    @Override
    protected void onResume() {//        Log.i("Back",getTag() + ",onResume,是否在前台:" + isOnForeground());
        super.onResume();        if (isLeave) {
            isLeave = false;
            timeOutCheck();
        }
    }    @Override
    protected void onStop() {        super.onStop();        if (!isOnForeground()){            if (!isLeave && isOpenALP()) {
                isLeave = true;
                saveStartTime();
            }
        }
    }    public void timeOutCheck() {        long endtime = System.currentTimeMillis();        if (endtime - getStartTime() >= Constant.TIMEOUT_ALP * 1000) {
            Util.toast(this, "超时了,请重新验证");
            String alp = pref.getString(Constant.ALP, null);            if (alp == null || alp == "") {
            } else {
                Intent intent = new Intent(this, UnlockGesturePasswordActivity.class);
                intent.putExtra("pattern", alp);
                intent.putExtra("login",false); //手势验证,不进行登录验证
                intent.setFlags(Intent.FLAG_ACTIVITY_CLEAR_TASK);                // 打开新的Activity
                startActivityForResult(intent, Constant.REQ_COMPARE_PATTERN_TIMEOUT_CHECK);
            }
        }
    }    public void saveStartTime() {
        pref.edit().putLong(Constant.START_TIME, System.currentTimeMillis()).commit();
    }    public long getStartTime() {        long startTime = 0;        try {
            startTime = pref.getLong(Constant.START_TIME, 0);
        }catch (Exception e){
            startTime = 0;
        }        return startTime;
    }    /**
     * 程序是否在前端运行,通过枚举运行的app实现。防止重复超时检测多次,保证只有一个activity进入超时检测
     *当用户按home键时,程序进入后端运行,此时会返回false,其他情况引起activity的stop函数的调用,会返回true
     * @return
    */
    public boolean isOnForeground() {
        ActivityManager activityManager = (ActivityManager) getApplicationContext().getSystemService(Context.ACTIVITY_SERVICE);
        String packageName = getApplicationContext().getPackageName();

        List<ActivityManager.RunningAppProcessInfo> appProcesses = activityManager.getRunningAppProcesses();        if (appProcesses == null)            return false;        for (ActivityManager.RunningAppProcessInfo appProcess : appProcesses) {            if (appProcess.processName.equals(packageName)
                    && appProcess.importance == ActivityManager.RunningAppProcessInfo.IMPORTANCE_FOREGROUND) {
                return true;
            }
        }        return false;
    }
}
补充说明:
可以根据importance的不同来判断前台或后台,RunningAppProcessInfo 里面的常量IMTANCE就是上面所说的前台后台,其实IMOPORTANCE是表示这个app进程的重要性,因为系统回收时候,会根据IMOPORTANCE来回收进程的。具体可以去看文档。
public static final int IMPORTANCE_BACKGROUND = 400//后台 public static final int IMPORTANCE_EMPTY = 500//空进程 public static final int IMPORTANCE_FOREGROUND = 100//在屏幕最前端、可获取到焦点 可理解为Activity生命周期的OnResume(); public static final int IMPORTANCE_SERVICE = 300//在服务中 public static final int IMPORTANCE_VISIBLE = 200//在屏幕前端、获取不到焦点可理解为Activity生命周期的OnStart();


热门评论
-

接发化2022-03-16 1
-

接发化2022-03-16 0
查看全部评论插眼留着之后看行不行。
先插眼,之后再细看。