背景减除(Background Subtraction)是许多基于计算机视觉的任务中的主要预处理步骤。如果我们有完整的静止的背景帧,那么我们可以通过帧差法来计算像素差从而获取到前景对象。但是在大多数情况下,我们可能没有这样的图像,所以我们需要从我们拥有的任何图像中提取背景。当运动物体有阴影时,由于阴影也在移动,情况会变的变得更加复杂。为此引入了背景减除算法,通过这一方法我们能够从视频中分离出运动的物体前景,从而达到目标检测的目的。 OpenCV已经实现了几种非常容易使用的算法。
环境
Python 3.6
OpenCV 3.2 + contrib
在Python下可以通过直接导入wheel包来安装opencv+contrib,可以从下面这个网址下载对应的文件:opencv_python‑3.2.0+contrib‑cp36‑cp36m‑win_amd64.whl
http://www.lfd.uci.edu/~gohlke/pythonlibs/
KNN
KNN算法,即K-nearest neigbours - based Background/Foreground Segmentation Algorithm。2006年,由Zoran Zivkovic 和Ferdinand van der Heijden在论文"Efficient adaptive density estimation per image pixel for the task of background subtraction."中提出。
bs = cv2.createBackgroundSubtractorKNN(detectShadows=True)

fg_mask = bs.apply(frame)
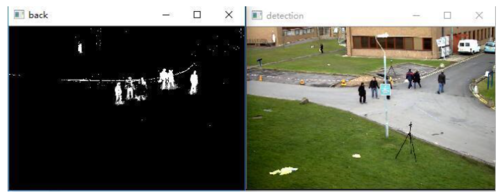
knn.jpg
MOG
MOG算法,即高斯混合模型分离算法,全称Gaussian Mixture-based Background/Foreground Segmentation Algorithm。2001年,由P.KadewTraKuPong和R.Bowden在论文“An improved adaptive background mixture model for real-time tracking with shadow detection”中提出。它使用一种通过K高斯分布的混合来对每个背景像素进行建模的方法(K = 3〜5)。
bs = cv2.bgsegm.createBackgroundSubtractorMOG(history=history)
bs.setHistory(history)

fg_mask = bs.apply(frame)
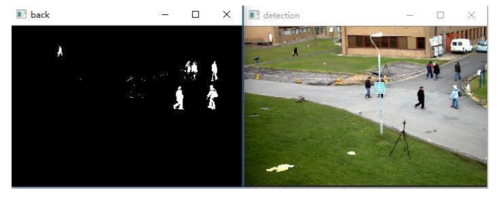
mog.jpg
MOG2
MOG2算法,也是高斯混合模型分离算法,是MOG的改进算法。它基于Z.Zivkovic发布的两篇论文,即2004年发布的“Improved adaptive Gausian mixture model for background subtraction”和2006年发布的“Efficient Adaptive Density Estimation per Image Pixel for the Task of Background Subtraction”中提出。该算法的一个重要特征是 它为每个像素选择适当数量的高斯分布,它可以更好地适应不同场景的照明变化等。
bs = cv2.createBackgroundSubtractorMOG2(history=history, detectShadows=True)
bs.setHistory(history)

fg_mask = bs.apply(frame)
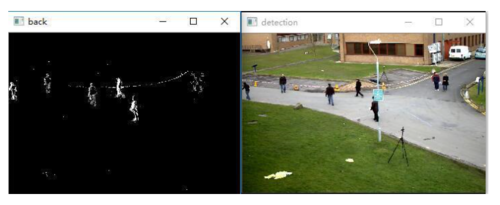
mog2.jpg
GMG
该算法结合统计背景图像估计和每像素贝叶斯分割。由 Andrew B. Godbehere, Akihiro Matsukawa, Ken Goldberg在2012年的文章“Visual Tracking of Human Visitors under Variable-Lighting Conditions for a Responsive Audio Art Installation”中提出。该算法使用前几个(默认为120)帧进行后台建模。它采用概率前景分割算法,使用贝叶斯推理识别可能的前景对象。
bs = cv2.bgsegm.createBackgroundSubtractorGMG(initializationFrames=history)

fg_mask = bs.apply(frame)
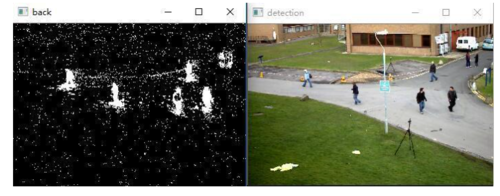
gmg.jpg
使用KNN根据前景面积检测运动物体
代码:
# coding:utf8import cv2def detect_video(video):
    camera = cv2.VideoCapture(video)
    history = 20    # 训练帧数

    bs = cv2.createBackgroundSubtractorKNN(detectShadows=True)  # 背景减除器,设置阴影检测
    bs.setHistory(history)

    frames = 0

    while True:
        res, frame = camera.read()        if not res:            break

        fg_mask = bs.apply(frame)   # 获取 foreground mask

        if frames < history:
            frames += 1
            continue

        # 对原始帧进行膨胀去噪
        th = cv2.threshold(fg_mask.copy(), 244, 255, cv2.THRESH_BINARY)[1]
        th = cv2.erode(th, cv2.getStructuringElement(cv2.MORPH_ELLIPSE, (3, 3)), iterations=2)
        dilated = cv2.dilate(th, cv2.getStructuringElement(cv2.MORPH_ELLIPSE, (8, 3)), iterations=2)        # 获取所有检测框
        image, contours, hier = cv2.findContours(dilated, cv2.RETR_EXTERNAL, cv2.CHAIN_APPROX_SIMPLE)        for c in contours:            # 获取矩形框边界坐标
            x, y, w, h = cv2.boundingRect(c)            # 计算矩形框的面积
            area = cv2.contourArea(c)            if 500 < area < 3000:
                cv2.rectangle(frame, (x, y), (x + w, y + h), (0, 255, 0), 2)

        cv2.imshow("detection", frame)
        cv2.imshow("back", dilated)        if cv2.waitKey(110) & 0xff == 27:            break
    camera.release()if __name__ == '__main__':
    video = 'person.avi'
    detect_video(video)
效果:
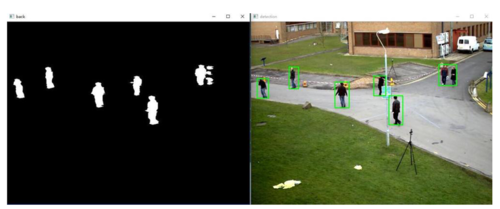
detect.jpg
作者:洛荷
链接:https://www.jianshu.com/p/12533816eddf


 随时随地看视频


