本节主要内容:
1、nacos安装与介绍
2、xxl-job-executor服务注册到nacos
3、创建remote-module服务并将其注册到nacos
4、xxl-job-executor服务通过openfeign远程调用remote-module服务
流程图

一、nacos安装与介绍
1.1 nacos既是一个注册中心也是一个配置中心,相当于eureka+Apollo的组合(eureka-注册中心,Apollo-配置中心)
1.2 nacos官网:https://nacos.io/zh-cn/index.html
1.3 安装(本次例子讲解时在windows环境下,linux安装请查看官网文档)
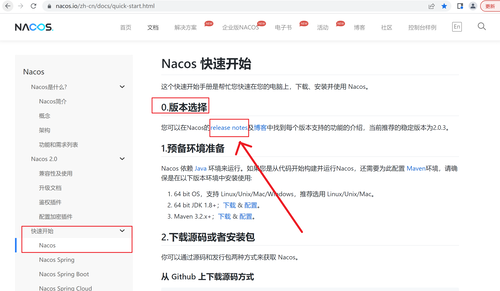
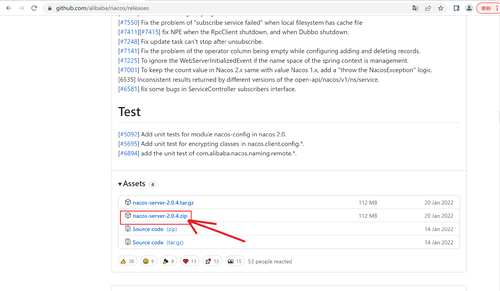
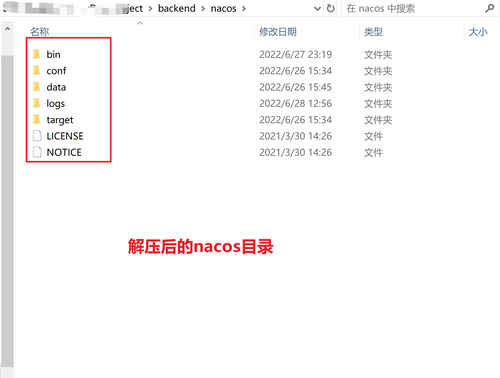
1.3.1 文档地址 https://nacos.io/zh-cn/docs/quick-start.htmlrelease notes 选择快速开始->nacos->版本选择->release notes-> 选择nacos-server-2.0.4版本下载到本地(稳定版)->解压zip包
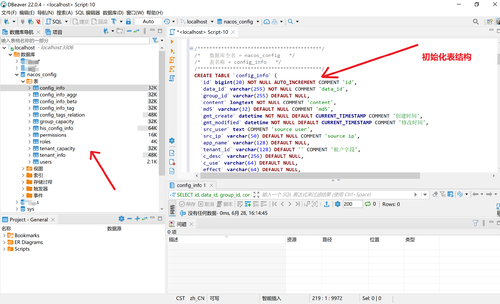
1.3.2 初始化数据库表结构
nacos目录->conf目录->nacos-mysql.sql->创建表结构
1.3.3 修改数据库连接配置
打开nacos目录->conf目录->application.properties文件
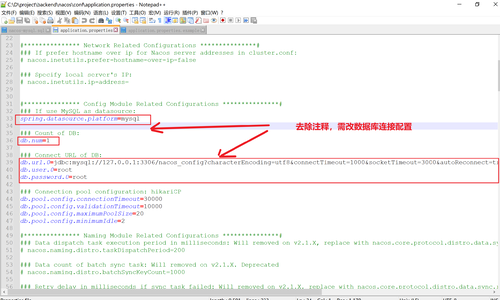
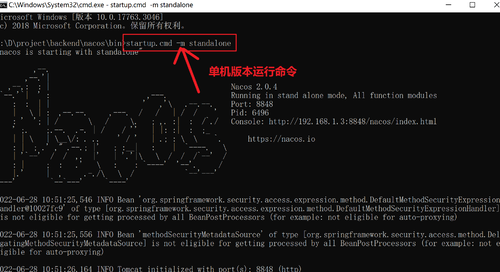
1.3.4 启动nacos
startup.cmd -m standalone
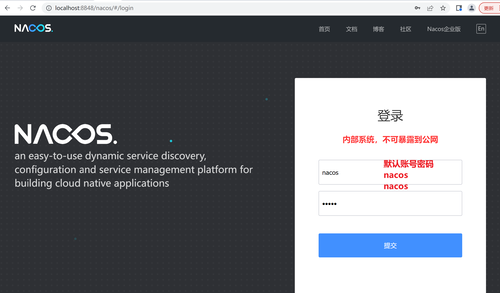
1.3.5 通过浏览器访问nacos
地址:http://localhost:8848/nacos/#/login
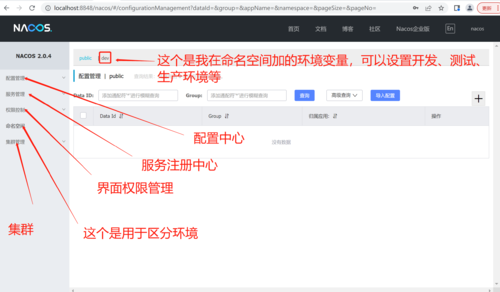
二、xxl-job-executor服务注册到nacos
2.1 添加依赖
在外层的pom.xml添加依赖管理
<dependencyManagement>
   <dependencies>
      <dependency>
         <groupId>org.springframework.cloud</groupId>
         <artifactId>spring-cloud-dependencies</artifactId>
         <version>2021.0.3</version>
         <type>pom</type>
         <scope>import</scope>
      </dependency>
      <dependency>
         <groupId>com.alibaba.cloud</groupId>
         <artifactId>spring-cloud-alibaba-dependencies</artifactId>
         <version>2021.0.1.0</version>
         <type>pom</type>
         <scope>import</scope>
      </dependency>
      <dependency>
         <groupId>org.springframework.boot</groupId>
         <artifactId>spring-boot-starter-parent</artifactId>
         <version>${spring-boot.version}</version>
         <type>pom</type>
         <scope>import</scope>
      </dependency>
   </dependencies>
</dependencyManagement> 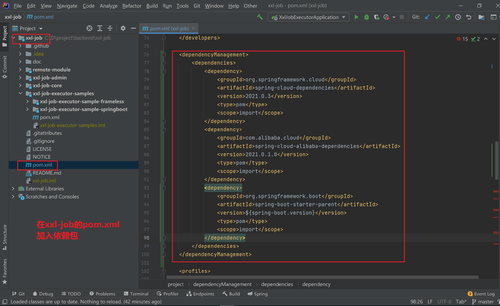
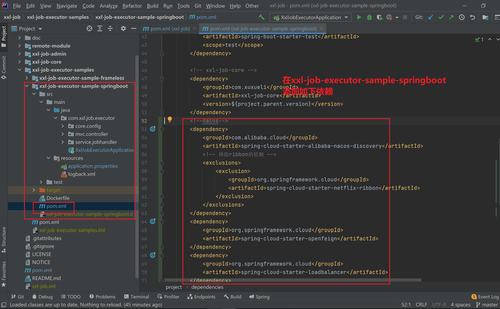
在executor模块加入nacos依赖
<!--nacos-->
<dependency>
    <groupId>com.alibaba.cloud</groupId>
    <artifactId>spring-cloud-starter-alibaba-nacos-discovery</artifactId>
    <!-- 排除ribbon的依赖 -->
    <exclusions>
        <exclusion>
            <groupId>org.springframework.cloud</groupId>
            <artifactId>spring-cloud-starter-netflix-ribbon</artifactId>
        </exclusion>
    </exclusions>
</dependency>
<dependency>
    <groupId>org.springframework.cloud</groupId>
    <artifactId>spring-cloud-starter-openfeign</artifactId>
</dependency>
<dependency>
    <groupId>org.springframework.cloud</groupId>
    <artifactId>spring-cloud-starter-loadbalancer</artifactId>
</dependency>
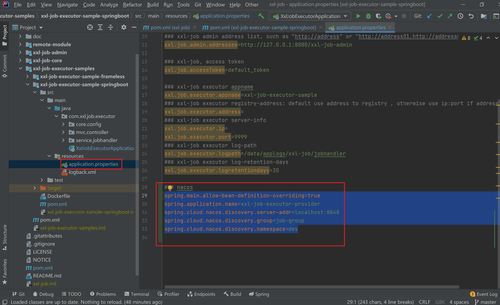
2.2 添加nacos配置文件
spring.main.allow-bean-definition-overriding=true
spring.application.name=xxl-job-executor-provider
spring.cloud.nacos.discovery.server-addr=localhost:8848
spring.cloud.nacos.discovery.group=job-group
spring.cloud.nacos.discovery.namespace=dev
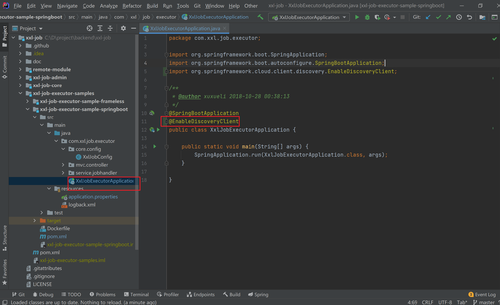
在启动类增加nacos服务注册与发现注解@EnableDiscoveryClient
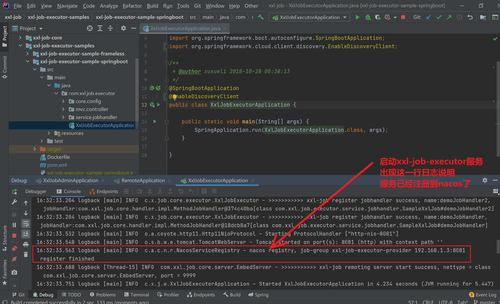
启动服务,出现nacos registry日志打印信息,说明服务已经注册到nacos了
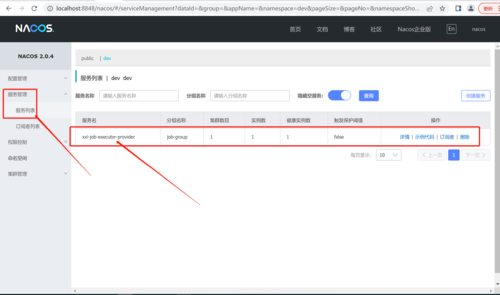
查看nacos服务注册列表
三、创建remote-module服务并将其注册到nacos
3.1 创建模块
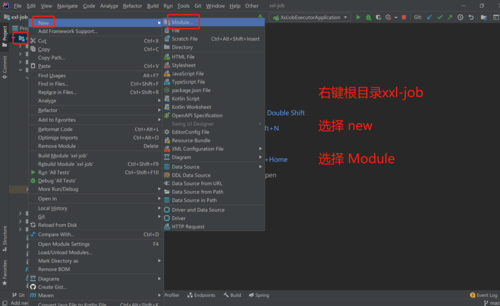
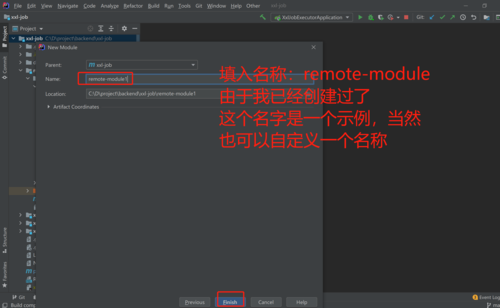
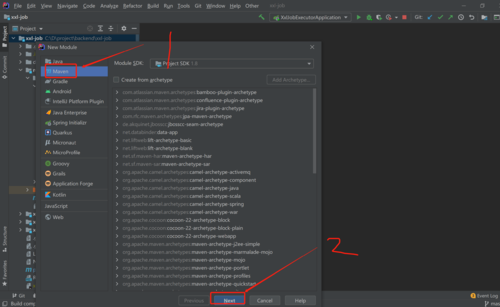
在根目录xxl-job右键->new->Module->选择maven 下一步->填写模块名称->完成即可。
3.2 添加依赖
在新建的模块pom.xml文件加入以下依赖配置
<dependencies>
    <!-- starter-web:spring-webmvc + autoconfigure + logback + yaml + tomcat -->
    <dependency>
        <groupId>org.springframework.boot</groupId>
        <artifactId>spring-boot-starter-web</artifactId>
    </dependency>
    <!--nacos-->
    <dependency>
        <groupId>com.alibaba.cloud</groupId>
        <artifactId>spring-cloud-starter-alibaba-nacos-discovery</artifactId>
        <!-- 排除ribbon的依赖 -->
        <exclusions>
            <exclusion>
                <groupId>org.springframework.cloud</groupId>
                <artifactId>spring-cloud-starter-netflix-ribbon</artifactId>
            </exclusion>
        </exclusions>
    </dependency>

    <dependency>
        <groupId>org.springframework.cloud</groupId>
        <artifactId>spring-cloud-starter-bootstrap</artifactId>
    </dependency>
    <dependency>
        <groupId>org.springframework.cloud</groupId>
        <artifactId>spring-cloud-starter-openfeign</artifactId>
    </dependency>
</dependencies>


<build>
    <plugins>
        <plugin>
            <groupId>org.apache.maven.plugins</groupId>
            <artifactId>maven-compiler-plugin</artifactId>
            <version>3.8.0</version>
            <configuration>
                <source>1.8</source>
                <target>1.8</target>
            </configuration>
        </plugin>
        <plugin>
            <groupId>org.springframework.boot</groupId>
            <artifactId>spring-boot-maven-plugin</artifactId>
        </plugin>
    </plugins>
</build>
3.3 创建目录文件和启动类
3.3.1 创建包目录
com.remote.module
3.2.2 在包内创建启动类
package com.remote.module;

import org.springframework.boot.SpringApplication;
import org.springframework.boot.autoconfigure.SpringBootApplication;
import org.springframework.cloud.client.discovery.EnableDiscoveryClient;
import org.springframework.cloud.openfeign.EnableFeignClients;

@SpringBootApplication
@EnableDiscoveryClient
@EnableFeignClients(basePackages = "com.remote.module.feign")
public class RemoteApplication {

    public static void main(String[] args) {
        SpringApplication.run(RemoteApplication.class);
    }
}
3.3.2 创建controller测试类
创建controller包,然后创建测试类TestController,内容如下:
package com.remote.module.controller;

import com.remote.module.dto.TestDto;
import org.springframework.web.bind.annotation.*;

@RestController
@RequestMapping(value = "/v1/user/")
public class TestController {


    @PostMapping(value = "/test")
    public String insert(@RequestBody TestDto testDto){
        System.out.println("111111111111 "+ testDto.getName());
        return "";
    }
}
3.3.2 创建一个dto实体类
package com.remote.module.dto;

import java.io.Serializable;

/**
 *
 */
public class TestDto implements Serializable {

    private String name;

    public String getName() {
        return name;
    }

    public void setName(String name) {
        this.name = name;
    }
}
3.3.3 创建Fegin接口和熔断器
// feign接口类
package com.remote.module.feign;

import com.remote.module.dto.TestDto;
import org.springframework.cloud.openfeign.FeignClient;
import org.springframework.stereotype.Component;
import org.springframework.web.bind.annotation.RequestMapping;
import org.springframework.web.bind.annotation.RequestMethod;

@Component
@FeignClient(name = "visdom-remote-provider", fallbackFactory = FeignServerImpl.class )
public interface FeignServer {

    @RequestMapping(value = "/v1/user/test", method = RequestMethod.POST)
    String test(TestDto body);

}
// 熔断器类
package com.remote.module.feign;
import com.remote.module.dto.TestDto;
import org.springframework.cloud.openfeign.FallbackFactory;
import org.springframework.stereotype.Component;
@Component
public class FeignServerImpl implements FallbackFactory<FeignServer> {
@Override
public FeignServer create(Throwable cause) {
return new FeignServer() {
@Override
public String test(TestDto body) {
System.out.println("fail--------------");
return null;
}
};
}
} 3.4 添加nacos配置
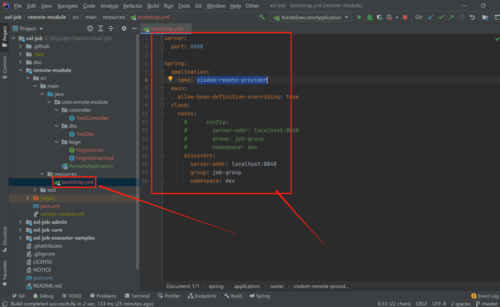
在resource目录下创建bootstrap.yml文件
server:
  port: 8088

spring:
  application:
    name: visdom-remote-provider
  main:
    allow-bean-definition-overriding: true
  cloud:
    nacos:
      #      config:
      #        server-addr: localhost:8848
      #        group: job-group
      #        namespace: dev
      discovery:
        server-addr: localhost:8848
        group: job-group
        namespace: dev
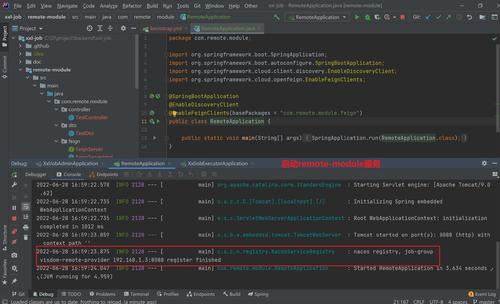
3.4 启动remote-module服务
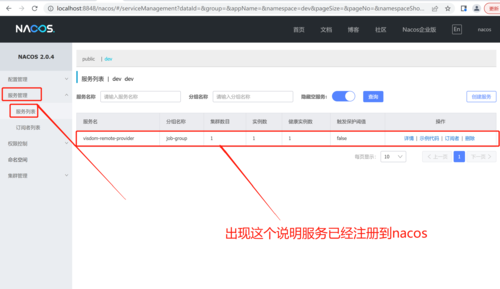
3.5 查看nacos控制面板
四、xxl-job-executor服务通过openfeign远程调用remote-module服务
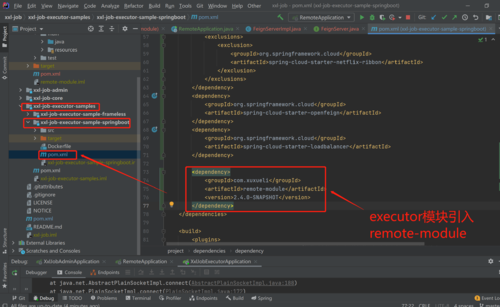
4.1 在job-executor引入remote-module依赖
<dependency>
    <groupId>com.xuxueli</groupId>
    <artifactId>remote-module</artifactId>
    <version>2.4.0-SNAPSHOT</version>
</dependency>
4.2 远程调用remote-module接口代码
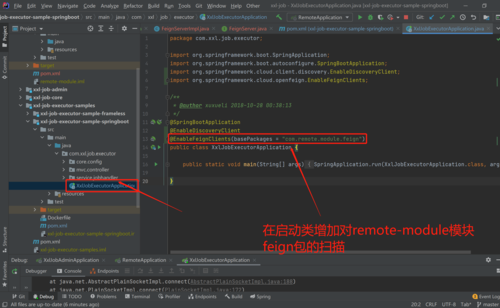
4.2.1 在启动类增加feign扫描包
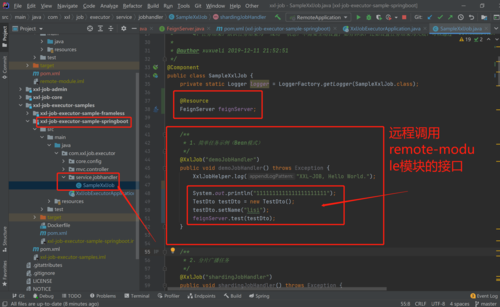
4.2.2 编写远程调用代码
4.5 测试代码
4.5.1 启动xxl-job-admin服务
4.5.2 启动xxl-job-executor服务
4.5.3 启动remote-module服务
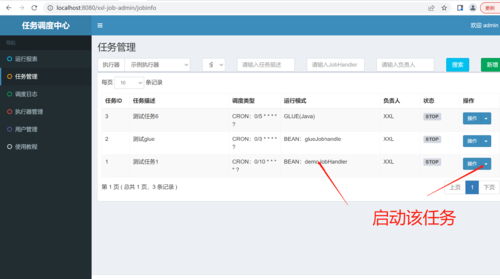
4.5.4 登陆xxl-job控制面板,启动任务
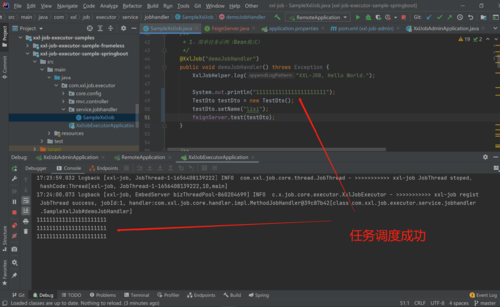
4.5.5 查看xxl-job-executor任务调度的代码日志
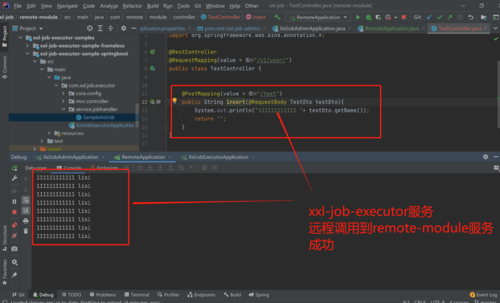
4.5.6 查看你remote-module模块远程调用的日志打印
预告下一篇文章内容:
1、修改xxl-job-admin源代码,对外提供接口服务;
2、remote-module服务远程调用xxl-job-admin api实现动态生成任务;


 随时随地看视频


热门评论
-

weixin_慕先生84826562022-12-13 0
查看全部评论一步一步走来都完成了,教程很详细谢谢博主,不过我刚才回头发现,我们集成了nacos之后,xxl-job里面的机器地址怎么填写啊,能填写服务在注册中心的名字吗?