这是我们的完整的React + GraphQL教程系列的第8部分。 每个部分都是独立的,并且引入了一个新的关键概念,因此您可以单独执行每个部分,也可以按照整个系列学习 - 当然这取决于您!
以下是我们迄今为止所涉及的部分:
在第6部分和第7部分中,我们介绍了如何向服务器添加订阅以及在客户端中热修改服务器。 在本部分中,我们将添加分页,以便您的服务器可以以更小的块发送数据,而不是一次发送所有内容。 到最后,你会知道以下部分:
使用游标和限制来控制从服务器返回的数据量
使用Apollo客户端获取更多功能
响应按钮点击实现基于光标的分页
首先,让我们克隆git仓库并安装依赖关系。 即使您完成了教程的前几部分,我们也建议您重新克隆存储库,因为我们已经对上一步中的应用程序的文件结构进行了一些有用的更改。
git clone https://github.com/apollographql/graphql-tutorial.gitcd graphql-tutorialgit checkout t8-startcd server && npm install && cd ../client && npm install && cd ..
为了确保它的工作,让我们启动服务器和客户端,每个都在一个单独的终端中:
cd servernpm start
在另一个终端中输入:
cd clientnpm start
当您将浏览器导航到http://localhost:3000 时,您应该会看到我们的消息应用程序的主页。 当你点击“faker”频道时,你会看到一长串随机生成的消息。 (我们需要为这一步生成一个长列表,以演示如何避免一次加载它。)

与其预先加载所有这些消息,我们可以实现分页并且一次只加载一页的价值数据。
更新架构
我们首先对服务器的模式进行一些更改,以公开一个API来加载更小的项目块。
//server/src/schema.js
const typeDefs = type Channel { id: ID! # "!" denotes a required field name: String messages: [Message] # messages will be returned in a MessageFeed object wrapper messageFeed(cursor: String): MessageFeed }input MessageInput{ channelId: ID! text: String}# ...
type Message { id: ID! text: String createdAt: Int}type MessageFeed { # cursor specifies the place in the list where we left off cursor: String! # this is a chunk of messages to be returned messages: [Message]!}除了返回正确的消息块之外,messageFeed类型还返回一个游标,该游标告诉客户端我们在列表中的位置。 然后,当我们想要加载更多的消息时,我们可以将这个值传递回服务器,告诉它接下来给我们的消息。
分页中的游标是什么?
游标是指向我们在数据中遗漏的位置的指针。 更具体地说,游标是可以保存客户端可以传递给服务器的任何值的变量,以帮助它找到应该开始返回数据的点。 不管你使用什么样的价值,事实上,从客户的角度来看,它应该是不透明的。
在这个例子中,我们将使用时间戳作为游标。 这比指向数组中的实际消息ID或消息索引要好得多。 如果我们使用ID或索引,则删除和插入的消息可能会导致问题:我们可能无法找到该特定ID,或者索引现在可能指向不同的消息。 在我们的网站阅读更多 previous article about understanding pagination_._
接下来,让我们为服务器上的解析器文件中的messageFeed添加一个新的解析器。 让我们在查询解析器下添加加粗的代码:
  Query: {    channels: () => {      return channels;
},
channel: (root, { id }) => { return getChannel(id);
}, }, // The new resolvers are under the Channel type Channel: { messageFeed: (channel, { cursor }) => { // The cursor passed in by the client will be an // integer timestamp. If no cursor is passed in, // set the cursor equal to the time at which the // last message in the channel was created. if (!cursor) { cursor = channel.messages[channel.messages.length - 1].createdAt;} cursor = parseInt(cursor);// limit is the number of messages we will return. // We could pass it in as an argument but in this // case let's use a static value. const limit = 10;const newestMessageIndex = channel.messages.findIndex( message => message.createdAt === cursor ); // find index of message created at time held in cursor
      // We need to return a new cursor to the client so that it      // can find the next page. Let's set newCursor to the      // createdAt time of the last message in this messageFeed:      const newCursor =        channel.messages[newestMessageIndex - limit].createdAt;const messageFeed = {        messages: channel.messages.slice(          newestMessageIndex - limit,          newestMessageIndex        ),        cursor: newCursor,      };return messageFeed;
},  },
请注意,如果没有将光标传递给查询,我们将光标设置为等于创建最近消息的时间,并且服务器将返回最近的消息。 这样,客户端可以轻松查询最初的页面加载时的最新消息。 我们还使用10的限制来指定要获取的消息数量,并相应地更新由messageFeed返回的游标,以便客户端稍后可以获取下一页的项目。
Test it out
此时,您应该能够测试您的服务器以确保上述所有代码都正确运行。 在浏览器中导航到 http://localhost:4000/graphiql ,然后运行以下查询:

您会看到我们现在可以通过messageFeed包装器检索邮件,该邮件还向我们提供了有关下一页的光标的信息,而且我们一次只能获得10个项目,而不是整个列表。 如果我们通过光标,我们得到了一个参数,我们得到了10个消息的新列表,它们代表我们离开的地方:

现在,让我们使用我们新发现的功能,通过加载正在显示的消息来提高客户端的效率。
更新客户端
在src / components / ChannelDetails.js(在客户端代码中),将频道详细信息查询替换为以下查询,其中包括新的messageFeed字段和一些关于分页的信息:
export const channelDetailsQuery = gql query ChannelDetailsQuery($channelId: ID!, $cursor: String) { channel(id: $channelId) { id name messageFeed(cursor: $cursor) @connection(key: "messageFeed") { cursor messages { id text } } } };由于我们将在UI中显示的消息现在嵌套在messageFeed下,我们还需要更新我们的ChannelDetails组件。 对粗体渲染函数进行粗体更改以访问messageFeed属性:
return ( {channel.name} );更新后的查询现在一次只能返回10条消息,而不是返回通道中的所有消息。
更新我们的变异和订阅代码
我们现在加载嵌套在messageFeed字段下的消息,所以这些消息将存储在Apollo客户端缓存中。 您可以通过打开Chrome开发工具并检查商店选项卡来确认:
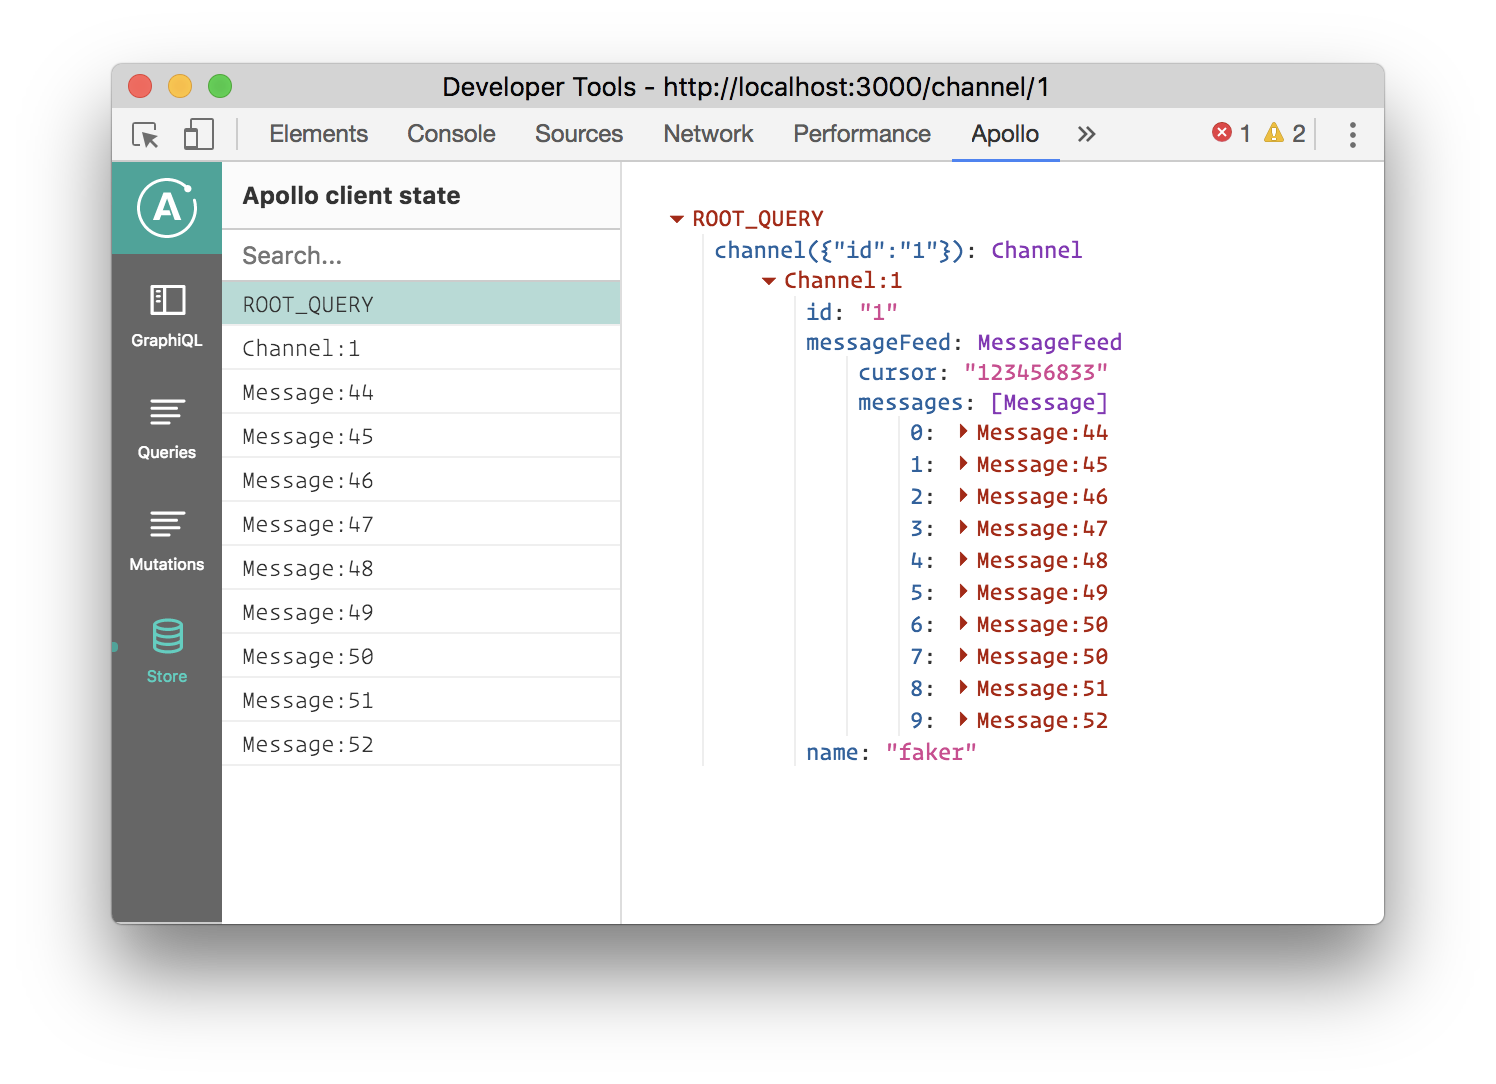
因此,我们需要更新我们的订阅和突变代码,该代码更新该列表以注意该嵌套,基本上用channel.messageFeed.messages替换channel.messages。
In src/components/AddMessage.js:
// don’t double add the messageif (!data.channel.messageFeed.messages.find((msg) => msg.id === addMessage.id)) { // Add our Message from the mutation to the end. data.channel.messageFeed.messages.push(addMessage);}Similarly, in src/components/ChannelDetails.js:
// don’t double add the messageif (!prev.channel.messageFeed.messages.find((msg) => msg.id === newMessage.id)) { return Object.assign({}, prev, { channel: Object.assign({}, prev.channel, { messageFeed: { messages: […prev.channel.messageFeed.messages, newMessage], } }) });} else { return prev;}现在,进入用户界面,在相同频道中打开两个制表符,然后测试添加消息。 它应该通过突变支持和订阅在屏幕和其他屏幕上正确显示。
如果你被困在这一步,请检查[第8步开始和结束之间的差异](https://github.com/apollographql/graphql-tutorial/compare/t8-start...t8-end) 到 查看所有必要的更改。
连接指令
_我们还在查询中将_connection _directive添加到 _messageFeed _field。 这是一个专门的客户端指令,用于控制该字段下的数据如何缓存在Apollo客户端存储中。 由于处理分页的字段通常会有一些额外的参数,如_cursor _或limit,我们要确保我们有一个干净的缓存键,不包含这些参数._
_I在这种情况下,我们指定从该字段返回的数据应该存储在key_messageFeed_下,这使得从添加新消息的突变中添加到该列表更容易。 如果我们没有在该字段上使用_connection_directive,那么我们的mutation _update_function将需要重现最初传递给该字段的参数的确切集合._
现在我们准备添加fetchMore函数,这是我们在Apollo客户端添加分页的主要方式。 我们将定义一个名为loadOlderMessages的函数,可以通过传递给我们ChannelDetails组件的道具来访问它。 该函数将使用Apollo Client附加到数据通道的fetchMore方法。
让我们将粗体代码添加到选项字段旁的channelDetailsQuery容器中:
export default (graphql(channelDetailsQuery, { options: (props) => ({ variables: { channelId: props.match.params.channelId, }, }), props: (props) => { return { data: props.data, loadOlderMessages: () => { return props.data.fetchMore({ variables: { channelId: props.data.channel.id, cursor: props.data.channel.messageFeed.cursor, }, updateQuery(previousResult, { fetchMoreResult }) { const prevMessageFeed = previousResult.channel.messageFeed;const newMessageFeed = fetchMoreResult.channel.messageFeed; const newChannelData = {...previousResult.channel, messageFeed: { messages: [ ...newMessageFeed.messages, ...prevMessageFeed.messages ], cursor: newMessageFeed.cursor } } const newData = { ...previousResult, channel: newChannelData };return newData;} });} };}})(ChannelDetails));
loadOlderMessages函数使用消息所属通道的id和第一个channelDetailsQuery返回的游标调用fetchMore。 fetchMore函数将默认使用原始查询(在本例中为channelDetailsQuery),所以我们只传入新变量。 请注意,我们实际上需要在loadOlderMessages函数中指定游标,因为我们不再需要最近的消息。 一旦从服务器返回新数据,我们使用Apollo Client的updateQuery函数将新数据与现有数据合并,这将导致您的UI组件的扩展列表重新呈现。 作为最后一步,让我们在ChannelDetails组件中添加一个'Load Old Messages'按钮。 用粗体代码更新渲染功能:
return ( Load Older Messages {channel.name} );现在,如果您访问http://localhost:3000/channel/1, 然后单击“Load Older Messages”按钮, 出现在屏幕的顶部,并且已经显示的消息将被压入列表中! 并且,您已经实现了基于光标的分页。
总结
恭喜,您已经在本系列教程的第8部分结束了! 您已经学会了如何使用游标,限制和fetchMore函数更新您的服务器和客户端,并在您的应用中实现基于光标的分页。 随着更多的变化像auth,我们将在后面的教程中介绍,您的应用程序将准备好实际使用!
Thanks to my mentor Sashko Stubailo and fellow intern Klaire Tan for helping me understand pagination and write this tutorial!