说明:
本文使用的是ubuntu系统,目前已在如下版本测试:
ubuntu-16.04.5-desktop 32
ubuntu-18.04.5-desktop-amd64
一、系统安装
u启动盘的制作及系统的安装过程参考以下网站介绍:
https://www.linuxidc.com/Linux/2016-04/130520.htm

二、硬盘挂载及环境配置
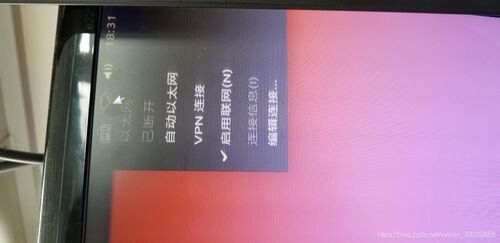
1、ip配置
a、 点击下图位置选择编辑连接
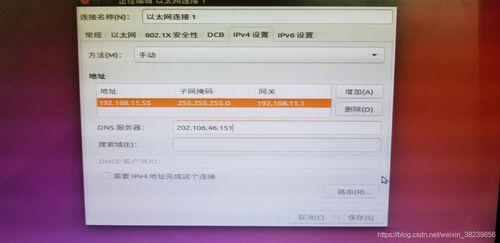
b、 点击新增->选择以太网->选择IPV4设置->方式选择手动->点击增加输入ip,子网掩码和网关,可以添加多个->填写DNS服务器地址以便使用网络(配置第二个ip后重启一下
或者使用下面方法:
修改/etc/netplan路径下的*.Yaml文件
vi 01-network-manager-all.yaml
加入如下内容:
network:
ethernets:
enp7s0f0:
addresses:
- 192.168.11.83/24
- 192.168.88.83/24
dhcp4: false
gateway4: 192.168.11.1
nameservers:
addresses:
- 202.106.46.151
search: []
2、修改root密码
因为系统刚安装root的密码是随机的,这里需要修改一下root的密码才可以切换到root用户,使用以下命令修改root密码:
sudo passwd root
3、关闭系统更新检查
系统设置->软件和更新->更新->自动检查更新选择从不
4、硬盘挂载
获取硬盘的UUID
root@localhost:/home# sudo blkid
/dev/sda1: UUID="336aa4b1-6a94-4bad-82c0-d28df2dc5eb2" TYPE="ext4" PARTUUID="ab408481-01"
/dev/sda5: UUID="f6cf0bfb-ce5b-403d-9ba2-5897a4b4270f" TYPE="swap" PARTUUID="ab408481-05"
/dev/sdb: UUID=" 98551d9d-3cb0-47d6-949e-4bc6ac0b5808 " TYPE="ext4"
编辑/etc/fstab文件
# /etc/fstab: static file system information.
#
# Use 'blkid' to print the universally unique identifier for a
# device; this may be used with UUID= as a more robust way to name devices
# that works even if disks are added and removed. See fstab(5).
#
# <file system> <mount point> <type> <options> <dump> <pass>
# / was on /dev/sda1 during installation
UUID=336aa4b1-6a94-4bad-82c0-d28df2dc5eb2 / ext4 errors=remount-ro 0 1
# swap was on /dev/sda5 during installation
UUID=f6cf0bfb-ce5b-403d-9ba2-5897a4b4270f none swap sw 0 0
UUID=98551d9d-3cb0-47d6-949e-4bc6ac0b5808 /home/work ext4 defaults 0 0
注意:在挂载的时候在 /home下另外创建了一个目录用于挂载,如果将硬盘直接挂载在某个用户的路径下会导致该用户无法通过桌面进行登录,现象为反复循环登录无法进入到系统中,但是使用命令行可以登陆。并且将该文件下的所有配置文件拷贝到硬盘中然后挂载现象一样,无法解决该问题,所以这里使用另建目录进行挂载的方式。
5、关闭防火墙
关闭: sudo ufw disable
查询防火墙状态: sudo ufw status
防火墙的其他操作可以访问: https://www.cnblogs.com/kluan/p/5993767.html
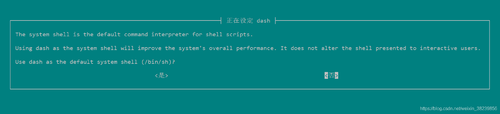
6、改变默认的shell为bash
因为ubuntu默认的shell是dash说以在执行bash的相关脚本的时候会无法正常使用,所以需要改变默认的shell。
root@localhost:/home# dpkg-reconfigure dash
出现下图界面选择否
7、开启root账户登录
sudo vim /usr/share/lightdm/lightdm.conf.d/50-ubuntu.conf
添加内容:
greeter-show-manual-login=true
保存重启系统
在通过root账户登录的时候会提示“读取 root profile时发现错误”,解决方法如下:
vi m /root/.profile
将 mesg n 替换成 tty -s && mesg n
保存重启即可
登录的时候在登录界面选择中间的选项输入用户名和密码进行登录
8、修改命令提示符当前路径的显示方式
cp ~/.bashrc ~/.bashrc-back
vim ~/.bashrc
最后加入:
1. 命令行提示符完全显示完整的工作目录名称:
export PS1= ’ [\u@\h $PWD]\$ ‘
2. 命令行提示符只列出最后一个目录:
export PS1= ’ [\u@\h \W]\$ ‘
3. 命令行提示符显示完整工作目录,当前用户目录会以 ~代替:
export PS1= ’ [\u@\h \w]\$ ‘
修改完成后,执行: source /etc/profile 使配置生效即可
三、软件安装
1、vim安装
root@localhost:/home# sudo apt-get install vim
2、安装ssh
安装: apt-get install ssh
修改配置: vi m /etc/ssh/sshd_config
把PasswordAuthentication设成yes(这里是允许使用密码进行验证登陆,否则需要key文件才能登陆)
把 PermitRootLogin prohibit-password改为 PermitRootLogin yes(这里是允许root使用密码登陆)
问题解决参考网址: https://blog.csdn.net/tangyongjiang/article/details/6045176
重启服务: service ssh restart
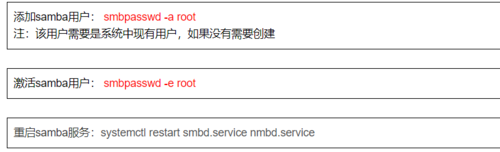
3、安装及配置samba
安装: sudo apt-get install samba
修改配置: Vim /etc/samba/smb.conf
在 Global Settings 栏目下添加:
#======================= Global Settings =======================
[global]
## Browsing/Identification ###
# Change this to the workgroup/NT-domain name your Samba server will part of
workgroup = WORKGROUP
在 share Defination 栏目最后添加:
[home]
comment = Home Directory
path = /home
public = yes
readonly = yes
write list = root
valid usres = root
guest ok = no
[root]
path = /home/work
writeable = yes

参考网址:
https://www.cnblogs.com/zhaopengcheng/p/5481048.html
4、nfs安装
安装: sudo apt install nfs-kernel-server
修改配置文件: sudo vi m /etc/exports 在文件最后添加:
/home *(rw,sync,no_root_squash)
/mnt *(rw,sync,no_root_squash)
/nfsroot *(rw,sync,no_root_squash)
/home/work *(rw,sync,no_root_squash)
重启nfs服务: sudo service nfs-kernel-server restart
5、安装svn
sudo apt-get install subversion
6、安装autoconf
sudo apt-get install autoconf
查看安装版本: autoconf -V
7、安装automake
sudo apt-get install automake
查看安装版本: automake --version
8、安装libtool
sudo apt-get install libtool
9、安装make
sudo apt-get install make
版本查询: make --version
10、安装cmake
sudo apt-get install cmake
版本查询: cmake --version
11、安装git
sudo apt-get git
12、安装ncurses
Make menuconfig的时候会使用到该工具显示图形界面
安装: sudo apt-get install libncurses5-dev
————————————————