
我的博客:兰陵笑笑生,欢迎浏览博客!
上一章 SpringCloud基础教程(一)-微服务与springCloud当中,我们介绍了什么是微服务的架构,以及微服务架构的常用组件。本章将继续探索SpringClud当中的服务发现,Eureka。
前言
Eureka 是Netflix开源的一款提供服务注册和发现的产品,SpringCloud集成并包装了它。通俗的讲,Eureka就是一个服务中心,是将所有的可以提供的服务都注册到这里去管理。调用者需要的时候就去注册中心获取,然后在发起调用。
所以,服务中心是非常的重要的,一旦宕机,会影响全部的服务,为此,我们需要搭建Eureka的集群。
一 、搭建Eureka的服务端
新建Maven项目,在pom.xml文件中引入org.springframework.cloud的依赖,import表示需要时在导入,此处的SpringCloud版本是Greenwich.SR3,早期的eureka依赖和当前不大一样,artifactId 是spring-cloud-starter-eureka-server。这里用的是发行版比较新的,SpringBoot使用的是2.1.1版本,如下:
 <dependencies>
    <dependency>
        <groupId>org.springframework.cloud</groupId>
        <artifactId>spring-cloud-starter-netflix-eureka-server</artifactId>
    </dependency>
 </dependencies>

<dependencyManagement>
        <dependencies>
            <dependency>
                <groupId>org.springframework.cloud</groupId>
                <artifactId>spring-cloud-dependencies</artifactId>
                <version>Greenwich.SR3</version>
                <type>pom</type>
                <scope>import</scope>
            </dependency>
        </dependencies>
</dependencyManagement>
新建 EurekaServerApplication.java类,添加@EnableEurekaServer注解:
import org.springframework.boot.SpringApplication;
import org.springframework.boot.autoconfigure.SpringBootApplication;
import org.springframework.cloud.netflix.eureka.server.EnableEurekaServer;

@SpringBootApplication
@EnableEurekaServer
public class EurekaServerApplication {

    public static void main(String[] args) {
        SpringApplication.run(EurekaServerApplication.class, args);
    }

}
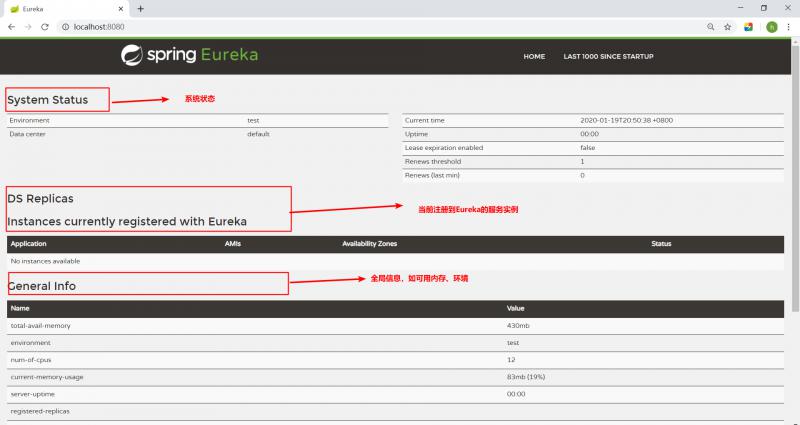
启动程序后,打开http://localhost:8080/ 就可以看到如下图的监控页面。
服务端application.yml配置文件
#eureka 服务端
spring:
  application:
    name: eureka-server

server:
  port: 8080

eureka:
  instance:
    hostname: 192.168.0.102 #服务端的实例名称
  client:
    service-url:
       # 设置与注册中心交互的url ,
      defaultZone: http://${eureka.instance.hostname}:${server.port}/eureka/
       #false表示自己就是服务中心
    fetch-registry: false
    #不注册自己到注册中心
    register-with-eureka: false
二 、Eureka服务提供方
新建maven项目为服务提供方,并在pom.xml中添加依赖
 <!--springBoot的核心文件-->
    <dependency>
        <groupId>org.springframework.boot</groupId>
        <artifactId>spring-boot-starter</artifactId>
    </dependency>
    <!--web依赖-->
    <dependency>
        <groupId>org.springframework.boot</groupId>
        <artifactId>spring-boot-starter-web</artifactId>
    </dependency>
    <dependency>
        <groupId>org.springframework.cloud</groupId>
        <artifactId>spring-cloud-starter-netflix-eureka-server</artifactId>
    </dependency>
新建ServerProviderApplication.java启动类和 ProviderController.java控制器
import org.springframework.boot.SpringApplication;
import org.springframework.boot.autoconfigure.SpringBootApplication;
import org.springframework.cloud.netflix.eureka.EnableEurekaClient;

@SpringBootApplication
@EnableEurekaClient
public class ServerProviderApplication {

    public static void main(String[] args) {
        SpringApplication.run(ServerProviderApplication.class, args);
    }

}
控制器
@RestController
public class ProviderController {

    @RequestMapping("/sayHello")
    public String sayHello(String name) {
        return "hello!,"+name;
    }
}
在application.yml配置eureka的服务地址和自身的服务名称
#服务提供方
spring:
  application:
    name: server-provider

server:
  port: 9001

eureka:
  instance:
    hostname: 192.168.0.102 #eureka服务端的实例名称
  client:
    service-url:
       # 与注册中心交互的url
      defaultZone: http://${eureka.instance.hostname}:8080/eureka/
启动ServerProviderApplication后,再去查看Eureka的监控页面,应该可以看到服务已经注册到Eureka了

三、Eureka服务调用方
新建maven项目,为服务调用方,在pom.xml文件中添加依赖
  <dependencies>
        <!--springBoot的核心文件-->
        <dependency>
            <groupId>org.springframework.boot</groupId>
            <artifactId>spring-boot-starter</artifactId>
        </dependency>
        <!--web依赖-->
        <dependency>
            <groupId>org.springframework.boot</groupId>
            <artifactId>spring-boot-starter-web</artifactId>
        </dependency>
        <dependency>
            <groupId>org.springframework.cloud</groupId>
            <artifactId>spring-cloud-starter-netflix-eureka-client</artifactId>
        </dependency>

    </dependencies>
新建ServerConsumerApplication.java启动类,添加@EnableEurekaClient注解:
import org.springframework.boot.SpringApplication;
import org.springframework.boot.autoconfigure.SpringBootApplication;
import org.springframework.cloud.netflix.eureka.EnableEurekaClient;

@SpringBootApplication
@EnableEurekaClient
public class ServerConsumerApplication {

    public static void main(String[] args) {
        SpringApplication.run(ServerConsumerApplication.class, args);
    }

}
编写控制器,
import org.springframework.beans.factory.annotation.Autowired;
import org.springframework.cloud.client.ServiceInstance;
import org.springframework.cloud.client.discovery.DiscoveryClient;
import org.springframework.context.annotation.Bean;
import org.springframework.web.bind.annotation.RequestMapping;
import org.springframework.web.bind.annotation.RestController;
import org.springframework.web.client.RestTemplate;

import java.util.List;

@RestController
public class ConsumerController {

    @Bean
    public RestTemplate restTemplate() {
        return new RestTemplate();
    }

    @Autowired
    private DiscoveryClient discoveryClient;

    @Autowired
    RestTemplate restTemplate;

    @RequestMapping("/sayHello")
    public String sayHello(String name) {

         List<ServiceInstance> instances =
             discoveryClient.getInstances("server-provider");

        if (!instances.isEmpty()) {
             ServiceInstance serviceInstance = instances.get(0);
             String res = restTemplate.getForObject(
                 serviceInstance.getUri().toString()  + "/sayHello?name="
                 + name, String.class);
            return res;
        }
        return "failed";
    }

}
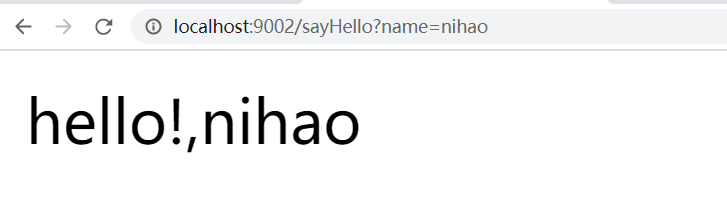
此时,启动调用方服务,我们通过HTTP请求调用/sayHello接口,就可以看到服务方从Eureka获取服务提供方的信息,并进行调用返回信息了。如下图:
四 、总结
这一篇文章简单的介绍了Eureka组件的使用,并结合示例搭建了服务提供方、调用方等服务。能够对Eureka注册中心进行初步的了解和使用。
以上就是本期的分享,你还可以关注本博客的#Spring Cloud基础教程!#
.以就是本期的分享,你还可以关注公众号: 程序员笑笑生,关注更多精彩内容!
本文由博客一文多发平台 OpenWrite 发布!


