
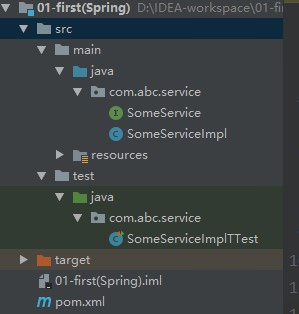
创建一个Maven的项目,我的项目结构如下:
在pom文件里写下需要导入的依赖:
    <?xml version="1.0" encoding="UTF-8"?>
    <project xmlns="http://maven.apache.org/POM/4.0.0"
         xmlns:xsi="http://www.w3.org/2001/XMLSchema-instance"
         xsi:schemaLocation="http://maven.apache.org/POM/4.0.0
         http://maven.apache.org/xsd/maven-4.0.0.xsd">
       <modelVersion>4.0.0</modelVersion>
       <groupId>com.abc</groupId>
       <artifactId>01-first(Spring)</artifactId>
       <version>1.0-SNAPSHOT</version>
       <build>
           <plugins>
               <plugin>
                   <groupId>org.apache.maven.plugins</groupId>
                   <artifactId>maven-compiler-plugin</artifactId>
                   <configuration>
                       <source>6</source>
                      <target>6</target>
                   </configuration>
               </plugin>
           </plugins>
       </build>
       <properties>
           <project.build.sourceEncoding>UTF-8</project.build.sourceEncoding>
           <maven.compiler.source>10</maven.compiler.source>
           <maven.compiler.target>10</maven.compiler.target>
           <spring.version>5.1.0.RELEASE</spring.version>
       </properties>
       <dependencies>
           <dependency>
               <groupId>org.springframework</groupId>
               <artifactId>spring-beans</artifactId>
               <version>${spring.version}</version>
           </dependency>
           <dependency>
               <groupId>org.springframework</groupId>
               <artifactId>spring-core</artifactId>
               <version>${spring.version}</version>
           </dependency>
           <dependency>
               <groupId>org.springframework</groupId>
               <artifactId>spring-context</artifactId>
               <version>${spring.version}</version>
           </dependency>
           <dependency>
               <groupId>org.springframework</groupId>
               <artifactId>spring-expression</artifactId>
               <version>${spring.version}</version>
           </dependency>
           <dependency>
               <groupId>org.springframework</groupId>
               <artifactId>spring-jcl</artifactId>
               <version>${spring.version}</version>
           </dependency>
           <dependency>
               <groupId>junit</groupId>
               <artifactId>junit</artifactId>
               <version>4.12</version>
               <scope>test</scope>
           </dependency>
       </dependencies>
       <build>
           <plugins>
               <plugin>
                   <artifactId>maven-compiler-plugin</artifactId>
                   <configuration>
                       <source>1.10</source>
                       <target>1.10</target>
                   </configuration>
               </plugin>
           </plugins>
       </build>
     </project>
在Java文件夹下新建package,在package包下新建接口及其实现类
接口:public interface SomeService { void doSome(); }
实现类:public class SomeServiceImpl implements SomeService { public SomeServiceImpl() { System.out.println("创建SomeServiceImpl对象"); } @Override public void doSome() { System.out.println("执行SomeServiceImpl里的doSome()方法"); } }在resources目录下新建
applicationContext.xml文件
我们需要在spring容器的配置文件中进行注册该Bean
spring使用的配置文件为xml文件,当然需要引入约束文件,一般将spring的配置文件命名为applicationContext.xml
 <?xml version="1.0" encoding="UTF-8"?>
     <beans xmlns="http://www.springframework.org/schema/beans"
            xmlns:xsi="http://www.w3.org/2001/XMLSchema-instance"
            xsi:schemaLocation="http://www.springframework.org/schema/beans
           http://www.springframework.org/schema/beans/spring-beans.xsd">
     <!--注册Servcie其造价于如下代码:   SomeServiceImpl someService = new SomeServiceImpl();
                其底层是通过反射机制创建的someService对象
        Object someService = Class.forName("com.abc.service.SomeServiceImpl").newInstance();-->
                <bean id="someService" class="com.abc.service.SomeServiceImpl"/>
 </beans>
spring的根元素是benas显然是注册Bean,子标签是Bean
注册:
<bean id="someService" class="com.abc.service.SomeServiceImpl"/>id属性为了唯一确定一个对象,class属性里边应写类全名
注册完毕后我们要在测试类中获取spring容器,而获取Spring容器有两种方式。
    package com.abc.service;    import org.junit.Test;    import org.springframework.context.ApplicationContext;    import org.springframework.context.support.ClassPathXmlApplicationContext;    import org.springframework.context.support.FileSystemXmlApplicationContext;    public class SomeServiceImplTTest {         // spring容器获取的两种方式
         @Test
         public void test01(){             //在类路径下加载Spring配置文件
             ApplicationContext ac = new ClassPathXmlApplicationContext("applicationContext.xml");             //在当前目录的根下加载该配置文件,路径应为文件实际存放的目录
                ApplicationContext ac2 = new FileSystemXmlApplicationContext
                       ("D:\\IDEA-workspace\\01-first(Spring)\\src\\main\\resources\\applicationContext.xml");
                System.out.println(ac2);
          }
        @Test
        public void test02() {             // 加载Spring配置文件,创建Spring容器对象
             ApplicationContext ac = new ClassPathXmlApplicationContext("applicationContext.xml");             //调用spring容器的getBean方法获取carImpl,方法参数为bean的id
             SomeService service = (SomeService) ac.getBean("SomeService");
             service.doSome();
            }
        }
Spring入门程序到此就结束了


