作者:xiaoyu
微信公众号:Python数据科学
知乎:python数据分析师

七夕礼物
一年一度的七夕节又到了,每年重复的过,花样各种有,很多男同胞又开始发愁了,该准备点什么呢?前一段时间非常火的电影 “西红市首富” 突然给了我点灵感,男主全城放烟花俘获了女主的芳心。没错!就是放烟花,而且要全城放。
可除了土豪,不是所有人都能在整个城市放烟花的。对于一个普通的不能再普通的我也只能想想了。虽然梦想很遥远,不过我还没放弃,我决定用Python来帮我实现一下这个愿望,毕竟Python是万能的。
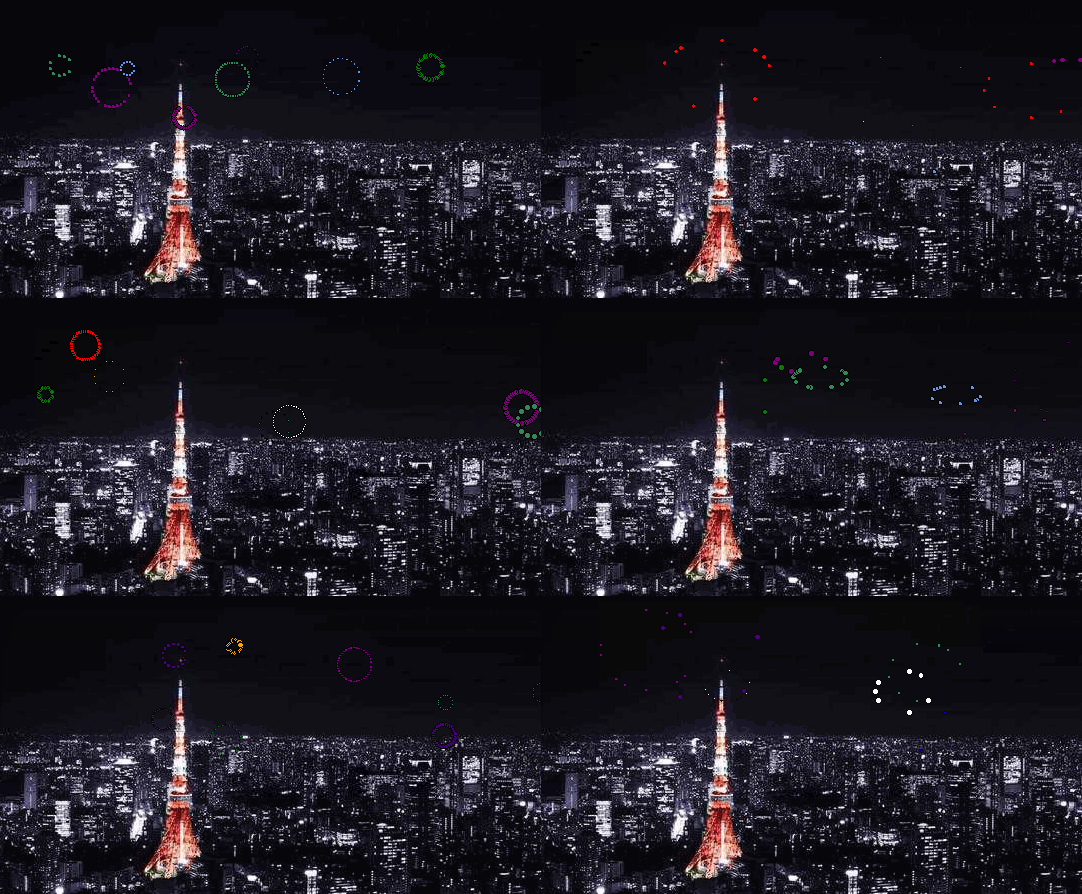
下面是Python实现的礼花动态效果。

Tkinter和代码实现
这个动态效果是由 Tkinter库来完成的,属于Python的GUI编程部分。Python提供了多个图形开发界面的库,常用的有Tkinter,xwPython,Jython。Tkinter是Python的标准GUI库,内置在Python中,不需要额外安装,对于一些简单的图形界面可以轻松实现。
下面是七夕节烟花效果的代码实现,首先导入所有需要的库:
Tkinter:最终的GUI实现;
PIL:处理图像,在最后画布背景中使用;
time:处理时间,完成时间生命周期的更新迭代;
random:随机产生数字,定义燃放过程中的随机变量;
math:数学函数方法,计算燃放移动使用;
import tkinter as tk from PIL import Image, ImageTk from time import time, sleep from random import choice, uniform, randint from math import sin, cos, radians
然后定义一个通用的烟花颗粒的类(part),烟花颗粒的属性如下:
id:每个烟花中颗粒的标识;
x, y: 烟花的x,y轴;
vx, vy:在x,y轴中颗粒的速度;
total:每个烟花的颗粒数量;
age:颗粒已经在背景度过的时间;
color:颜色;
cv:背景;
lifespan:颗粒将在背景持续多久;
然后在这个类中定义了烟花颗粒的一些类方法:
update:通过判断颗粒状态更新颗粒的生命时间;
expand:定义爆炸的时间;
alive:检查颗粒在生命周期内是否还存在;
# 设置重力参数 GRAVITY = 0.05 # 设置随机的颜色列表 colors = ['red', 'blue', 'yellow', 'white', 'green', 'orange', 'purple', 'seagreen', 'indigo', 'cornflowerblue'] class part: def __init__(self, cv, idx, total, explosion_speed, x=0., y=0., vx=0., vy=0., size=2., color='red', lifespan=2, **kwargs): self.id = idx self.x = x self.y = y self.initial_speed = explosion_speed self.vx = vx self.vy = vy self.total = total self.age = 0 self.color = color self.cv = cv self.cid = self.cv.create_oval( x - size, y - size, x + size, y + size, fill=self.color) self.lifespan = lifespan def update(self, dt): self.age += dt # 颗粒爆炸 if self.alive() and self.expand(): move_x = cos(radians(self.id * 360 / self.total)) * self.initial_speed move_y = sin(radians(self.id * 360 / self.total)) * self.initial_speed self.cv.move(self.cid, move_x, move_y) self.vx = move_x / (float(dt) * 1000) # 颗粒降落 elif self.alive(): move_x = cos(radians(self.id * 360 / self.total)) self.cv.move(self.cid, self.vx + move_x, self.vy + GRAVITY * dt) self.vy += GRAVITY * dt # 如果颗超过最长持续时间,颗粒消失 elif self.cid is not None: cv.delete(self.cid) self.cid = None # 定义爆炸的时间 def expand(self): return self.age <= 1.2 # 检查颗粒在生命周内是否还存在 def alive(self): return self.age <= self.lifespan
上面完成了一个通用的烟花颗粒类的实现,下面就开始烟花燃放的模拟循环过程:通过递归不断循地在背景中产生新的烟花。
首先定义一个 simulate 模拟的函数,在函数中定了一些参数:
t:时间戳;
explode_points:烟花爆炸点列表,供后续更新使用;
num_explore:随机的烟花数量;
然后在所有的烟花数量中循环创建所有的烟花颗粒类,当然在每次循环中颗粒类都需要设置一定的属性参数,参数多是随机产生:
objects:存放所有的颗粒对象;
x_cordi,y_cordi:随机产生烟花在背景中的x,y坐标位置(50,550);
speed:随机产生颗粒移动速度(0.5,1.5);
size:随机产生颗粒大小(0.5,3);
color:选择颜色随机列表中的颜色;
total_particles:随机产生每个烟花中所有颗粒的数量;
有了这些参数,我们就可以定义循环产生每个颗粒对象了,并将每个烟花的所有颗粒对象储存在objects中。也就是说explore_points是列表中套列表,内层列表是每个烟花的所有颗粒对象,外层列表是所有烟花。
所有的颗粒对象完成后,就开始对每个颗粒的生命时间进行更新,且总时间设定在1.8秒以内。最后通过root递归使烟花可以一直在背景中燃放。
def simulate(cv): t = time() explode_points = [] wait_time = randint(10, 100) numb_explode = randint(6, 10) # 循环创建所有的烟花颗粒 for point in range(numb_explode): objects = [] x_cordi = randint(50, 550) y_cordi = randint(50, 150) speed = uniform(0.5, 1.5) size = uniform(0.5, 3) color = choice(colors) explosion_speed = uniform(0.2, 1) total_particles = randint(10, 50) for i in range(1, total_particles): r = part(cv, idx=i, total=total_particles, explosion_speed=explosion_speed, x=x_cordi, y=y_cordi, vx=speed, vy=speed, color=color, size=size, lifespan=uniform(0.6, 1.75)) objects.append(r) explode_points.append(objects) total_time = .0 # 保持在1.8秒内进行更新 while total_time < 1.8: sleep(0.01) tnew = time() t, dt = tnew, tnew - t for point in explode_points: for item in point: item.update(dt) cv.update() total_time += dt # 通过递归持续不断的在背景中添加新烟花 root.after(wait_time, simulate, cv) def close(*ignore): """停止模拟循环,关闭窗口""" global root root.quit()
以上代码部分均与Tkinter无关,只是定义了颗粒对象以及模拟颗粒生命周期的全过程,下面将使用Tkinter完成最终的效果。
root:Tkinter类的对象;
cv:定义了Tkinter中背景画布对象,其中height和width参数可根据实际进行调整;
image:打开的图像对象,图像将被作为画布中的背景,图像可根据自己喜好自行选择;
photo:使用ImageTk定义了Tkinter中的图像对象;
然后将在画布对象上创建一个图像(使用定义的photo对象作为参数),最后调用Tkinter对象root进行持续不断地simulate模拟过程。
if __name__ == '__main__': root = tk.Tk() cv = tk.Canvas(root, height=600, width=600) # 自己选择一个好的图像背景填充画布 image = Image.open("image.jpg") photo = ImageTk.PhotoImage(image) cv.create_image(0, 0, image=photo, anchor='nw') cv.pack() root.protocol("WM_DELETE_WINDOW", close) root.after(100, simulate, cv) root.mainloop()注意:背景图片可根据自己的喜好进行更换,还不赶紧定制一个属于自己的烟花秀?
七夕总结
以上便是博主给大家的七夕节礼物了,代码不到100行,但却完成了一个超炫的GUI效果。完整代码可在公众号后台回复 “七夕” 获取,最后祝大家七夕节快乐。
https://github.com/tuangauss/...

 随时随地看视频


