上期我们使用Gradle构建web项目,本期(20160316)我们加上SSH著名的Struts2来做web项目。
- 1Gradle的强大之处在于自动化构建,比之其他的构建工具(Maven,Ant等)方便可是很多,首先没有xml文件,只是一个【build.gradle】文件,外加命令【gradle build】,就完事了。另外,【build.gradle】文件异常简单。寥寥几行代码即可。
-
2先贴一个项目的文件目录。
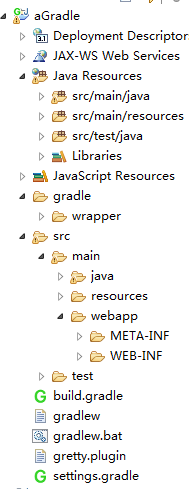
一般的web项目也大概按这个文件结构来构建。其中比较重要的文件目录的映射原理,右击项目选择【Build Path>Configure Build Path】或者(右击项目【Properties】)打开项目的配置窗口。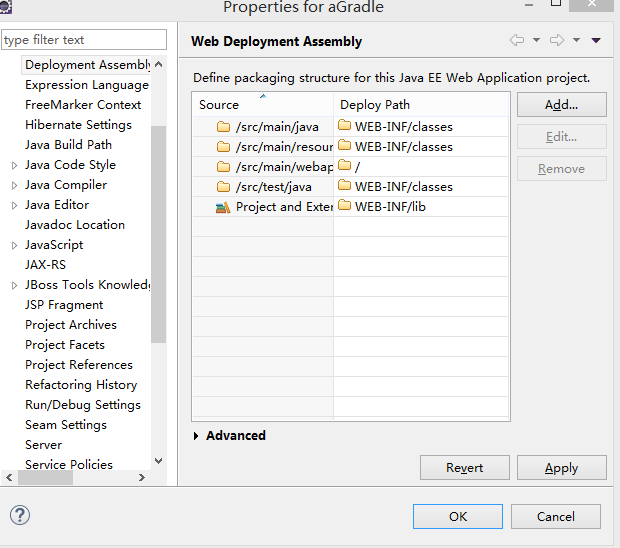 找到【Deployment Assembly】。可以看到两列【 Source】和【Deploy Path】,其中Source代表项目真实的文件路径和结构,Deploy Path代表eclipse为你配置的路径映射,【/src/main/java】映射到【WEB-INF/classes】这些映射也是我们真正发布项目的时候的文件路径。(重点理解,后面还会提到)
 -
- 重头戏,【build.gradle】文件
/*
 * This build file was auto generated by running the Gradle 'init' task
 * by 'admin' at '16-3-7 上午10:33' with Gradle 2.11
 *
 * This generated file contains a sample Java project to get you started.
 * For more details take a look at the Java Quickstart chapter in the Gradle
 * user guide available at https://docs.gradle.org/2.11/userguide/tutorial_java_projects.html
 */

// Apply the java plugin to add support for Java
apply plugin: 'java'
apply plugin:'war'
// In this section you declare where to find the dependencies of your project
repositories {
    // Use 'jcenter' for resolving your dependencies.
    // You can declare any Maven/Ivy/file repository here.
    jcenter()
}

// In this section you declare the dependencies for your production and test code
dependencies {
    // The production code uses the SLF4J logging API at compile time
  compile 'org.slf4j:slf4j-api:1.7.14','org.apache.struts:struts2-core:2.3.24.1',
  'jstl:jstl:1.2','javax.servlet:javax.servlet-api:3.1.0','org.apache.struts:struts2-convention-plugin:2.3.24.1',
  'org.apache.struts:struts2-config-browser-plugin:2.3.24.1'

    // Declare the dependency for your favourite test framework you want to use in your tests.
    // TestNG is also supported by the Gradle Test task. Just change the
    // testCompile dependency to testCompile 'org.testng:testng:6.8.1' and add
    // 'test.useTestNG()' to your build script.
    testCompile 'junit:junit:4.12'
}
以上代码相信大家在第一期都已经看到了。其中我们需要配置的是【apply plugin:‘java’】后面添加【apply plugin:'war'】代表我们现在创建的是web项目(apply plugin:‘java’也可以删掉,因为apply plugin:'war'中已经包含apply plugin:'java''),
- 4找到JAR包引用。我们需要去jcenter /Maven repository中搜索struts2的JAR,Maven 仓库贴图为证
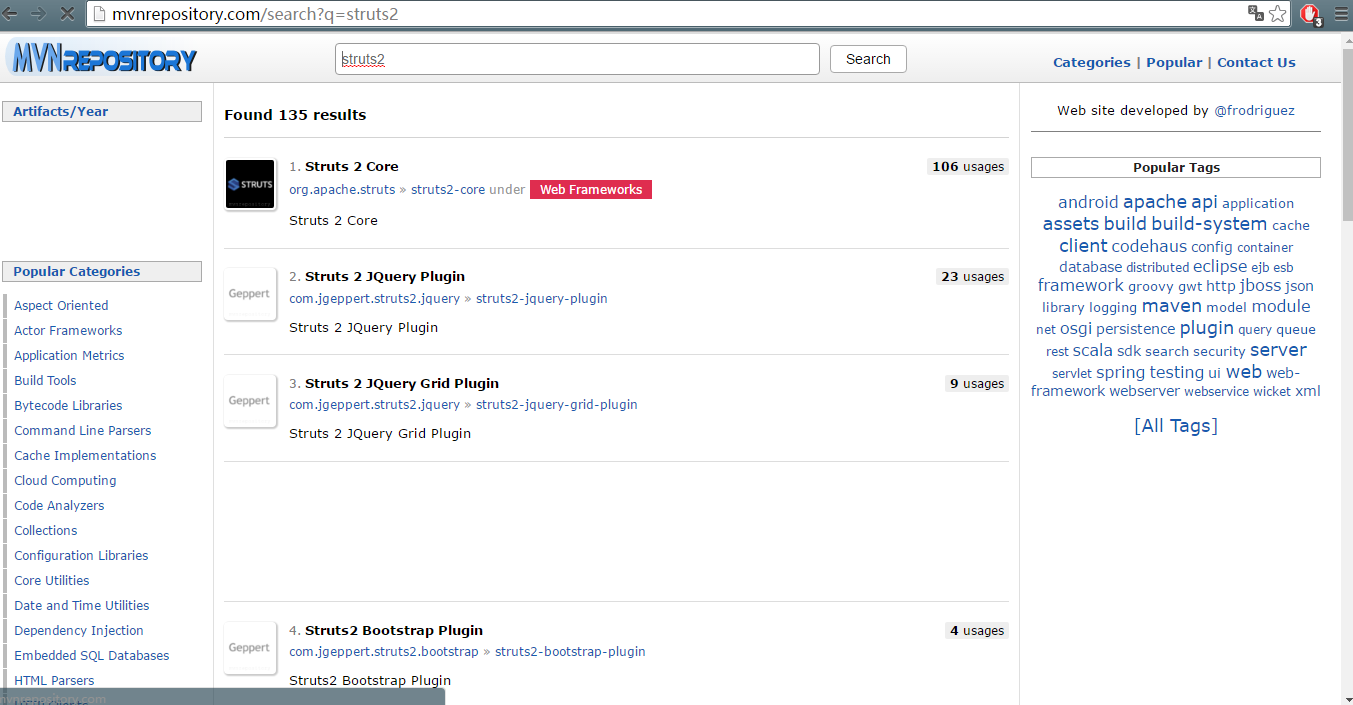
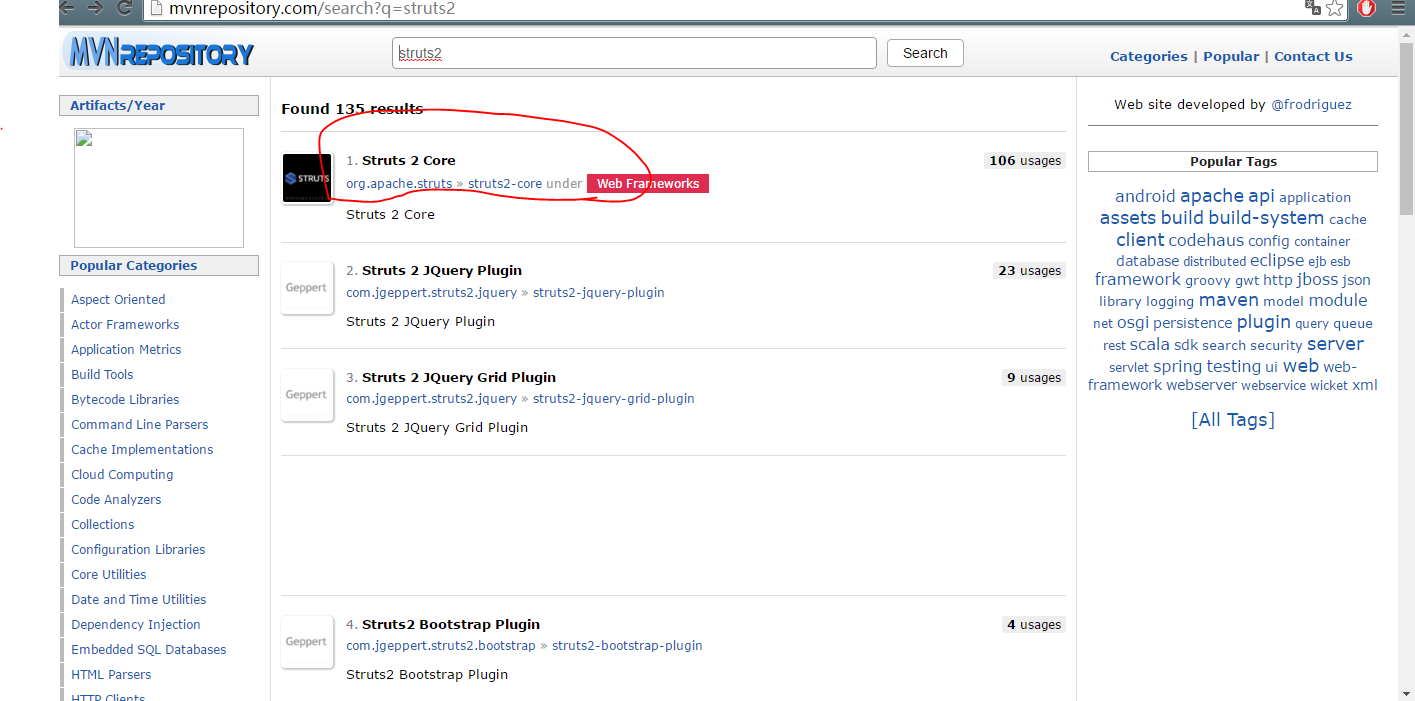

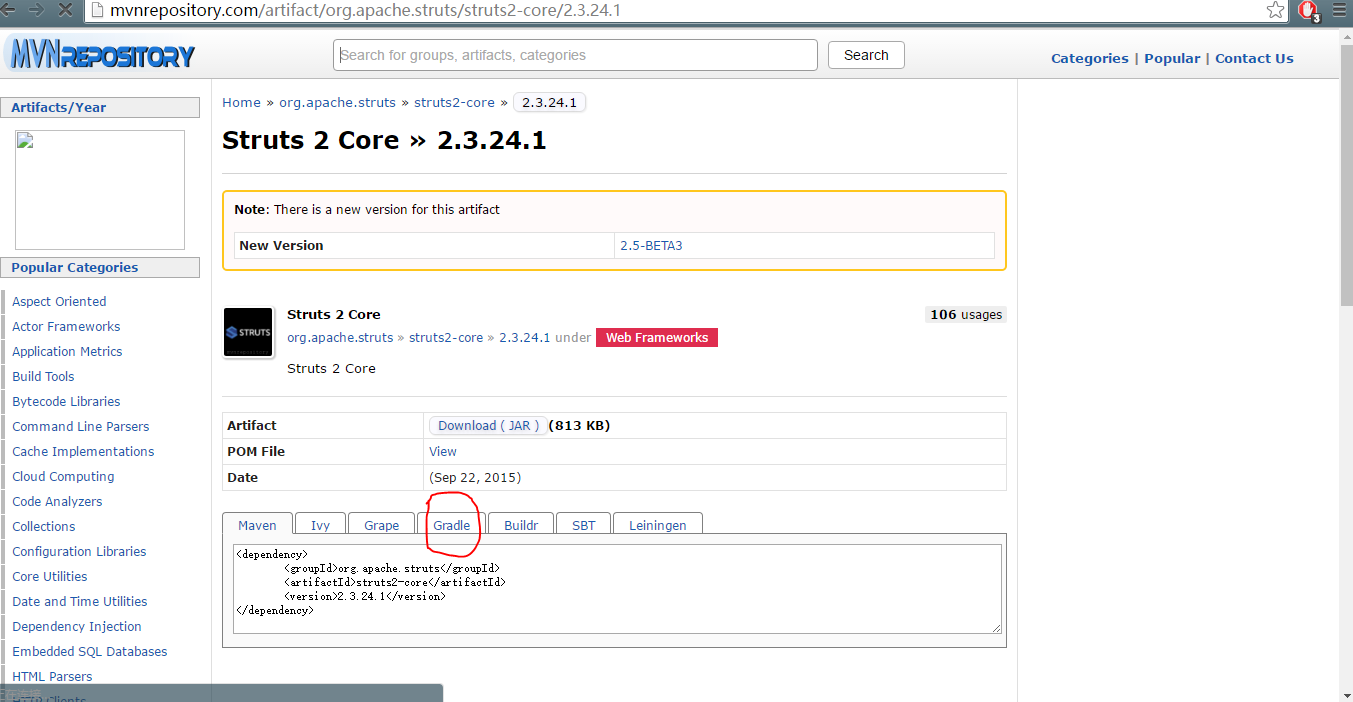 。将我们找到的引用【'org.apache.struts:struts2-core:2.3.24.1'】加到【dependencies { }】里面就可以了。没办法就是这么简单。
 - 5下一步开始【gradle build】构建。此处一共两种方法,一种在eclipse中build,一种在命令行中build,原理都一样。先说在eclipse中构建,找到【Gradle Tasks】面板点击【build】
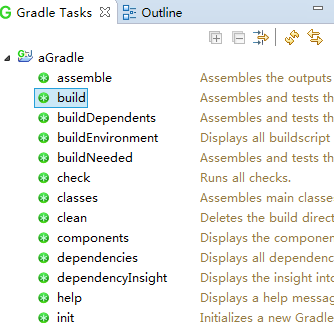 (如果找不到【Window>Show View>Other】将Gradle的两个面板加入点击【OK】。)点击【build】后,在 【console】面板等待
:processResources
:classes
:war
:assemble
:compileTestJava
:processTestResources UP-TO-DATE
:testClasses
:test
:check
:build

BUILD SUCCESSFUL

Total time: 10.693 secs
即完成【build】。下面讲述第二种方法,在命令行中【build】【win+R>cmd】进入命令行,切换到你的项目目录下,输入命令【gradle build】。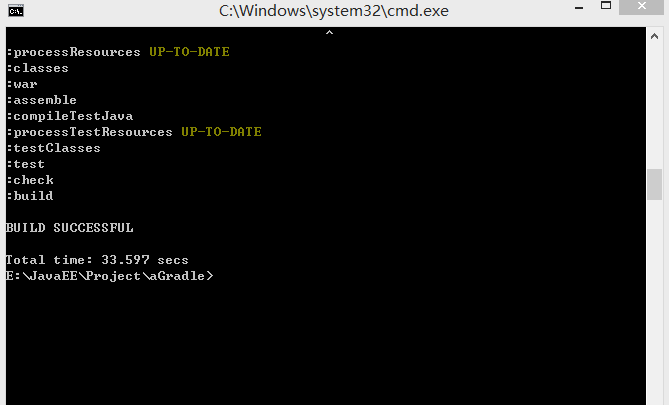 两种方法都是找【build.gradle】文件进行【build】
-
6.然后就像一般struts2一样构建就可以了。修改【web.xml】添加【struts.xml】创建Action,jsp等如果这一切都顺利,恭喜你构建成功。
-
7.如果你无法访问,一直出现【404】错误这个时候你就要小心了。在你确保struts一切配置正常的情况下。则需要修改映射如第二步【properties>Deployment Assembly】如图所示点击【Add】
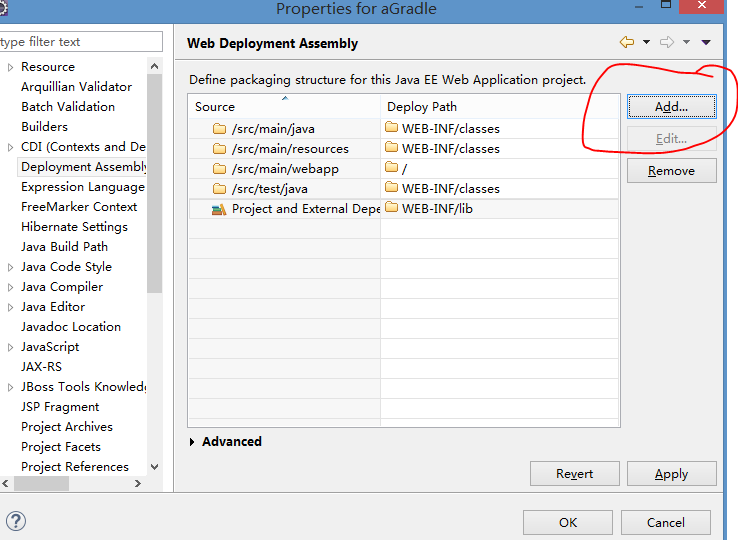
选中【Java Build Path Entries】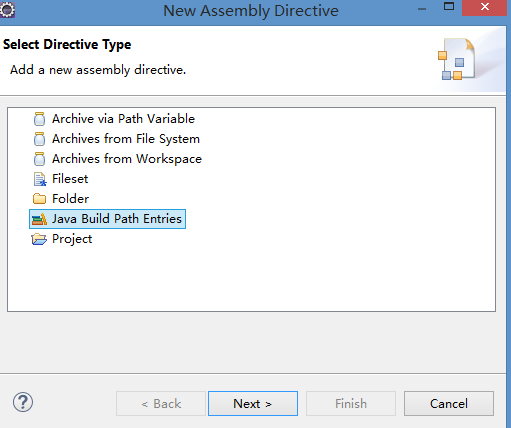
点击【Next】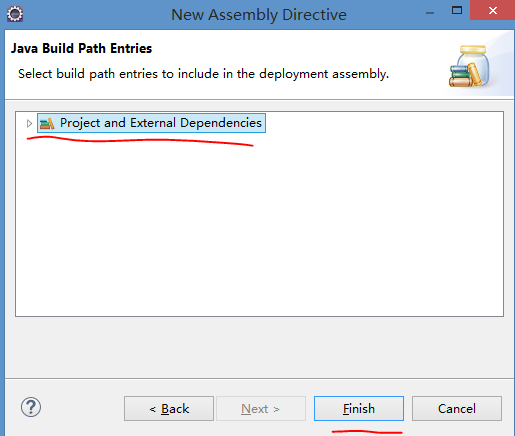 最后确保包含如图所示映射
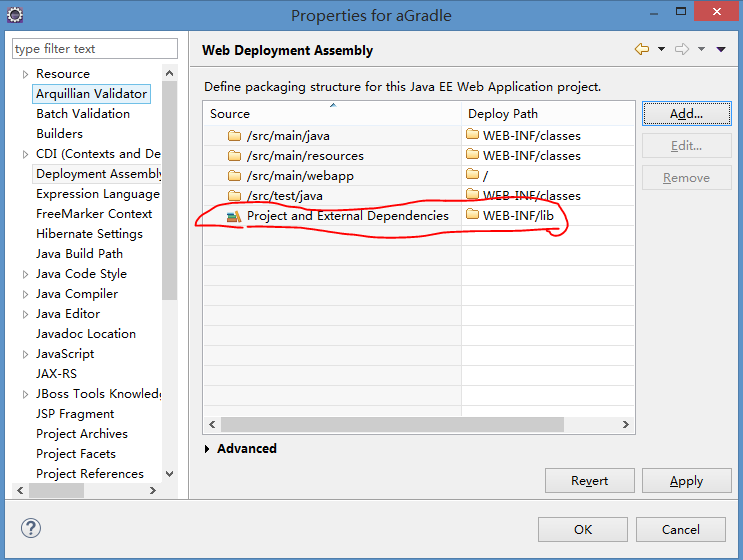
- 8.按照如上,最终成功构建Gradle+struts2项目(重点在添加JAR映射)最后,关于Gradle的WEB使用到此介绍完毕!感谢!


 随时随地看视频


