课程名称: 晋级TypeScript高手,成为抢手的前端开发人才
课程章节: 10-3~10-4 【类装饰器】类装饰器的两种实现 上 下
课程讲师: keviny79
课程内容:
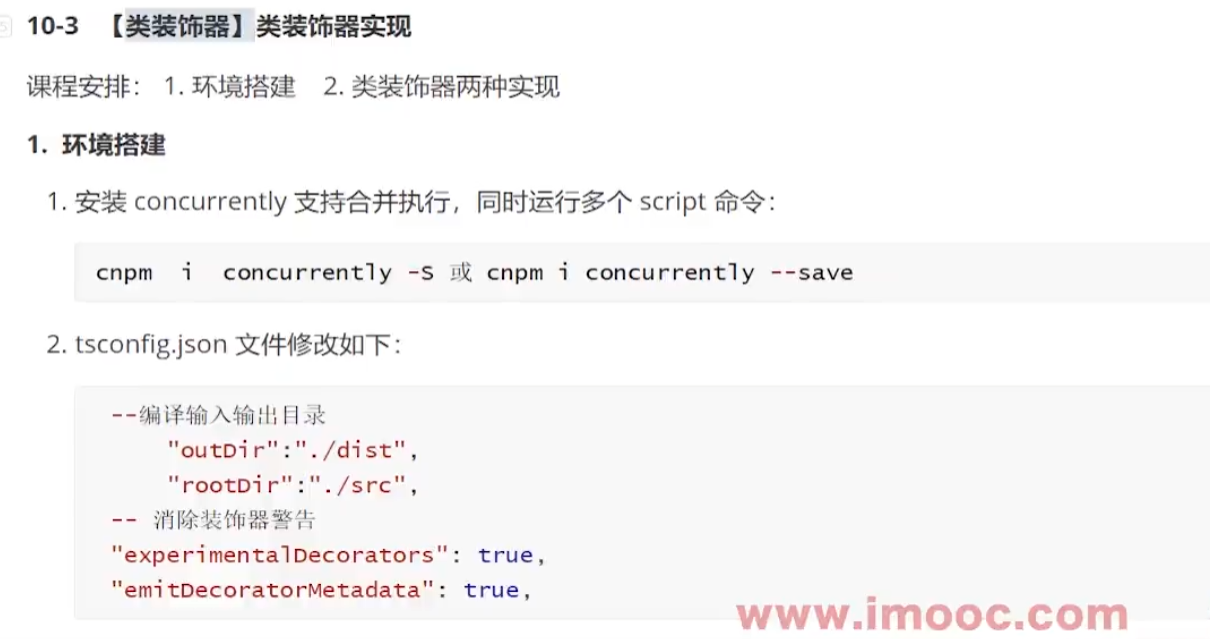
一. 环境搭建
- 安装 concurrently 支持合并执行,同时运行多个 script 命令:
cnpm i concurrently -S 或 yarn add concurrently -S - 安装 nodemon 监听ts文件变化,自动运行ts文件:
cnpm i nodemon -S 或 yarn add nodemon -S - tsconfig.json 文件修改如下:
--编译输入输出目录 "outDir":"./dist", "rootDir":"./src", -- 消除装饰器警告 "experimentalDecorators": true, "emitDecoratorMetadata": true, - 配置 package.json 文件脚本信息
"scripts": {
	 "dev:build": "tsc -w",

	  --监控 dist/teaching 目录中的 js 文件,变化时执行 node 命令
	  --这里文件路径需要自己修改对应的文件 dist/teaching.js 、./dist/teaching/1ClassDecorator.js
	 "dev:start":"nodemon --watch dist/teaching js --exec  node ./dist/teaching/1ClassDecorator.js",

	  --合并启动
	 "start":  "concurrently npm:dev:*",

	  --命令解决 typescript 编译装饰器类时出现的 bug
	  "tsc":"tsc src/teaching/1ClassDecorator.ts  --target ES5 -w --experimentalDecorators"
 }
二、类装饰器两种实现 [带参数和不带参数]
- 不带参数
// 1.声明装饰器,前面说装饰器是一个函数,所以直接使用函数的语法就行 function FirstClassDecorator(targetClass: any) { // 这里 targetClass 就是 CustomerService类构造函数本身 let targetClassObj = new targetClass(); targetClassObj.buy(); console.log("targetClass:", targetClass.name); } // 使用装饰器需加上 @ + 函数名 即可 // 这里是 类装饰器,因为这是修饰在类上 @FirstClassDecorator // 类 class CustomerService { name: string = "下单"; constructor() {} buy() { console.log(this.name + "购买"); } placeOrder() { //下单 console.log(this.name + "下单购买"); } } - 带参数
	// 1.声明带参数的类装饰器,需要在函数内部返回一个函数,作为修饰类的函数
	function FirstClassDecorator(params: any) {
	    console.log("params:", params);

		// 这里的函数是修饰 CustomerService类构造函数的
		return function (targetClass: any) {
		  console.log("targetClass:", targetClass.name);
		}
	}

	// 使用带参数的类装饰器需加上 @ + 函数名 + ([需要传递的参数])
	@FirstClassDecorator('我是用来修饰CustomerService类的装饰器参数===')
	// 类
	class CustomerService {
	  name: string = "下单";
	  constructor() {}
	  buy() {
	    console.log(this.name + "购买");
	  }
	  placeOrder() {
	    //下单
	    console.log(this.name + "下单购买");
	  }
	}
课程收获:
本节对ts使用装饰器时需要搭建的环境有了了解,并明白了如何声明 带参数和不带参数的 “类装饰器” 和 使用。


 随时随地看视频


