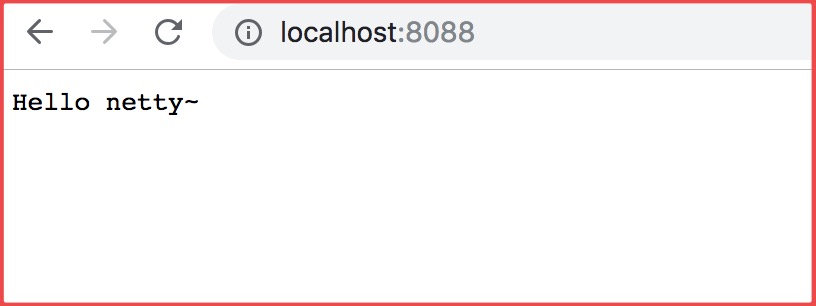
说明:本篇博客是基于学习慕课网有关视频教学。效果:当用户访问:localhost:8088 后 服务器返回 “hello netty”;
一、服务端线程模型
下面的做法是服务端监听线程和 IO 线程分离,类似于 Reactor 的多线程模型,它的工作原理图如下(盗的图):
这里netty版本是4.1.25
    <dependency>
            <groupId>io.netty</groupId>
            <artifactId>netty-all</artifactId>
            <version>4.1.25.Final</version>
    </dependency>
二、主程序类
/**
 * @Description: 实现客户端发送一个请求,服务器会返回 hello netty
 */public class HelloServer {    public static void main(String[] args) throws Exception {        // 定义一对线程组
        // 主线程组, 用于接受客户端的连接,但是不做任何处理,跟老板一样,不做事
        EventLoopGroup bossGroup = new NioEventLoopGroup();        // 从线程组, 老板线程组会把任务丢给他,让手下线程组去做任务
        EventLoopGroup workerGroup = new NioEventLoopGroup();
        try {            // netty服务器的创建, 辅助工具类,用于服务器通道的一系列配置
            ServerBootstrap serverBootstrap = new ServerBootstrap();
            serverBootstrap.group(bossGroup, workerGroup)           //绑定两个线程组
                           .channel(NioServerSocketChannel.class)   //指定NIO的模式
                           .childHandler(new HelloServerInitializer()); // 子处理器,用于处理workerGroup

            // 启动server,并且设置8088为启动的端口号,同时启动方式为同步
            ChannelFuture channelFuture = serverBootstrap.bind(8088).sync();
            // 监听关闭的channel,设置位同步方式
            channelFuture.channel().closeFuture().sync();
        } finally {            //退出线程组
            bossGroup.shutdownGracefully();
            workerGroup.shutdownGracefully();
        }
    }
}
上面这段代码展示了服务端的一个基本步骤:
(1)、 初始化用于Acceptor的主"线程池"以及用于I/O工作的从"线程池";
(2)、 初始化ServerBootstrap实例, 此实例是netty服务端应用开发的入口;
(3)、 通过ServerBootstrap的group方法,设置(1)中初始化的主从"线程池";
(4)、 指定通道channel的类型,由于是服务端,故而是NioServerSocketChannel;
(5)、 设置ServerSocketChannel的处理器
(6)、 设置子通道也就是SocketChannel的处理器, 其内部是实际业务开发的"主战场"(8)、 配置子通道也就是SocketChannel的选项
(9)、 绑定并侦听某个端口
三、子处理器 HelloServerInitializer类
/**
 * @Description: 初始化器,channel注册后,会执行里面的相应的初始化方法
 */public class HelloServerInitializer extends ChannelInitializer<SocketChannel> {    @Override
    protected void initChannel(SocketChannel channel) throws Exception {        // 通过SocketChannel去获得对应的管道
        ChannelPipeline pipeline = channel.pipeline();
        // 通过管道,添加handler
        // HttpServerCodec是由netty自己提供的助手类,可以理解为拦截器
        // 当请求到服务端,我们需要做解码,响应到客户端做编码
        pipeline.addLast("HttpServerCodec", new HttpServerCodec());
        // 添加自定义的助手类,返回 "hello netty~"
        pipeline.addLast("customHandler", new CustomHandler());
    }

}
子处理器也可以通过内部方法来实现的。
b.group(group).channel(NioServerSocketChannel.class)
              .childHandler(new ChannelInitializer<SocketChannel>() {                @Override
                protected void initChannel(SocketChannel socketChannel) throws Exception {                    //这里进行方法实现.......
                    socketChannel.pipeline().addLast(serverHandler);
                }
            });
四、自定义助手类 CustomHandler类
/**
 * 创建自定义助手类
 */// SimpleChannelInboundHandler: 对于请求来讲,其实相当于[入站,入境]public class CustomHandler extends SimpleChannelInboundHandler<HttpObject> {    @Override
    protected void channelRead0(ChannelHandlerContext ctx, HttpObject msg)
            throws Exception {        // 获取channel
        Channel channel = ctx.channel();
        if (msg instanceof HttpRequest) {            // 显示客户端的远程地址
            System.out.println(channel.remoteAddress());
            // 定义发送的数据消息
            ByteBuf content = Unpooled.copiedBuffer("Hello netty~", CharsetUtil.UTF_8);
            // 构建一个http response
            FullHttpResponse response =
                    new DefaultFullHttpResponse(HttpVersion.HTTP_1_1,
                            HttpResponseStatus.OK,
                            content);            // 为响应增加数据类型和长度
            response.headers().set(HttpHeaderNames.CONTENT_TYPE, "text/plain");
            response.headers().set(HttpHeaderNames.CONTENT_LENGTH, content.readableBytes());
            // 把响应刷到客户端
            ctx.writeAndFlush(response);
        }
    }    /**
     * 上面的方法是必须重写的,因为是父类定义的抽象方法。
     *
     * 下面的方法是一些 助手类的执行顺序
     */
    @Override
    public void channelRegistered(ChannelHandlerContext ctx) throws Exception {
        System.out.println("channel。。。注册");        super.channelRegistered(ctx);
    }    @Override
    public void channelUnregistered(ChannelHandlerContext ctx) throws Exception {
        System.out.println("channel。。。移除");        super.channelUnregistered(ctx);
    }    @Override
    public void channelActive(ChannelHandlerContext ctx) throws Exception {
        System.out.println("channel。。。活跃");        super.channelActive(ctx);
    }    @Override
    public void channelInactive(ChannelHandlerContext ctx) throws Exception {
        System.out.println("channel。。。不活跃");        super.channelInactive(ctx);
    }    @Override
    public void channelReadComplete(ChannelHandlerContext ctx) throws Exception {
        System.out.println("channeld读取完毕。。。");        super.channelReadComplete(ctx);
    }    @Override
    public void userEventTriggered(ChannelHandlerContext ctx, Object evt) throws Exception {
        System.out.println("用户事件触发。。。");        super.userEventTriggered(ctx, evt);
    }    @Override
    public void channelWritabilityChanged(ChannelHandlerContext ctx) throws Exception {
        System.out.println("channel可写更改");        super.channelWritabilityChanged(ctx);
    }    @Override
    public void exceptionCaught(ChannelHandlerContext ctx, Throwable cause) throws Exception {
        System.out.println("补货到异常");        super.exceptionCaught(ctx, cause);
    }    @Override
    public void handlerAdded(ChannelHandlerContext ctx) throws Exception {
System.out.println("助手类添加");        super.handlerAdded(ctx);
    }    @Override
    public void handlerRemoved(ChannelHandlerContext ctx) throws Exception {
        System.out.println("助手类移除");        super.handlerRemoved(ctx);
    }

}
五、启动主类 进行测试

后台完整输出
六、客户端线程模型
相比于服务端,客户端的线程模型简单一些,它的工作原理如下:
代码如下
  EventLoopGroup group = new NioEventLoopGroup();         try {
             Bootstrap b = new Bootstrap();
             b.group(group) // 注册线程池
              .channel(NioSocketChannel.class) // 使用NioSocketChannel来作为连接用的channel类
              .remoteAddress(new InetSocketAddress(this.host, this.port)) // 绑定连接端口和host信息
              .handler(new ChannelInitializer<SocketChannel>() { // 绑定连接初始化器
                        @Override
                        protected void initChannel(SocketChannel ch) throws Exception {                                     //这里放入自定义助手类
                                     ch.pipeline().addLast(new EchoClientHandler());
                                 }
                             });

             ChannelFuture cf = b.connect().sync(); // 异步连接服务器
             cf.channel().closeFuture().sync(); // 异步等待关闭连接channel

         } finally {
             group.shutdownGracefully().sync(); // 释放线程池资源
         }
     }
客户端的开发步骤和服务端都差不多:
(1)、 初始化用于连接及I/O工作的"线程池";
(2)、 初始化`Bootstrap`实例, 此实例是netty客户端应用开发的入口;
(3)、 通过Bootstrap的group方法,设置(1)中初始化的"线程池";
(4)、 指定通道channel的类型,由于是客户端,故而是`NioSocketChannel`;
(5)、 设置SocketChannel的选项;
(6)、 设置SocketChannel的处理器, 其内部是实际业务开发的"主战场";
(7)、 连接指定的服务地址;
相比于服务端很明显的区别在于
(1),客户端只需要创建一个 EventLoopGroup,因为它不需要独立的线程去监听客户端连接,也没必要通过一个单独的客户端线程去连接服务端。Netty 是异步事件驱动的 NIO 框架,它的连接和所有 IO 操作都是异步的,因此不需要创建单独的连接线程。
(2)服务端引导类ServerBootstrap,而客户端引导是Bootstrap进行开发的,不过它们都需要通过group属性指定EventLoopGroup, 因为是开发NIO程序,所以我们选择NioEventLoopGroup。

 随时随地看视频


